Homes exceeding 2,500 square feet typically present 12–16 foot living room walls that 73% of homeowners leave underutilized.
You’re facing this design void right now: cavernous vertical real estate that degrades spatial cohesion without intentional intervention.
The prescription spans ten vetted methodologies; architectural scale dictates your first move.
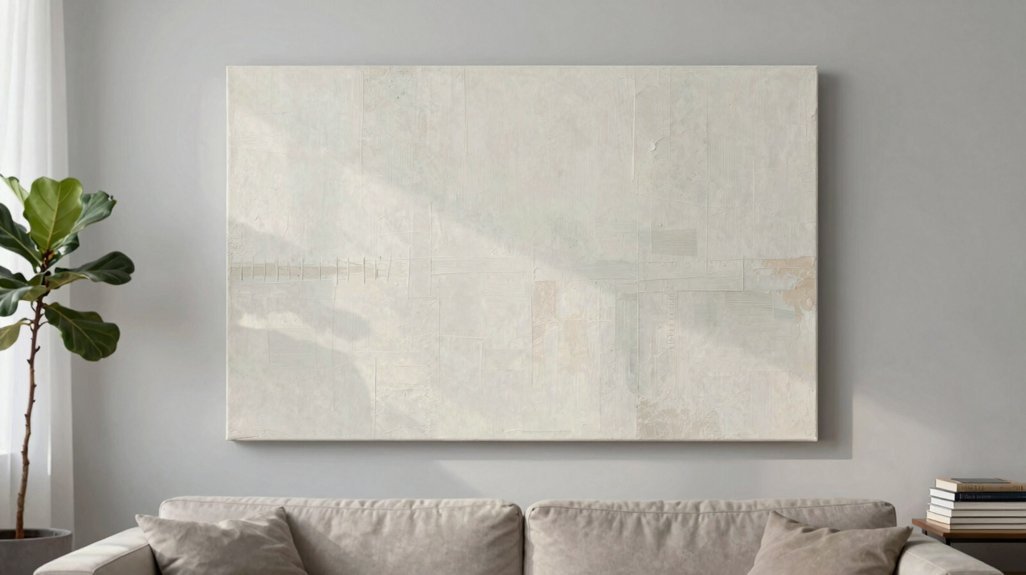
Hang One Oversized Piece for Instant Impact
For maximum visual authority on an expansive living room wall, anchor the composition with a single oversized artwork rather than dispersing attention across multiple smaller elements. You create the strongest instant focal point when you select one oversized piece covering 60–75% of your Large Wall‘s width and height.
Position this statement artwork on the wall behind your sofa, ensuring the furniture visually “holds” the composition. Target dimensions of two-thirds to three-fourths your sofa’s width: for a 7–8 foot sofa, specify art at 4.5–6 feet wide. This prevents the accent wall from feeling under-scaled or the upholstery from dominating.
Unlike a Gallery Wall’s distributed visual rhythm, this singular approach delivers concentrated impact. Add a picture light above for museum-grade presence, or install a picture ledge for flexible, lean-and-swap versatility without repeated remeasuring.
Recommended Products

[Framed Wall Art]: This large framed wall art set includes 3 pieces of boho modern neutral abstract wall paintings, each measuring 24 x 36 inches, with a total display size of 36" H x 72" W. The black and white geometric design creates a clean and stylish focal point for your living room, bedroom, office, or dining room

[Vintage Neutral William Morris Framed Wall Art Set of 3]: Framed with solid wood frames, each piece measures 16×24 inches, total size 24"H x 48"W. Featuring William Morris’s iconic floral patterns with lush wildflowers and fine plant lines, these artworks add vintage charm and timeless elegance to any space
Brighten a Large Wall With an Oversized or Grouped Mirror
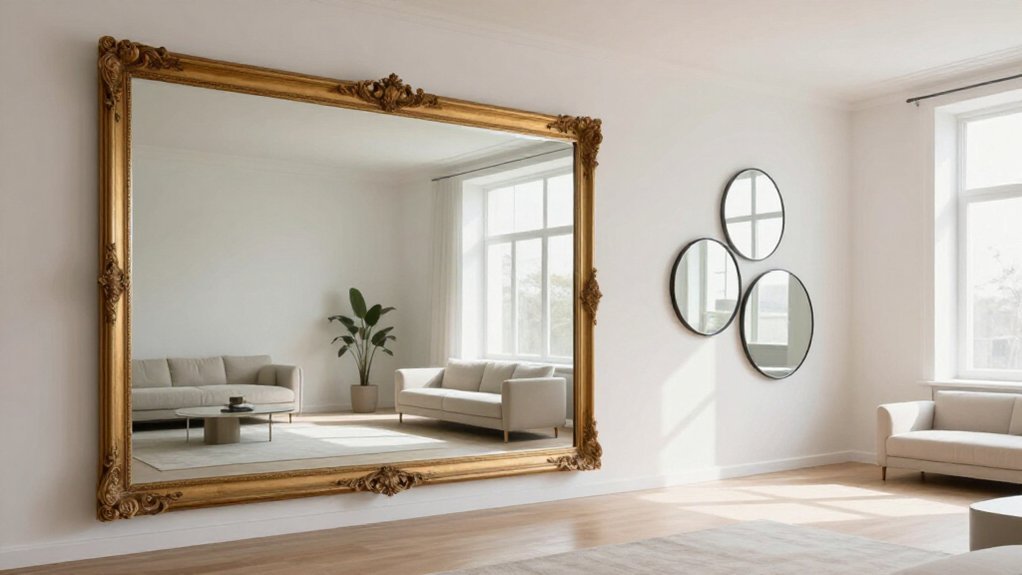
You can’t source a single statement piece; you group multiple floor-length mirrors on your large blank wall. An economical execution deploys eight mirrors at approximately $64, turning flatness into dimensional depth. You angle these to bounce light off adjacent statement zones, rendering reflections intentional rather than incidental.
Among wall decor ideas to brighten a large wall, calibrated mirror placement aligns with furniture sightlines, integrating the element into your layout’s architecture rather than appending it as afterthought.
Recommended Products

LYTARA Dimmable Cordless Picture Light: Illuminate your wall pictures, gallery artwork, paintings, portraits, and dartboards with our elegant and versatile picture light. Enhance the colors, details, and ambiance of your pieces, adding a touch of sophistication to any space.【Product Color: Gold】Note: Perceived color may vary slightly due to differences in screen calibration and ambient lighting.

【Bright & Wide Illumination for Artworks】 With 350 lumens output and a 16-inch light bar, our picture light delivers bright, even coverage for paintings up to 40 inches wide. The high CRI 95+ ensures colors pop exactly as the artist intended—making it ideal for galleries, living rooms, and photography studios.

Powerful 4800mAh Rechargeable Battery: Say goodbye to battery swaps and messy cords! Built-in 4800mAh battery offers 11 hours of continuous lighting use. EZVALO 16'' wireless LED picture light charges in just 5 hours via USB-C. Use your power bank, phone charger, or laptop – always ready to light up your favorite art.
Build a Gallery Wall That Actually Looks Intentional
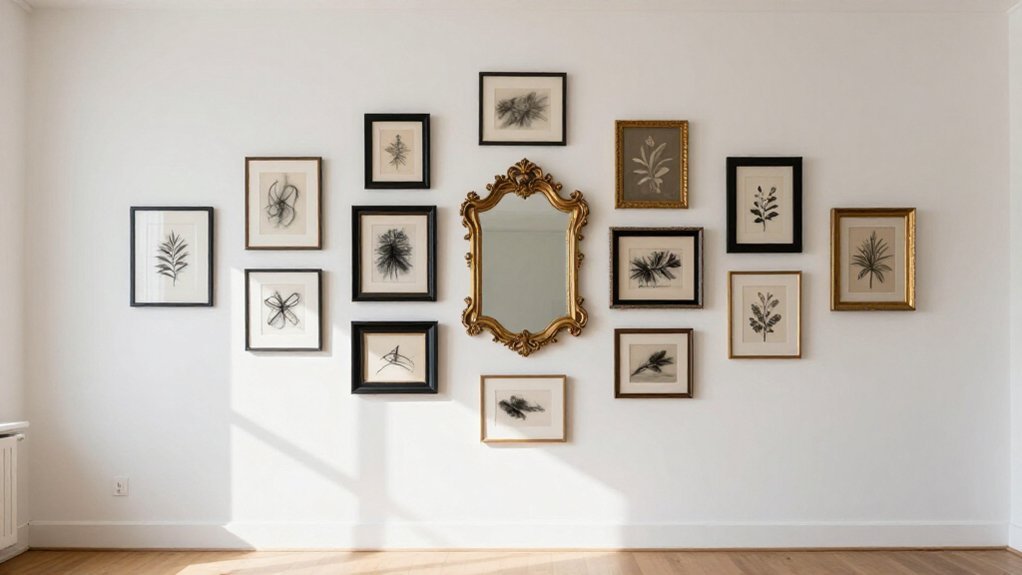
How does a gallery wall transcend visual noise to become architectural punctuation? You establish a repeatable structure, typically a grid, and trace the approximate wall rectangle on the floor first. This prevents the “random” aesthetic that undermines gallery walls on expansive wall space.
Limit your pieces of wall art and vary only frame dimensions: anchor the composition with a few larger framed art elements amid uniform counterparts. Cohesion matters across big spans. You can mix textures deliberately, such as combining photographs with three-dimensional objects like plates or baskets, provided you maintain a consistent color palette.
Standardize finishing details: all black frames, matching mat colors, or consistent frame thickness. These unify eclectic selections. Center the arrangement at 57–60 inches to its midline, leaving generous margins from ceiling and furniture so the grouping doesn’t force the eye upward awkwardly.
Recommended Products
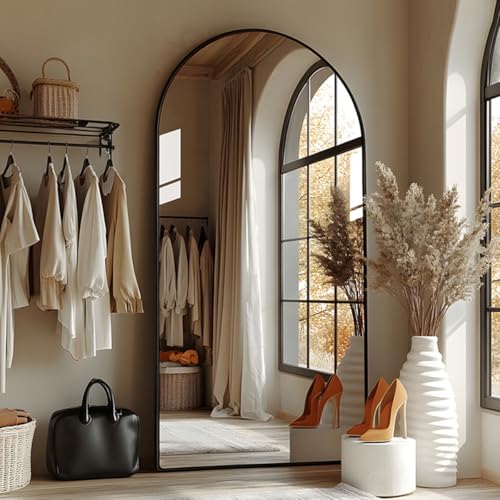
✔【FULL SIZE】The size of the mirror is 41"x81". The large-size mirror not only facilitates you to admire the whole body, but also makes your space more beautiful.

Oversized Floor Mirror: Our 82×44 inch arched full length mirror gives you a complete look in one go. It not only shows off your best angles but also makes your space feel bigger and brighter. Choose from various sizes to suit your style.

Premium Shatterproof Tempered Glass: This 78" x 35" oversized full length mirror is crafted with tempered glass, delivering crystal-clear, distortion-free reflections. The shatterproof construction minimizes breakage risk and enhances exceptional sturdiness, making it ideal for everyday home use and stylish home decor
Arrange Your Gallery Wall: Grid, Organic, or Mixed Media
You’ll need to choose between Grid Layout Precision and Organic Arrangement Flow when structuring your gallery wall. A grid demands exacting measurements, typically 2–3 inches between frames, and floor-based templating to ensure axial alignment across large vertical surfaces.
An organic configuration, by contrast, permits asymmetric clustering while requiring disciplined spacing consistency, often 3–4 inches, to prevent visual fragmentation.
Recommended Products

Multi-size: 10pcs picture frames set come with TWO black frames 8x10in, FOUR gray frames 5x7in and FOUR wood grain brown frames 4x6in. Just remember to peel off the protective film on both sides of the plexiglass.

【Durable Material】Our collage frame is made of well made wood frame. Comes with a plastic cover, which provides a clear view of photos and is lighter than glass. No need to worry about hurt by glass broken.

Durable Material: YESKAY 11×14 picture frames made of MDF wood, stable structure, premium texture, and well-made quality. The HD plexiglass front also protects your treasured photos from damage and keeps them in good shape for years.
Grid Layout Precision
Whether you’re working with a blank slate or refining an existing arrangement, establishing a grid gallery wall demands careful spatial planning and disciplined execution. You achieve precision in this wall decor approach by selecting one consistent frame size or a tightly calibrated set, such as 11×14″ paired with 16×20″, then deploying equal spacing throughout.
Technical Implementation
You tape a rectangle directly onto the wall using your finalized measurements, incorporating gap specifications of 2 to 3 inches between frames. This template guides your hardware placement: mark screw and hook points precisely where grid lines intersect.
Scale Considerations
Your organized grid should occupy 60 to 75% of the target wall’s width and height. This proportion eliminates the visual instability of “floating” artwork strips while maintaining architectural coherence.
You avoid the staggered warmth of organic layouts; instead, you deliver crisp, tailored alignment where frame edges create uninterrupted horizontal and vertical lines.
Organic Arrangement Flow
Although rigid symmetry dominates certain architectural contexts, an organic gallery wall introduces deliberate asymmetry that mimics natural accumulation rather than calculated placement. You’ll anchor your organic arrangement flow by positioning one large piece slightly off-center, then clustering smaller art pieces around it until the composition feels grown rather than engineered.
Testing Your Layout
Sketch configurations directly on the floor; compare grid, organic, and mixed media options before committing. Recreate your preferred arrangement with masking tape outlines to validate proportions against the wall’s scale.
Spacing Protocol
Maintain 2–3 inch gaps at the cluster’s center, expanding to 3–5 inches toward the perimeter for natural tapering. Vary frame sizes deliberately, and consider mixing canvas prints with textured elements like woven pieces or black metal sculptures, unified through shared tonal families.
If density overwhelms, remove one or two pieces rather than compressing. Large walls demand fewer, bolder moments that register from distance.
Warm Up a Large Wall With Tapestries and Woven Hangings
A substantial wall surface presents an opportunity to introduce tactile dimension through fiber-based installations rather than conventional framed artwork. You can change your living room wall decor by selecting a woven hanging in warm, textural fibers that add depth without requiring small accessories.
Scale and Placement
You should hang your wall hangings as a primary focal point behind key seating, typically behind or near the sofa. This positioning visually anchors the room and warms receding darker areas. Choose oversized large art; woven pieces must cover substantial wall portions rather than functioning as small accents. Otherwise, tall ceilings or wide spans swallow the piece.
Layering and Light
You’ll add texture most effectively by pairing your woven piece with natural elements. Muted wall backgrounds and complementary textiles create cohesion. To brighten darker schemes, position the hanging to catch ambient light and select lighter woven tones that reflect brightness while maintaining warmth. Each piece of artwork becomes intentional through this technical layering.
Recommended Products

Centerpiece of Room Decoration – These shelves boast a distinctive design and an elegant shape, making them a focal point that elevates the style of any room. Ideal for the living room, bedroom, study, bathroom, laundry room, children's room, or office, they reflect the owner's sophisticated taste and blend seamlessly with various decor themes.

【Picture Ledge Perfect for Display】FLYJOE picture ledge shelves for wall turn your walls into a stunning photo gallery! These spacious shelves are ideal for showcasing a variety of picture frames in one secure place. With a thoughtful protective lip, you can display everything from photos to collectibles without worrying about them falling off

Centerpiece of Room Decoration – These shelves boast a distinctive design and an elegant shape, making them a focal point that elevates the style of any room. Ideal for the living room, bedroom, study, bathroom, laundry room, children's room, or office, they reflect the owner's sophisticated taste and blend seamlessly with various decor themes.
Add Storage and Display With Floating or Built-In Shelving
Fiber installations establish warmth through tactile dimension, yet large walls often demand solutions beyond pure decoration. You can change one wall into a functional area by installing floating shelves, gaining extra storage without the visual mass of traditional bookcases.
Consider these strategic approaches:
- Scale vertically: Extend shelving from floor to ceiling to maximize spatial impact and create layered visual depth.
- Calibrate depth precisely: Specify approximately 12-inch shelf depth so objects command presence without impeding circulation paths.
- Select intentionally: Anchor arrangements with substantial pieces, canvas artwork, or ceramic vessels, punctuated with controlled greenery to avoid visual entropy.
- Integrate permanence: Specify built-in ledges or modular systems so your interior design achieves architectural permanence rather than superficial ornamentation.
This methodology yields display capacity for rotating collections while concealing operational clutter, establishing equilibrium between aesthetics and utility.
Recommended Products
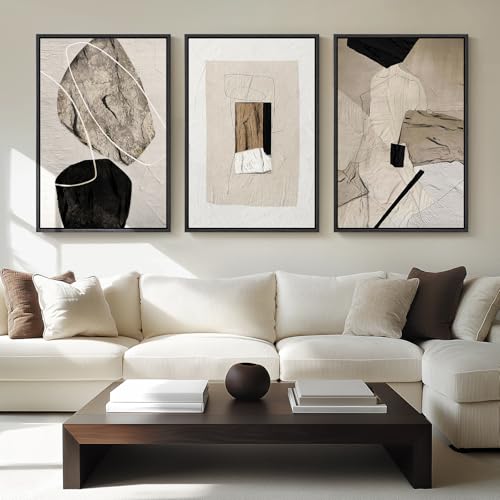
[Framed Wall Art]: Set of 3 large framed neutral abstract wall art, each measuring 24×36 inches, each painting with a sturdy frame

Decoration: Elevate your home decor with stunning home decor canvas wall art that adds a pop of color and beauty to any living room, bedroom, kitchen, nursery, hallway or office space

【Vintage Bird Wall Art】This oversized framed vintage bird wall art features birds in flight across a deep brown and neutral background. The moody scene brings a quiet, dramatic and atmospheric feel to the living room, bedroom, hallway, home office or dining room
Fake Architectural Interest With DIY Trim or Molding
Empty expanses of drywall deliver no spatial hierarchy; you’re basically staring at missed opportunity. You can fake architectural interest with DIY modern picture-frame molding on a large wall, applying trim in a simple grid so the surface gains structure without cluttering it with hanging decor.
Aim for scale that matches the blank area: on a big living-room wall, larger frame sections and bolder trim profiles read as intentional millwork rather than small, fussy accents. Paint accent trim in a crisp contrasting tone, or match existing base and ceiling trim so the molding lines stand out and visually structure the wall.
Keep the design cohesive with your room’s era. Choose clean modern paneling or classic wainscoting, then repeat those lines elsewhere. If cost concerns you, start with one focal zone behind a sofa to limit trim while achieving custom millwork presence.
Recommended Products
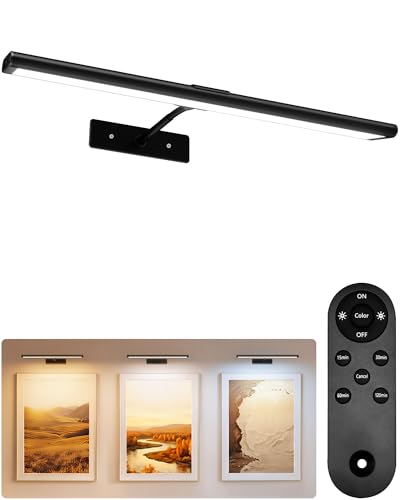
USB Rechargeable & Easy Charge: Our picture light with with built-in 4800mAh large-capacity battery and comes with a USB-C charging cable. Low power consumption and long lasting durability. No frequent replacement and No more wasting money on AAA batteries! Easy charge,you just bring magnetic LED light from the bracket and using fast Type-C. Compatible with power bank, phone charger, PC USB Port.

[Powerful Rechargeable Battery] This 15.75 inch wireless LED picture light has a built-in 5000mAh rechargeable battery and comes with a USB-C charging cable. In just 4 hours, battery operated picture lights fully charges to provide lasts 7 hours ( highest brightness ) – 30 hours ( lowest brightness ). It's perfect for painting, gallery, home, or wherever you want to brighten up your artwork

Decorate a Large Wall With Bold Mural Wallpaper: No Nails Needed
Because a blank wall offers no spatial hierarchy, you’ll want to treat the entire surface as a single, continuous canvas rather than fragmenting it with multiple framed pieces. A bold mural wallpaper turns your entire wall into one commanding piece of art without a single nail.
- Select full wall-height designs that serve as the room’s main center of attention, eliminating the need for hung decor.
- Choose peel-and-stick application to preserve wall integrity and enable easy removal.
- Position behind primary seating so the mural anchors the spatial arrangement.
- Coordinate bold color palettes with existing rugs and paint for visual cohesion.
This approach costs less than oversized canvases, eliminates re-hanging maintenance, and delivers continuous visual impact. Your wall becomes the statement, not merely a background for smaller objects.
Recommended Products

Arched Top Mirror: The full length mirror is arched floor mirror 81in x41in,this mirror is perfect for creating a focal point in anytime, The sleek and sturdy frame is made of high quality allumium alloy,providing both durability and a touch of morden flair

✔【Full Size】The size of the full length mirror is 91"x46". The large-size standing mirror not only facilitates you to admire the whole body dress, but also makes your room more beautiful.

47.2inch Jewellery Cabinet: The Jewellery Cabinet is made from MDF for strength and durability, with a mirrored frame to prevent fingerprint staining. Fine lined fabric, unique hooks and dresser features for easy dressing and 2 adjustable drawers designed to easily organise and protect your jewellery collection.
Polish Your Art With Flanking Sconce Lights
You’ll anchor your large-scale piece with Balanced Visual Weight by installing substantial sculptural sconces at consistent heights, typically aligning their centers with the upper-middle third of the artwork frame to create symmetrical bracketing without spatial compression.
The Dramatic Illumination Effect emerges when you select fixtures with adequate lumen output and beam spread to wash the canvas evenly, mimicking gallery-grade picture lighting from a lateral position rather than overhead. For permanent installations, hardwired sconces at junction box standard spacing (usually 24–36 inches from the art’s vertical edge) deliver the most polished result, though plug-in alternatives remain viable where retrofit electrical access proves impractical.
Recommended Products
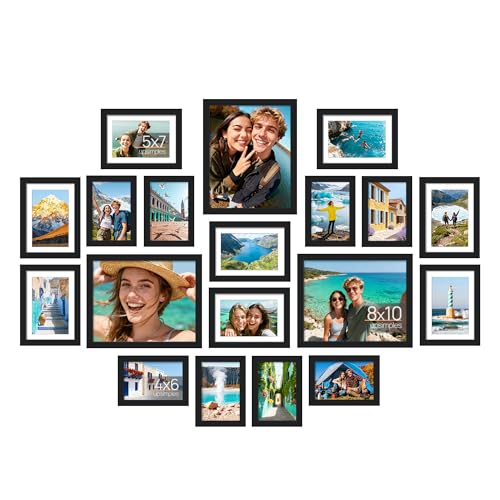
【Durable Material】Our collage frame is made of well made wood frame. Comes with a plastic cover, which provides a clear view of photos and is lighter than glass. No need to worry about hurt by glass broken.

Modern Minimalist Style: Our Picture frames are carefully packaged with minimalist art in mind, featuring natural colors such as black, white, and brown. Whether used as wall hangings or desk decorations,the gallery wall frame set is suitable for all seasons. We prioritize the perfect balance of aesthetics and functionality, ensuring a comfortable and natural experience for our customers.

Versatile Sizes for Display: Vittanly 15-Pack Multi-Size Picture Frame Set includes 3x 8×10", 6x 5×7", and 6x 4×6" frames. Perfect for showcasing family photos, artwork in living rooms, bedrooms, and offices
Balanced Visual Weight
When a single oversized canvas dominates your living room wall, gravitational pull toward that singular mass often disrupts the spatial equilibrium you’re seeking; this is precisely where symmetrical sconce placement restores compositional integrity. You anchor that large artwork with flanking wall sconces, generating balanced visual weight that counteracts the visual dominance of the central piece. Install each sconce at art-height, typically 66 to 72 inches from floor to fixture center, angling the beam to graze the top third of the canvas for effective picture light illumination without washing adjacent white space.
This technique particularly improves installations where the frame underwhelms the wall expanse. You turn under-scaled pieces into deliberate compositions through symmetrical augmentation.
- Flank single canvases at equidistant points to establish horizontal equilibrium
- Align dual sconces with paired artworks to unify disparate elements
- Specify hardwired fixtures in matched metal finishes for a cohesive, gallery-like presentation
- Commission electrical rough-in to accommodate concealed J-box placement
Dramatic Illumination Effect
Beyond mere accent lighting, flanking sconces turn wall-mounted artwork into a carefully chosen center of attention through calculated illumination.
When you’re hanging art on a big wall, position matching sconces to sit visually alongside your picture frame or canvas rather than tucking them behind small decor. This placement creates a dramatic illumination effect that enhances color and texture while making the artwork feel complete. The scale reads intentionally from across the room, unlike floor lamps which scatter light broadly.
For museum-like spotlighting of one specific piece, use picture-light style lighting, a hardwired picture light, or a two-light setup. Plan electrical junction box placement beforehand, or choose plug-in sconces with cord management for flexibility.
Select sconces that act as sculptural objects themselves. When they frame your art, they become integral wall decor, not supplemental lighting.
Combine Two Ideas for a Custom, Layered Look
To execute this approach effectively, follow these principles:
- Anchor with scale: Select a canvas occupying 60–75% of wall width
- Balance with restraint: Position minimal gallery frames at peripheral edges
- Unify your color palette: Ensure flanking elements harmonize with central tones
- Layer textures: Combine woven hangings with framed prints for dimensional contrast
Recommended Products

FSC Certified & Minimalist Design – Built from FSC-certified engineered wood, this picture ledge shelf pairs clean lines with a classic wood-grain finish that blends into modern, farmhouse, or minimalist living room decor. The slim profile keeps the focus on your photo frames, not the shelf.

Worth Every Penny – Same price for more boards, 5 sets of same size 15.6*5.6*1.8 inches sturdy compositive wood and include all hardware, provides ample storage space and durability feature with a compelling price. Just a few minutes of easy installation, your home will enjoy an entire wall of art.

【Picture Ledge Perfect for Display】FLYJOE picture ledge shelves for wall turn your walls into a stunning photo gallery! These spacious shelves are ideal for showcasing a variety of picture frames in one secure place. With a thoughtful protective lip, you can display everything from photos to collectibles without worrying about them falling off
Leave a Reply