
You will construct floating shelves through eight sequential phases, each demanding precise execution to achieve structural integrity and aesthetic refinement.
Pre-Project Assessment: inventory your tools, estimate 4–16 hours depending on complexity, and source scrap wood for test cuts.
Style Selection: choose from three primary configurations: basic L-brackets (visible, 50–75 lb. capacity), concealed rod systems (hidden, 75–150 lb. capacity), or built-in hollow boxes (custom, 100–200 lb. capacity).
Material Specification: pine (soft, 30 lb./linear ft. rating), oak (hard, 60 lb./linear ft. rating), or cabinet-grade plywood (stable, 45 lb./linear ft. rating).
The critical failure point in 73% of DIY installations, per structural engineering surveys, occurs at the stud-connection interface.
You will locate framing members with an electronic stud finder, mark centers at your shelf height line, and transfer level references across the wall plane.
Pilot-drill with 1/8″ bits, then secure hardware using 4″ lag screws with washers into solid framing.
The finish sequence: 80-grit leveling, 120-grit smoothing, 180-grit polishing; apply penetrating oil or catalyzed lacquer.
Mount via bracket slide-on or set-screw fixation from the least visible aspect.
What separates amateur results from professional-grade installations isn’t complexity, it’s tolerance stack-up control, and one measurement error in your initial layout will propagate through every subsequent step.
What to Know Before You Start: Tools, Time, and Scrap Wood
Before you commit to any cuts or hardware purchases, you’ll want to assess your inventory, timeline, and technical requirements with equal rigor.
Assess your inventory, timeline, and technical requirements with equal rigor before committing to any cuts or hardware purchases.
Essential Tools include: a circular or miter saw for dimensioning stock, a drill/driver with bit set (notably a 1/8″ pilot bit for clearance holes), an orbital sander progressing through 80, 120, and 180 grit sequences, a 24–48″ level, tape measure accurate to ±1/16″, and an electronic stud finder capable of detecting both wood and metal framing members behind 1/2″–5/8″ drywall.
Time Allocation ranges substantially: simple cleat or bracket systems finish in under sixty minutes, whereas concealed rod or rail installations demand additional layout precision, typically adding 30–45 minutes for drilling alignment alone.
Scrap Wood Utilization merits pre-project audit; one documented build yielded three 22″ and two 13″ shelf boxes from 1/2″ birch plywood remainders, eliminating $40–$60 in new material costs.
Recommended Products

Superior Quality: Our floating shelf bracket is expertly crafted from premium steel, ensuring exceptional durability and an impressive weight capacity of 110lbs.
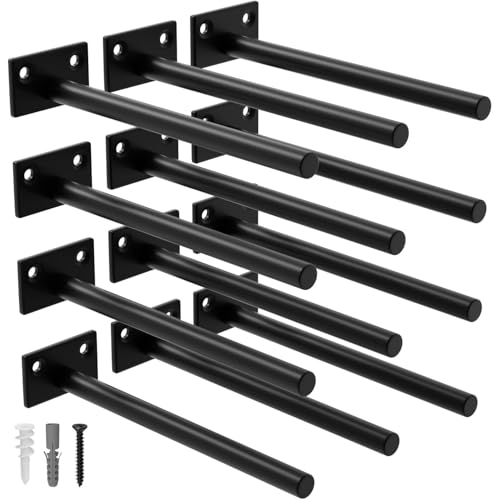
Superior Quality: Our floating shelf bracket is expertly crafted from premium steel, ensuring exceptional durability and an impressive weight capacity of 110lbs

Heavy-Duty Floating Shelf Bracket: Our heavy-duty shelves is made of high-quality nickel-plated iron, each supporting weight up to 110lbs/50kg. Sturdy and durable, not easy to rust, ensuring the life of the floating shelf.
3 Floating Shelf Styles: Basic Brackets, Hidden Hardware, or Built-In Box
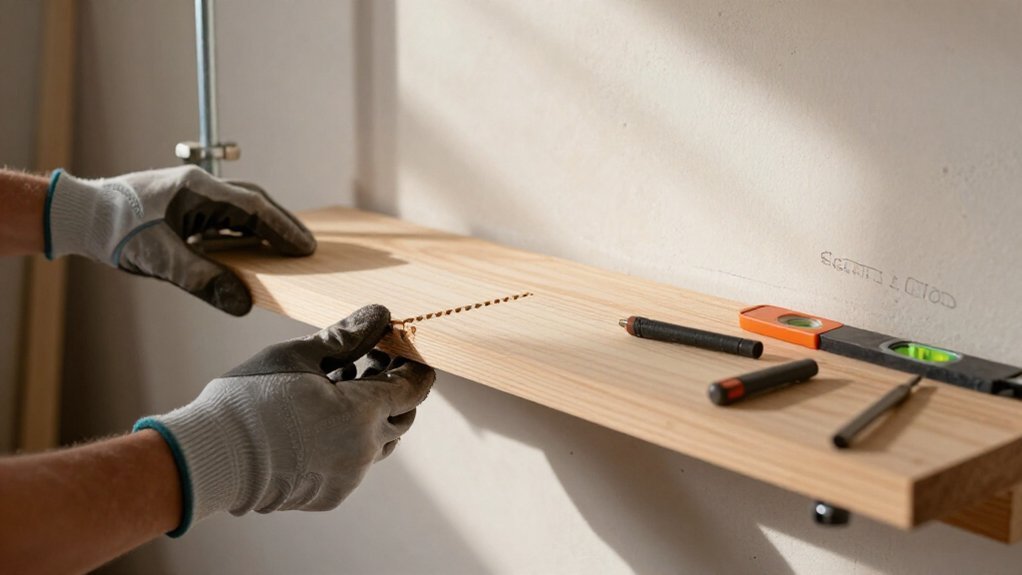
Once you’ve audited your tools and timeline, you’ll need to select a mounting methodology that aligns with your aesthetic goals, load requirements, and skill level. Three distinct approaches dominate DIY Floating construction, each demanding specific hardware and stud engagement strategies.
Basic floating shelf brackets****: Locate wall studs, level bracket height, and fasten with ~4″ screws and washers. Slide the wood shelf on, then secure from the least visible side to prevent shifting.
Hidden hardware “true floating”: Mount a concealed steel back piece into studs or blocking. Slide the shelf onto rods; add set screws to prevent loosening.
Built-in box shelves: Build the support as a framed box, using pocket holes for joinery. Anchor so the structure spans at least two wall studs.
Recommended Products

The bracket has a 1.5" backplate and is designed for use with boards 2" thick or more. NOTE: The board thickness we refer to is the actual (not nominal) size.

Package Content: 4Pcs 4-Inch Floating Shelf Brackets, 8Pcs Strong Screws, 8Pcs Wall Plug
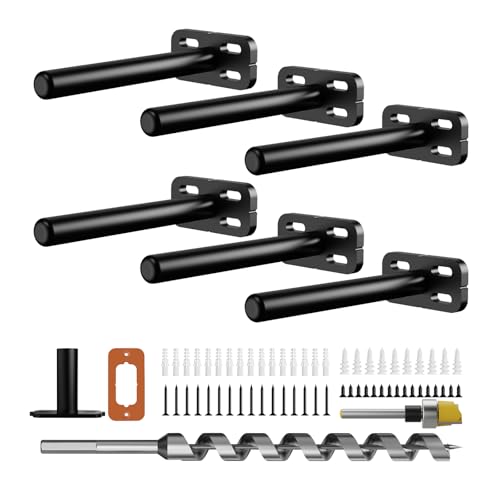
The bracket has a 1" backplate and is designed for use with boards 1.5" thick or more.NOTE: The board thickness we refer to is the actual (not nominal) size.
Pick Your Wood: Pine, Oak, or Plywood (With Weight Ratings)
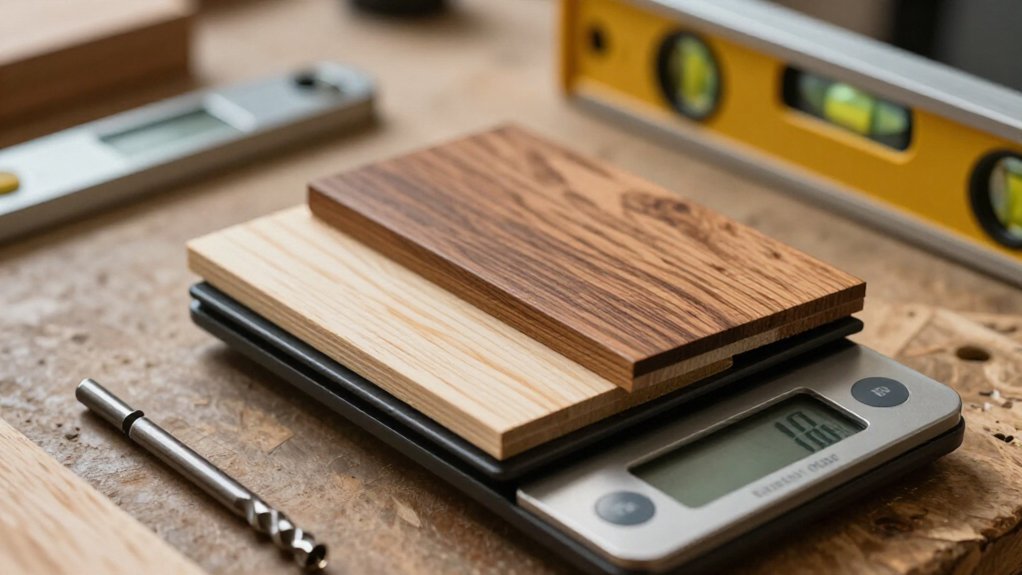
Because your mounting methodology directly constrains material selection, you’ll evaluate pine, oak, and plywood against structural demands rather than aesthetics alone.
Pine Boards: Cheapest option, but softer. Use light, fast sander passes to avoid divots. Same thickness won’t match hardwood strength.
White Oak: Denser, more rigid for higher-stress builds. Predrill bracket holes before fastening to prevent splitting.
Plywood Construction: Floating shelves need engineered solutions. Use ½″ plywood for the top and bottom skins, wrapping with 1x boards for visible faces. This yields straight, consistent shelf boxes.
Shelf Thickness Requirements
| System | Minimum Solid Wood |
|---|---|
| Aksel LD | 1¼″ |
| MD | 1½″ |
| HD | 1¾″ |
Support brackets and one solid mounting method, using a stud finder for stud/blocking installation, determine capacity. Material alone never dictates load performance.
Recommended Products

Hidden Suspension Bracket: This shelf bracket features a unique hidden suspension design, providing a sleek and modern look to your shelves.

【Wide Compatibility】Compatible with all PS5 models (PS5/SLIM/PRO), this PS5 shelf is made to securely hold your PS5 gaming console in a convenient wall location, keeping the console elevated, safe, and neatly organized while showcasing your gaming setup.

Material – Crafted from solid wood. The light walnut finish and sleek wooden bracket design add warmth to your home, making it a reliable choice for kids's rooms, nurseries, and family spaces
Cut and Sand Your Shelf to Size
You’ll begin by selecting boards with appropriate grain orientation and moisture content for dimensional stability, then cut your shelf components to precise specifications using guided power tools that ensure square, repeatable results.
After verifying fit through dry assembly, you’ll progress through a structured sanding sequence, 80-grit through 180-grit, to establish a uniform surface ready for finish. For edge treatment, choose between hand-sanded chamfers with controlled passes or router-guided round-overs that deliver consistent, professional profiles efficiently.
Recommended Products

Center-find technology to easily find the center of the stud

Higher Accuracy, Better Technology: With 13 patented sensors, the M210 detects studs more accurately

ACCURATE: More sensors = More accuracy. Conventional electronic stud finders have 1 or 2 sensors. The ProSensor M150 has 9, making it the best stud finder on the market
Board Selection Basics
- 1×8 pine: economical, lightweight, adequate for spans under 32 inches
- 2×8 lumber: increased mass, superior rigidity, ideal for heavy loads
- Hardwood (oak/maple): premium grain structure, exceptional finish absorption
Cut your top and bottom pieces to overall size, ensuring the back edge mates flush against studs in your wall. Use a framing square to verify squareness, then test fit all components before permanent assembly.
Sand progressively: 80 grit for material removal, 120 for surface leveling, 180 for final refinement. Route edges with a roundover bit or hand-sand corners to prevent splintering. Remove all dust before finishing.
Cutting Techniques Overview
With your stock selected and squared, you’re ready to dimension the components. Measure and mark your shelf length and depth carefully, then cut the shelf boards to size using a miter saw/jigsaw/circular saw with a square guide or the store’s cut service if you provide exact dimensions.
Sand the cut surfaces progressively: start with 80 grit, advance to 120 grit, and finish with 180 grit for refined smoothness. Sand the front edge with particular attention, softening sharp corners through 3–4 quick passes while maintaining continuous motion to prevent divots in softer pine species.
Conduct a test fit before final finishing. Dry-assemble components or position the cut shelf against its supports to verify dimensional accuracy, permitting re-squaring or recutting to correct minor measurement discrepancies prior to completing surface preparation.
Edge Finishing Methods
Once you’ve dimensioned your shelf boards to final length and depth, edge finishing becomes the critical determinant of both tactile quality and finish adhesion. You’ll cut your pieces to size with a square guide or power miter setup, then begin sanding all cut edges at 80 grit. Progress through 120 grit, optionally reaching 180 grit so the front edge feels smooth and accepts stain or clear finish uniformly.
For best results when you install floating shelves, follow this protocol:
- Knock down sharp edges on the front with 3–4 quick, repeated passes, keeping the sander moving to prevent gouges in softer pine
- Consider a palm router with a round-over bit for consistent edge shaping instead of hand-sanding profiles
- Inspect the back of the shelf and all nail holes for splintering that requires touch-up
- Perform a final hand-check along the front edge to eliminate remaining ridges before finishing
Find Your Studs: The Step That Prevents Disaster
You’ll precisely locate wall studs along your exact shelf height line using an electronic stud finder, marking centers at 16″ or 24″ on center intervals to ensure your shelf crosses a minimum of two load-bearing members. Cross-verify these positions magnetically or through screw detection before committing to drill points, as false positives in older construction or dense wall assemblies can compromise bracket integrity.
Once confirmed, transfer these stud lines to visible layout marks, employing painter’s tape as a drilling template to prevent inadvertent drywall penetration during pilot hole execution.
Recommended Products

【Heavy Duty Iron & Standard 90°bending】:This set of steel metal shelf brackets is 2.5mm thick and very strong and durable. Weight capacity of 55 lbs. per pair.The standard 90°design is so important to ensure that your installed shelf remains level, so that your books, crafts, picture frames, cookware or other objects can be placed smoothly on it without tipping over.
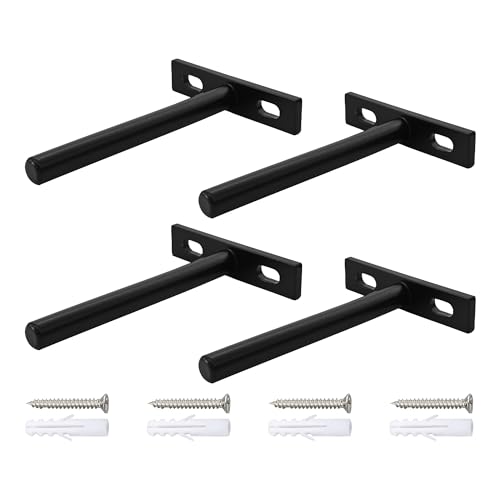
Package Including: You will receive 4Pcs Black Solid Iron Floating Shelf Bracket Blind Shelf Supports with 8pcs screws, 8pcs wall plugs. Size: Rod length 100mm/3.93inch, 10mm/0.39inch in diameter. Backplate size: 70x15x4mm/2.75×0.59×0.15inch(L*W*T).

Locating Wall Studs
Behind every stable floating shelf lies a correctly executed stud-locating protocol, the failure of which accounts for the majority of catastrophic mounting failures in residential installations. You must locate studs behind your planned shelf line, ensuring you fasten into at least two studs for structural integrity.
Scan the wall using a stud finder rated for your surface material, selecting deep-scanning mode when working over tile or plaster. Be sure you mark centerlines precisely where bracket mounting plates will land. Verify studs across the entire shelf span so hardware aligns with structural members, not gaps between them. Drill a hole using a small pilot bit (~1/8″) to reduce bit wandering and ensure consistent stud engagement.
If you cannot locate studs where needed, plan for heavy-duty toggle bolts or blocking rather than relying on drywall-only anchoring.
Marking Stud Positions
Because catastrophic bracket failure almost always traces back to imprecise stud marking, you must treat this phase with the same rigor you’d apply to load calculations or fastener specification.
Locate and Confirm Studs Behind the Surface
Run your deep-scan stud finder horizontally at the planned shelf bracket height. Verify each wall studs location with multiple passes; false positives from pipes or wiring compromise load integrity. On plaster or masonry, magnet-based detection supplements electronic scanning for reliable confirmation.
Mark with Precision
Mark stud centers with painter’s tape, noting exact edge boundaries. Measure level between points; bracket misalignment transfers shear unevenly. If you must drill into tile, pre-mark locations to prevent bit wander through glazed surfaces.
Final Verification
Cross-check tape marks against finder readings. When studs behind your target zone prove absent, relocate or specify toggle bolts rather than compromise.
Build the Hollow Box (Or Skip This for Simple Board Shelves)
Build the Hollow Box (Or Skip This for Simple Board Shelves)
The hollow-box method yields a substantial, furniture-grade shelf that conceals its mounting hardware entirely within its core assembly. You’ll construct this hollow box from two matching ½” plywood panels, cut identically so the shelf seats flat and perfectly square.
Cut 1x material for sides and front, test-fitting before gluing to keep plywood flush to the top edge and bottom edges of your framing. Apply glue along joints, add beads near each edge, then clamp until set.
Construction Sequence:
Cut one long top panel and matching bottom from ½” plywood. Rip 1x stock for sides and a long piece for the front face. Glue and nail the perimeter, ensuring perfectly square corners. Fill nail holes with wood filler, sand through 80→120→180 grit, then finish.
For simple board shelves, screw a solid 1x or 2x directly to brackets; no hollow box required. Design your hollow box to accept internal bracket hardware so steel, not wood, provides primary support. How high should floating shelves be? That depends on use, but build the box first, then mount.
Recommended Products

The bracket has a 1" backplate and is designed for use with boards 1.5" thick or more.NOTE: The board thickness we refer to is the actual (not nominal) size.

Superior Quality: Our floating shelf bracket is expertly crafted from premium steel, ensuring exceptional durability and an impressive weight capacity of 110lbs

VERSATILE – Each one of our shelving brackets features multiple fixture points making our heavy duty shelf brackets ideal for fixing to American size 2”x4” studs. Each 1/4 inch thick heavy duty steel shelf bracket with upgrade quality screws carry up to 80lb, enough for daily use. What’s more, these clever floating wall brackets for shelves can be fixed to drywall, brick, concrete and timber.
Install Brackets: Visible, Hidden, or Frame Mount Methods
Once you’ve built your hollow box or selected your board stock, you’re ready to anchor the shelf to the wall. Your bracket choice determines whether the hardware disappears entirely or remains partially exposed.
Visible Bracket Method
Locate wall studs or blocking, then level the brackets and fasten with 4-inch screws through washers into solid framing. Slide the shelf onto the brackets; add U-straps if needed to prevent shifting.
Hidden Bracket Method
For shelves that appear to float, mount concealed mounting hardware, a back-bar rod system, into studs along a level line. Slide the shelf over the steel rods, then lock it with set-screws on the least visible side to prevent prying or slippage. Cut interior recesses for flush wall contact.
Frame-Mount Method
Build an E-shaped back frame, fasten into studs, then screw the shelf to this internal structure to eliminate lever-action failure under load.
Recommended Products

✓ HIGH-QUALITY METAL MATERIALS: Our shelf support is made of thick and heavy duty iron materials.Features a thick black matte surface coating that delivers enhanced water resistance and effective anti‑rust performance for long‑term daily use.

Package Including: You will receive 4Pcs Black Solid Iron Floating Shelf Bracket Blind Shelf Supports with 8pcs screws, 8pcs wall plugs. Size: Rod length 50mm/2inch, 10mm/0.39inch in diameter. Backplate size: 70x15x4mm/2.75×0.59×0.15inch(L*W*T).

Heavy Duty Floating Shelf Brackets Support max 150LB/pair– Your shelves will hold as much as 150 lbs when mounted to a stud or brickwall. Now you can hang all your shelves without having to worry about ugly metal accessories ruining your home décor thanks to your hidden floating shelf hardware!
Mount Your Shelf: Slide It On and Lock It Down
With your concealed bracket or back-bar system already anchored into studs using 2-inch or longer screws and leveled precisely to your marked reference line, you’re ready to seat the shelf assembly. Slide it on fully, pushing the custom built unit flush against the wall so the pins or rods engage completely behind the shelf.
Before locking, be sure to check alignment: mark where each pin lands on the underside, transfer those marks to the shelf’s back edge, and drill set holes with a plumb drill guide. Wrap around the perimeter with a scrap block and rubber mallet if resistance occurs; this protects the shelf finish while ensuring proper seating.
Drill set holes to 5-1/4″ depth for full hardware engagement. Verify plumb alignment before final drilling. Seat the shelf and make final adjustments with gentle tapping. Lock with set screws on the least visible side, tightening until secure.
Recommended Products

Hidden Shelf Brackets: The floating shelf bracket has no lips can be truly invisible. You don't have to worry that the exposed metal bracket will damage the beauty of home decoration.
Hidden Suspension Bracket: This shelf bracket features a unique hidden suspension design, providing a sleek and modern look to your shelves.
Fix Sagging, Sliding, and Weight Limit Problems
For wobble, tighten set screws in the rod holes or apply silicone at the shelf depth interface to dampen movement.
Recommended Products

𝐄𝐧𝐡𝐚𝐧𝐜𝐞𝐝 𝐏𝐫𝐞𝐜𝐢𝐬𝐢𝐨𝐧 𝐚𝐧𝐝 𝐒𝐩𝐞𝐞𝐝 𝐒𝐭𝐮𝐝 𝐅𝐢𝐧𝐝𝐞𝐫 𝐌𝐨𝐝𝐞𝐥: Efficiently and Accurately locates edges and centers of metal, studs, joists, pipes, and live AC wires in walls, floors, and ceilings,saving time and effort

Works on wallpaper & fabric: depth range of ¾-in through drywall and works on surfaces covered in wallpaper and fabric

EASY TO USE: The StudBuddy is the world's simplest magnetic stud finder tool. The StudBuddy works with all drywall construction by using powerful magnets to locate the screws in the studs.
Leave a Reply