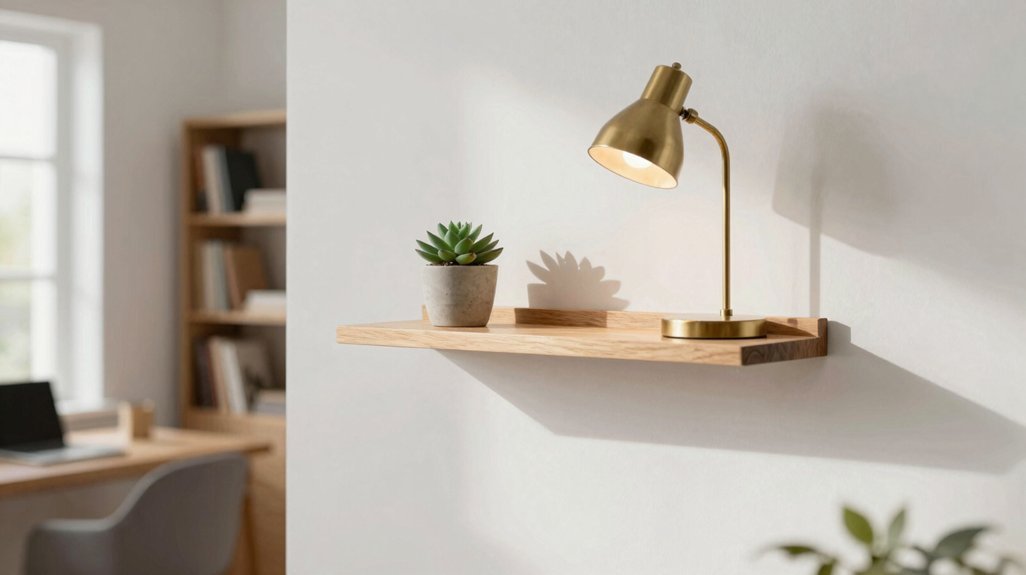
You’ll anchor into studs; drywall alone fails at 15–20 lbs per anchor. Your bracket selection, rod diameter (typically 3/8″–1/2″ steel), and shelf depth (8″–12″ standard; 16″ max for 2× stud spacing) determine load capacity: 25 lbs for basic cleats, 75+ lbs for integrated steel.
Choose your method: basic cleat, concealed bracket, or built-in frame. Each demands precise stud location, often 16″ or 24″ on center.
The real question isn’t whether you *can* build it; it’s whether you’ve accounted for dynamic loads, seasonal wood movement, and the hidden failure points most DIYers miss entirely.
Pick Your Floating Shelf Method: Basic, Hidden, or Built-In
Before you commit to a single board or bracket, you’ll need to determine which structural approach aligns with your load requirements, aesthetic priorities, and installation constraints. For Basic Floating shelves, you’ll anchor at least two shepherd-style floating shelf brackets into wall studs, using a stud finder to locate solid mounting points. Level both brackets identically so you can slide the shelf on and secure it against shifting.
Hidden Bracket
If you’re pursuing the true floating look, select a concealed rod-and-hidden bracket system. The shelf slides over rods that disappear entirely from view, but you’ll still need to install floating shelves into studs or blocking. Never rely on drywall alone for structural integrity.
Built-In Box
For DIY Floating with heavy capacity, build the support as a rigid box frame using 11″ full-width shelves. Use a laser level, raising each tier by approximately 1.5″ for consistent spacing.
Recommended Products

Superior Quality: Our floating shelf bracket is expertly crafted from premium steel, ensuring exceptional durability and an impressive weight capacity of 110lbs.
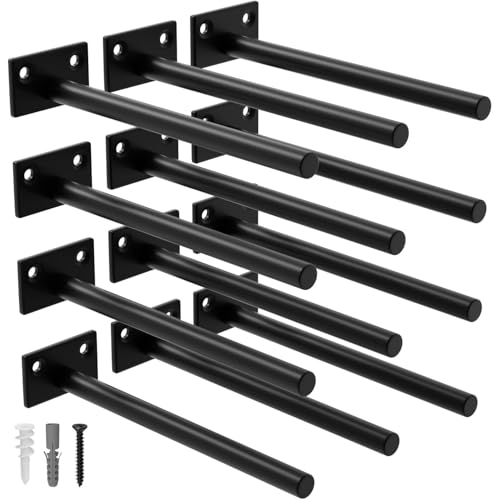
Superior Quality: Our floating shelf bracket is expertly crafted from premium steel, ensuring exceptional durability and an impressive weight capacity of 110lbs

Heavy-Duty Floating Shelf Bracket: Our heavy-duty shelves is made of high-quality nickel-plated iron, each supporting weight up to 110lbs/50kg. Sturdy and durable, not easy to rust, ensuring the life of the floating shelf.
Check Your Tools and Gather Materials
Once you’ve settled on the hidden bracket method, you’ll need to verify your workshop contains the precision cutting and fastening equipment this installation demands.
Core Tool Inventory
Floating shelves need a miter saw (or circular saw with a square guide) and a jigsaw for fine cuts. You’ll also want a drill/driver, two levels, a stud finder, and an orbital sander with 80, 180 grit progression.
Material Specifications
Plan your cut list early. Measure your wall opening, then cut the top and bottom pieces to finished dimensions, approximately 39.5″ wide × 11″ deep × 2.5″ high.
Measure twice, cut once: plan your dimensions early to ensure your top and bottom pieces fit the wall opening precisely.
Use solid hardwood, typically 1¼”+ thick. Assemble with wood glue, using pocket holes for concealed joinery.
Finishing Supplies
Collect your hidden bracket hardware with set screws, plus tack cloth, stain, and three coats of matte poly sealer.
Specialized Prep
For tile or uneven walls, secure carbide or diamond tile bits for stud attachment and keep shims handy so you’ll use a level effectively before final installation.
Recommended Products
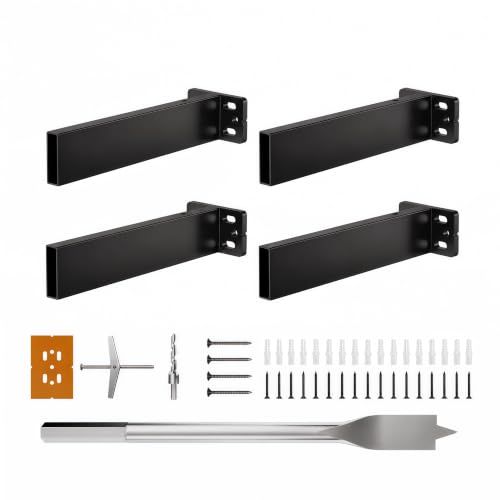
【Designed for Hollow Mantels & Hollow Shelves】Stop relying on wood cleats that can warp, sag, or weaken over time. Unlike traditional l brackets for shelves, our floating mantel brackets system is engineered specifically for hollow fireplace mantels and hollow floating shelves, providing long-term structural support without compromising appearance. The shelf mounting brackets compatible with most hollow wood mantels and hollow floating shelves used in residential and commercial projects.

Heavy-Duty Shelf Brackets: Engineered with 6063 T6 aircraft-grade aluminum, the Hovr Classic supports 300lbs, making it 13x stronger than heavy duty shelf brackets. Premium floating shelves brackets for walls, offices, all commercial and residential spaces.

【ULTRA-STABLE INTERLOCKING DESIGN】 Tired of crooked frames or wobbling mirrors? Our French cleat hanger features a precision Z-bar interlocking system that provides a flush, secure mount. The 6-inch profile is specifically engineered to distribute weight evenly, ensuring your heavy wall decor stays exactly where you put it without the risk of falling.
Find Studs and Finalize Your Shelf Size
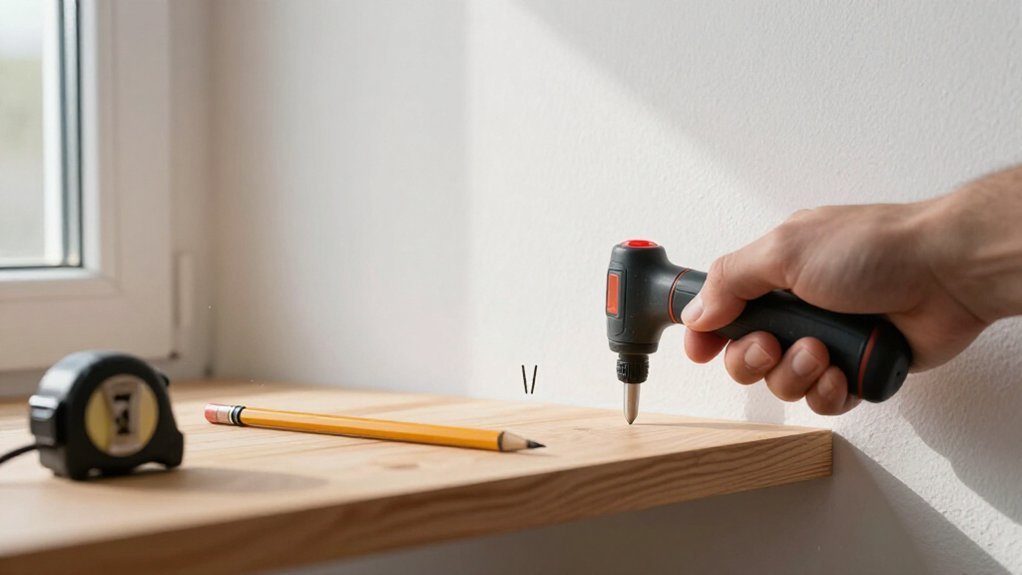
Grab a stud finder or use a magnet-based method like the “Stud Buddy” to locate drywall screws and mark every stud behind your planned shelf location. Make sure your shelf length spans at least two studs. You’ll need roughly 17″ for standard 16″ stud spacing or about 25″ for 24″ spacing.
Once you’ve confirmed stud alignment, finalize your shelf width (typically 10–11″ for common storage applications) and double-check all measurements before cutting any material.
Recommended Products

Heavy duty design – Our shelves will hold as much as 120 lbs when mounted to a stud or brickwall because our brackets are made of solid steel and welded components and includes quality screws and anchors

Material:Our stainless steel round rods are made of high-quality 304 stainless steel,not easy to corrode, durable and strength.ensures long service life.

Complete Packaging: 2 solid 304 stainless steel round rods, each product is fully packaged in a bubble bag.
Stud Finder Methods
How do you make certain your floating shelf won’t detach from drywall under load? You locate studs first, then complete dimensions.
Electronic Detection
Run a stud finder horizontally across the wall, marking each stud center with painters tape. For 16″ o.c. framing, plan an overall size exceeding 17″; for 24″ o.c., exceed 25″. This guarantees your bracket’s back piece spans multiple studs positioned for load distribution.
Alternative Methods
When paint interferes, use a magnet-based unit to detect drywall screws. On tile, employ deep-sensor models, though outcomes vary.
Verification
After studs located, hold the bracket against the wall for a test fit. Confirm the top of the bracket aligns with your intended mounting height.
If studs prove elusive, abandon drywall-only anchors; specify heavy-duty toggle bolts or blocking instead.
Marking Stud Locations
With studs identified through your chosen detection method, you’re ready to fix their positions precisely and derive your final shelf dimensions from those structural anchors.
Marking Your Findings
Use your stud finder to locate vertical framing members behind your intended shelf placement. Mark stud locations with light pencil lines or painter’s tape, extending marks vertically beyond your planned shelf height for visibility during installation.
Measure and Plan for Structural Integrity
Span at least two studs to ensure adequate load distribution. For standard 16-inch on-center framing, specify 17 inches minimum length; for 24-inch centers, use 25 inches or greater. Transfer your bracket spacing onto the wall, aligning hardware locations with confirmed structural members.
Final Verification
Check stud positions along the full horizontal run before material procurement. If uncertainty persists, create multiple wall marks at bracket points rather than single references. This alignment protocol prevents costly errors and guarantees your final shelf dimensions correspond exactly to available structural support.
Determining Shelf Length
Three critical measurements govern your shelf’s length: stud spacing, minimum span requirements, and room-specific constraints.
To determine shelf length properly, you must first locate wall studs with a stud-finder, marking their positions behind your intended floating shelves installation. Measure stud spacing carefully; most residential framing uses 16-inch on-center spacing, though older or commercial construction may employ 24-inch on-center patterns.
Your shelf must span at least two studs for structural integrity. With 16-inch on-center studs, plan minimum 17 inches of length; with 24-inch on-center, you need at least 25 inches. Verify your continuous shelf surface extends adequately beyond both outer studs.
Confirm final dimensions by measuring center-to-center between studs, then cut or order hardware only after this stud-verified shelf length is established.
Build the Support Frame to Fit Your Wall
Before you cut a single piece of lumber, map your wall’s structural anatomy to make sure your support frame anchors into solid substrate rather than hollow drywall. Locate your wall studs first, then design the Floating shelf’s back support to align with at least two studs so the frame can be fastened into structure, not just drywall.
Frame Construction Specifications
Build the support frame to fit inside the Floating shelf box with clearance that avoids the back piece where a stud will be located, so all screws land in wood. Use an E-shaped frame layout: back piece plus shorter side and front supports. Keep the frame level during installation to prevent a crooked shelf.
Size the frame depth to approximately two-thirds of total shelf depth. For example, a 10″ deep x shelf requires a ~9″ frame for proper load transfer.
If studs behind your ideal location are unavailable, plan for heavy-duty anchors or toggle bolts, as frame strength depends entirely on fastener engagement with wall structure.
Recommended Products

✓ HIGH-QUALITY METAL MATERIALS: Our shelf support is made of thick and heavy duty iron materials.Features a thick black matte surface coating that delivers enhanced water resistance and effective anti‑rust performance for long‑term daily use.

【Suitable For 2*4” Wood Studs】Goovilla hidden shelf brackets is desiged with a 1.57*1.38” backplane. The small size and 3 close together screw holes match the narrow 2×4 inch (actual size is 1.5*3.5” ) wood studs thoroughly.

【Standard 90° bending】In order to ensure that each shelf bracket can be at 90° to the maximum extent possible, we add a rigorous picking process before the shelf brackets are packaged. The standardized 90-degree design is so important that it’ s the objective factor in ensuring that items remain level and do not tip over after being placed on the board(board is not included).
Cut and Assemble the Hollow Floating Shelf Box
Once you’ve mapped your wall structure and built the internal E-shaped support frame, you’re ready to fabricate the hollow sleeve that conceals the mounting hardware and carries the shelf’s visual weight.
Cut the Plywood Panels
Cut two identical 1/2″ plywood pieces for the top and bottom; size them 3/4″ narrower and 1 1/2″ shorter than your overall shelf opening. Verify they match exactly.
Build the 1x Frame
Wrap the sides and front with 1x stock. Mitre front corners at 45° for cleaner joints, or use square butt joints. Dry-fit everything before committing.
Assemble the Hollow Box
Tape seams, flip upside down, run glue beads near top and bottom edges, then clamp. Attach plywood flush to frame edges so your hollow box slides over the internal support like a sleeve. You’re building shelves that appear to defy gravity.
Recommended Products


【Space-Saving Deep Wall Shelves】Our stylish deep floating shelves (Shelf Size: 16" x 12") look rustic yet modern, are a great addaition if you need extra storage space or if you want to add wall decor – indoor plants, artworks, picture frames etc. These deep wall shelves can free up floor & counter spaces and make places much tidier and neater in your Kitchen, bedroom, living room and laundry room.
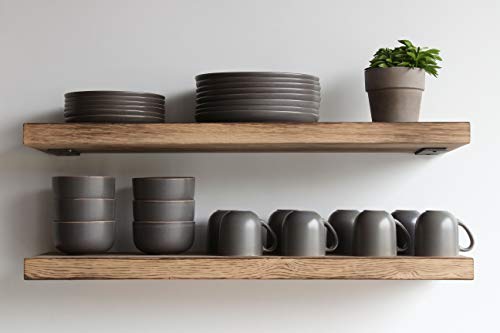
Set of 2 Urban Legacy Deep Floating Shelves, Torched White Oak with Low Profile Brackets. Each shelf measures 24" x 11" x 2" (nominal) and weighs approximately 15 lbs.
Sand, Shape the Edges, and Finish the Wood
Sand the assembled box in progressive stages to prepare the surface for finishing. Start at 80 grit, progress to 120 grit, and optionally finish with 180 grit for a smoother feel. Keep passes even to prevent uneven spots.
Shape and Refine
Soften sharp edges with 3–4 quick passes, keeping the sander moving to avoid divots in softer woods like pine. For more consistent results, use a palm router with a round-over bit rather than relying solely on sanding.
Apply Finish
Wipe dust with a tack cloth. If you used wood filler or need to drill a hole for cable management, address these now. It’s time to apply stain evenly; let Simply White sit 10–15 seconds before wiping off. Seal with multiple thin coats of matte polyurethane, three coats typically, with a light sand between coats if adhesion demands it.
Recommended Products

The bracket has a 1" backplate and is designed for use with boards 1.5" thick or more.NOTE: The board thickness we refer to is the actual (not nominal) size.

Package Content: 4Pcs 4-Inch Floating Shelf Brackets, 8Pcs Strong Screws, 8Pcs Wall Plug

Superior Quality: Our floating shelf bracket is expertly crafted from premium steel, ensuring exceptional durability and an impressive weight capacity of 110lbs.
Mount the Brackets Flush and Slide the Shelf On
Your finished shelf box awaits its final installation, and the stability of the entire assembly depends on proper bracket anchoring. You must locate studs first, marking their positions with precision. Then mount the brackets flush against the wall, checking level across the bracket with a torpedo or laser level. Secure with 2-inch screws driven into two pieces of framing minimum; drywall anchors alone won’t suffice for meaningful loads.
Using a mallet and scrap wood, slide the shelf on in one time, protecting the finish. The bracket rods must seat fully inside the shelf so hardware disappears completely. Verify level immediately. Shim between bracket and wall if uneven plaster prevents flush contact, correcting any cant or sag before the shelf sees load.
Recommended Products
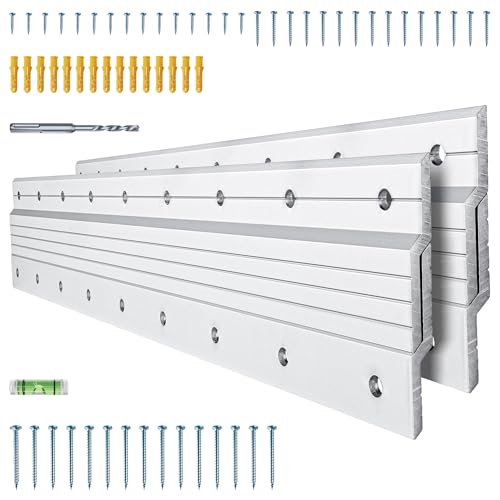
Invisible Mount: AENTGIU wall hanging hardware stays hidden for a sleek, floating look. Each 17-inch interlocking Z clip locks your mirrors, cabinets, or artwork firmly in place while keeping the hardware out of sight

Amazing Illusion – Gain practical storage space while maintaining a beautiful and elegant modern look. Once installed, these concealed shelf brackets are completely hidden from view, creating the illusion of a floating shelf. Typical shelf depths are 10" for kitchen, 8-10" for living room/bookshelves, our 6 inch large size shelf brackets will handle both with ease

Packing Included – 2Pcs x Cleat Hanger, 2Pcs x M4*25mm Screws and Plastic Anchors, 2Pcs x M4*15mm Screws. Come with pre-drilled holes, it's convenient and quickly for you to install.
Troubleshoot Wobble and Secure the Shelf Locked
Even when you’ve seated the shelf with care, wobble can surface if set screws haven’t been tightened or if the bracket-to-shelf interface lacks full contact. Check each connection point systematically. Make sure you slide the shelf fully onto the rods; tap it gently with a mallet protected by a scrap block if resistance occurs. One common oversight: uneven wall planes. Shim behind the shelf bracket until the assembly sits perfectly flush.
Two additional factors demand attention: load distribution and mechanical locking. Exceeding the rod depth rating amplifies wobble, so position mass closer to the wall. Add the front retaining screws on the least visible side after seating to prevent vibration-induced displacement.
Quick Fixes for Persistent Wobble
- Tighten all set screws; apply silicone in rod holes for semi-permanent stabilization
- Verify bracket-to-wall contact; shim gaps before final installation
- Confirm load limits match your bracket/rod depth specification
Recommended Products

National Hardware's 3/8" x 36" Smooth Rod – Steel is designed for axles on wagons, carts, and other do-it-yourself projects.

Material: 304 stainless steel, which offers a high level of chemical and corrosion resistance.

Vertical Application: hangs threaded rod to all your overhead wood structures
Leave a Reply