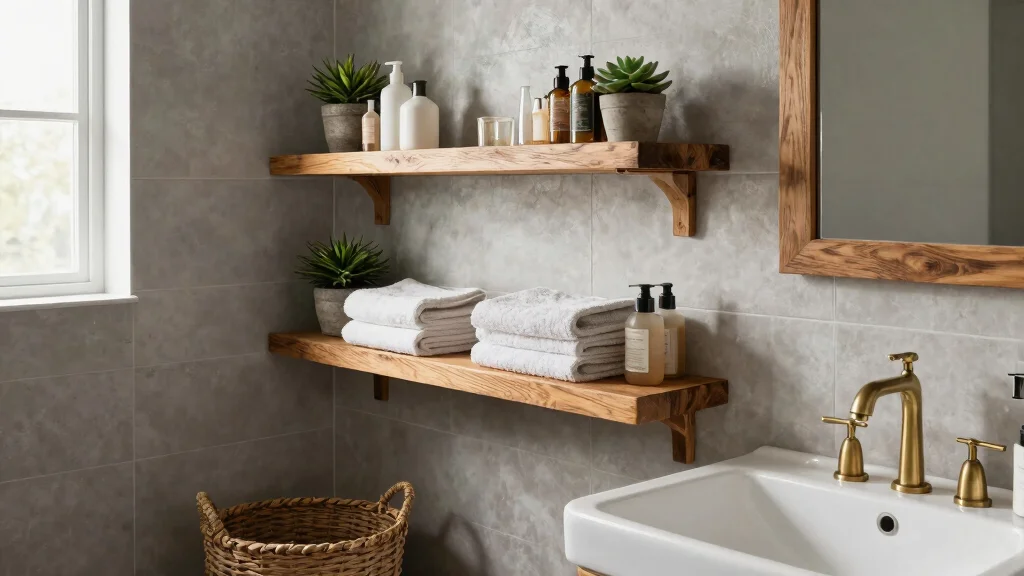
Upgrading your bathroom can feel like a daunting task, especially when you’re trying to stick to a budget. This space is one of the most used areas in the home, and everyone wants it to look fresh and functional. DIY floating shelves are an excellent way to enhance your bathroom’s style and storage without breaking the bank. With a bit of creativity and effort, you can transform your bathroom into a cozy retreat that reflects your personal taste.
If you’re a homeowner, renter, or anyone who wants to spruce up their space, this post is for you. Whether you adore rustic farmhouse styles or prefer sleek minimalist designs, these floating shelf ideas can cater to various tastes and needs. I’ve gathered 18 DIY floating shelves bathroom ideas that are stylish, affordable, and perfect for maximizing your space.
By the end of this guide, you’ll have plenty of inspiration and practical steps to create your own stunning floating shelves. From simple wooden planks to creative shelving concepts, you’ll find ideas that not only save space but also add character to your décor. Get ready to elevate your bathroom with these budget-friendly upgrades!
Key Takeaways
– Explore 18 creative DIY floating shelf ideas tailored for a bathroom setting, focusing on rustic and farmhouse styles.
– Learn how to use simple materials like wooden planks and repurposed items to create stylish and functional storage solutions.
– Discover ways to maximize vertical space through wall-mounted shelves, making even small bathrooms feel more spacious.
– Get practical tips on how to incorporate decorative brackets and themed designs for a personalized touch.
– Find inspiration for adding unique elements such as hooks, plants, and gallery displays to enhance your floating shelves.
Recommended Products

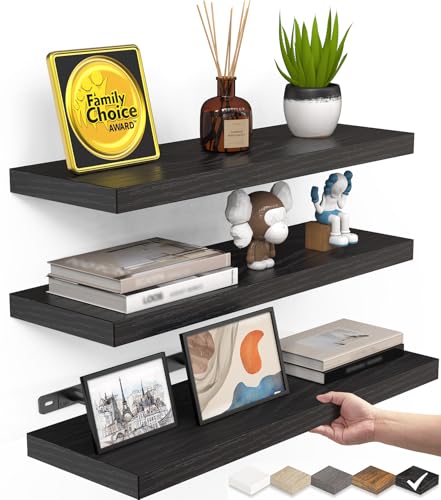
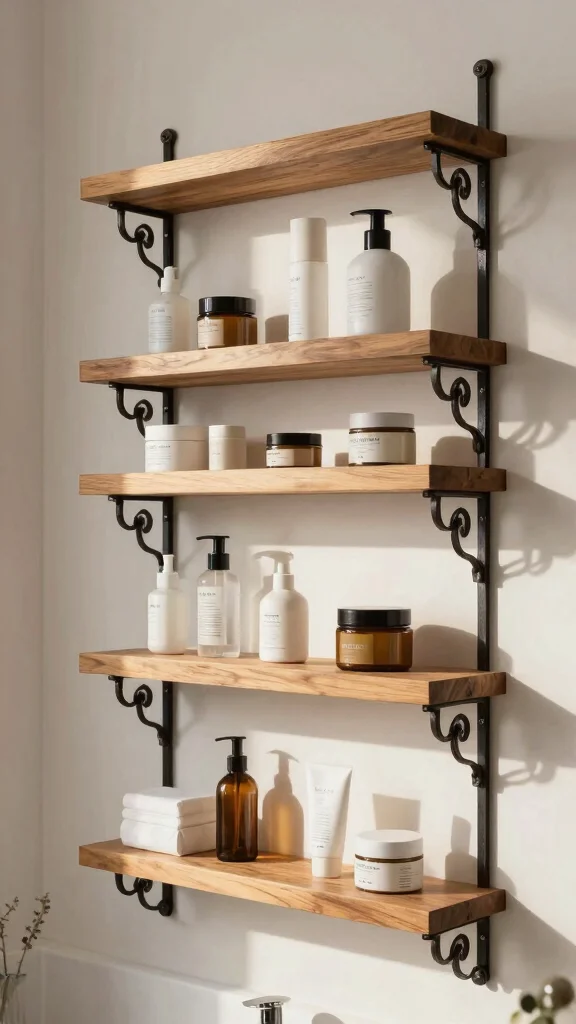
𝐄𝐱𝐩𝐚𝐧𝐝 𝐒𝐩𝐚𝐜𝐞 𝐚𝐧𝐝 𝐌𝐨𝐝𝐞𝐫𝐧 𝐃𝐞𝐬𝐢𝐠𝐧: With 𝐜𝐥𝐞𝐚𝐧 𝐥𝐢𝐧𝐞𝐬 𝐚𝐧𝐝 𝐚 𝐰𝐚𝐫𝐦 𝐟𝐢𝐧𝐢𝐬𝐡, these floating shelves expand wall space in dry bathroom zones. Effortlessly 𝐨𝐫𝐠𝐚𝐧𝐢𝐳𝐞 𝐭𝐨𝐰𝐞𝐥𝐬, 𝐭𝐨𝐢𝐥𝐞𝐭𝐫𝐢𝐞𝐬, 𝐚𝐧𝐝 𝐝𝐞𝐜𝐨𝐫 𝐰𝐢𝐭𝐡 𝐭𝐡𝐞 𝐢𝐧𝐯𝐢𝐬𝐢𝐛𝐥𝐞 𝐛𝐫𝐚𝐜𝐤𝐞𝐭 that creates 𝐚 𝐬𝐥𝐞𝐞𝐤, 𝐦𝐨𝐝𝐞𝐫𝐧 𝐝𝐢𝐬𝐩𝐥𝐚𝐲 𝐚𝐩𝐩𝐞𝐚𝐫𝐢𝐧𝐠 to float seamlessly on your wall
High Quality: Sized in 15.7"L x 7.9"W x 1.5"H. The 1.5" thick floating shelves for wall are fixed with Invisible and enhanced dual-pipe iron Brackets, stable with great load up to 22 lb per wall mounted shelf
[More Space For Your Home] – Don't worry about cluttered desktops and floors! Why not try using the walls? The smooth-surfaced metal invisible brackets and solid wood texture combination adds a natural and organized beauty to your home.
1. Simple Wooden Planks
Embrace the beauty of rustic charm by using simple wooden planks for floating shelves. This natural element creates a warm and inviting atmosphere, perfect for any bathroom. The versatility of wooden shelves allows you to customize their size and finish, making it easy to match your existing decor. You can enhance their appeal by using a rich wood stain or leaving them in their natural state for an organic feel.
To implement this idea, start by selecting wood that complements your bathroom’s color scheme. You might consider using reclaimed wood for added character and sustainability. With a little sanding and a protective coat to guard against moisture, these shelves can serve as a beautiful display for your favorite decor items like candles or plants.
Consider these practical tips to elevate your wooden shelves:
– Pair different wood finishes for depth and interest.
– Space shelves to accommodate taller decor pieces.
– Use matching brackets to create a unified look.
This natural texture enhances the overall design, bringing warmth and style to your bathroom.
Recommended Products

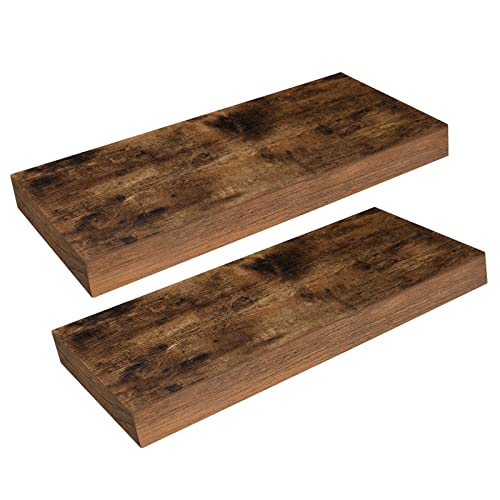
【Basic 3 Set Floating Wall Shelves】Just make your own storage space by using DOLLFIO 3 sets of wooden floating wall shelves! You can combine our floating wall shelves in any way you want. Our floating wall shelves are great for all-type rooms because they process a simple & simple design.

【100% Solid Wood Wall Shelf – Sturdy & Durable】 The wall shelf made of high-quality solid wood, it is eco-friendly and odorless. With a robust structure and strong load-bearing capacity, this floating shelves won’t deform easily even after long-term use, providing reliable support for your ornaments, green plants, daily necessities, and more. Enjoy long-lasting durability and peace of mind.

Centerpiece of Room Decoration – These shelves boast a distinctive design and an elegant shape, making them a focal point that elevates the style of any room. Ideal for the living room, bedroom, study, bathroom, laundry room, children's room, or office, they reflect the owner's sophisticated taste and blend seamlessly with various decor themes.
2. Rustic Ladders
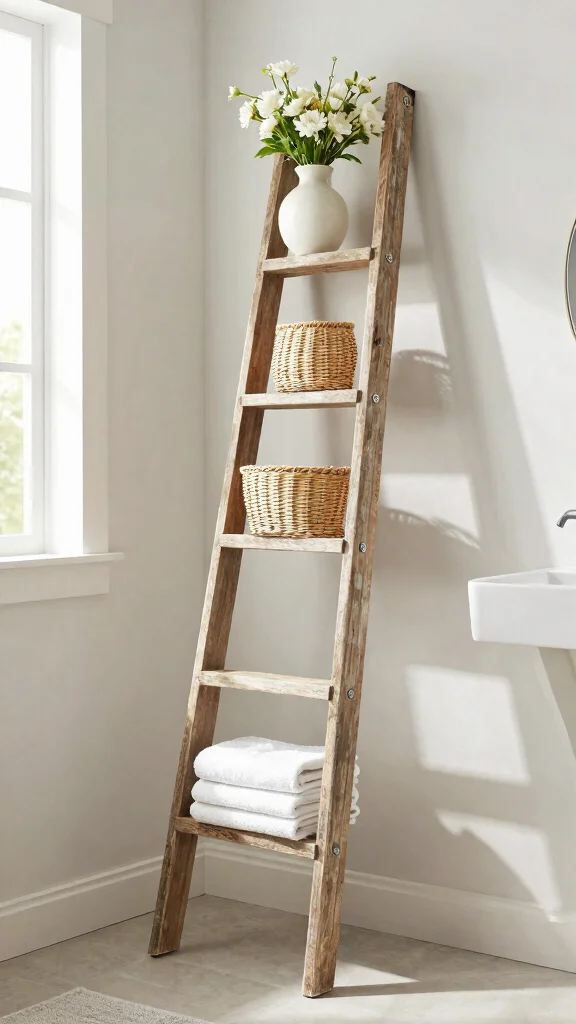
Transform a simple wooden ladder into a charming rustic shelving unit by leaning it against your bathroom wall. This design not only serves as a unique storage solution but also adds height and visual intrigue to your space. You can leave the ladder in its natural finish for an authentic rustic appeal or paint it to fit your desired aesthetic.
To maximize this idea, utilize the ladder’s rungs for smaller items and reserve the top for decorative displays. This open design allows you to easily swap out decor based on seasons, from fresh flowers in spring to cozy throws in winter.
Here are some suggestions to make the most of your rustic ladder:
– Secure it to the wall for added safety.
– Incorporate stylish baskets for extra storage.
– Add fairy lights to create a whimsical ambiance.
This innovative approach not only elevates your storage but also enhances the overall charm of your bathroom.
Recommended Products

✓ HEAVY DUTY CONSTRUCTION: Made from premium quality metal with reinforced design, each 6 inch shelf bracket supports up to 150 lbs, providing reliable strength for your floating shelves, kitchen shelves, bathroom storage, and home organization needs


Well-designed Floating Shelves: Our white floating shelves for wall are made of MDF Laminate. These wall shelves can organize daily sundries to tidy your space, display your art pieces on the wall to decorate your home, and make it full of aesthetic flare.
3. Industrial Pipe Shelves
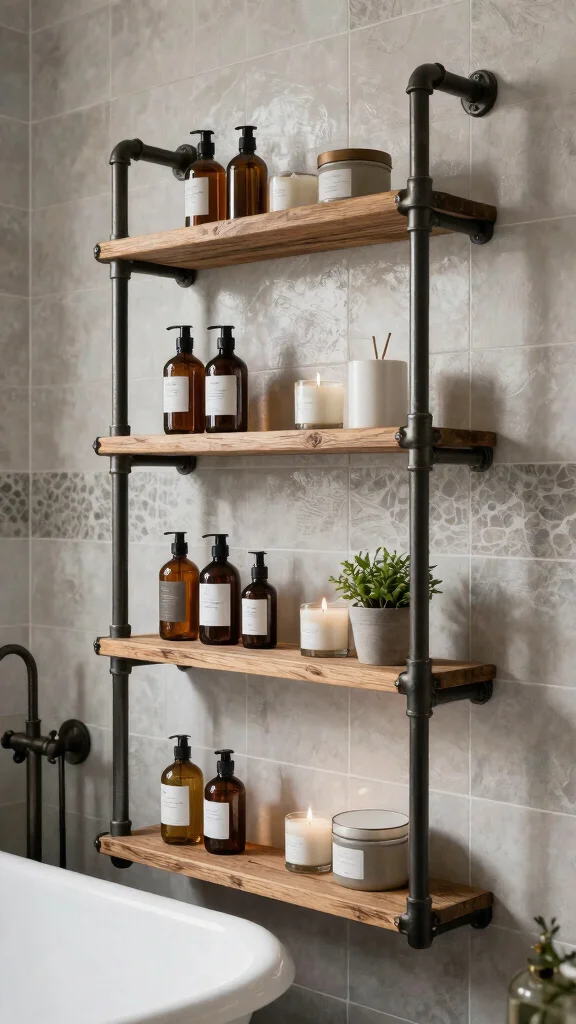
For a bold design choice, consider industrial pipe shelves that combine rustic charm with modern flair. The use of pipes as brackets provides a sturdy framework for your wooden shelves, making them both functional and stylish. This look is particularly appealing in bathrooms featuring mixed materials like brick or tile, offering a striking contrast.
Assembling these shelves is straightforward, and you can easily find materials at your local hardware store. Choose a wood finish that complements the pipe color, ensuring a cohesive appearance while showcasing your bathroom essentials like toiletries and scents.
Here are some tips to enhance your industrial shelves:
– Use varying shelf heights for visual interest.
– Paint the pipes for a pop of color.
– Ensure everything is securely fastened for safety.
This design not only provides practicality but also enriches your space with an edgy yet cozy vibe.
Fun fact: DIY floating shelves bathroom upgrades with industrial pipe shelves can be done in under 2 hours, boosting storage by 30% and giving your space bold, rustic charm. Pro tip: pair pipes with warm wood for a standout, budget-friendly look.
Recommended Products

Patent Design: Create a farmhouse oasis in your bathroom with decor sets! Includes 2 floating shelves, 1 basket, and 1 decorative sign


𝐌𝐨𝐝𝐞𝐫𝐧 & 𝐌𝐢𝐧𝐢𝐦𝐚𝐥𝐢𝐬𝐭 𝐒𝐭𝐲𝐥𝐞 – Featuring clean lines and a rustic finish, these wall-mounted shelves 𝐚𝐝𝐝 𝐚 𝐦𝐨𝐝𝐞𝐫𝐧 𝐭𝐨𝐮𝐜𝐡 to any room, suitable 𝐟𝐨𝐫 𝐛𝐚𝐭𝐡𝐫𝐨𝐨𝐦, 𝐛𝐞𝐝𝐫𝐨𝐨𝐦, 𝐥𝐢𝐯𝐢𝐧𝐠 𝐫𝐨𝐨𝐦, 𝐤𝐢𝐭𝐜𝐡𝐞𝐧, 𝐎𝐟𝐟𝐢𝐜𝐞, 𝐋𝐚𝐮𝐧𝐝𝐫𝐲 𝐑𝐨𝐨𝐦, 𝐚𝐧𝐝 𝐛𝐨𝐨𝐤 𝐝𝐢𝐬𝐩𝐥𝐚𝐲
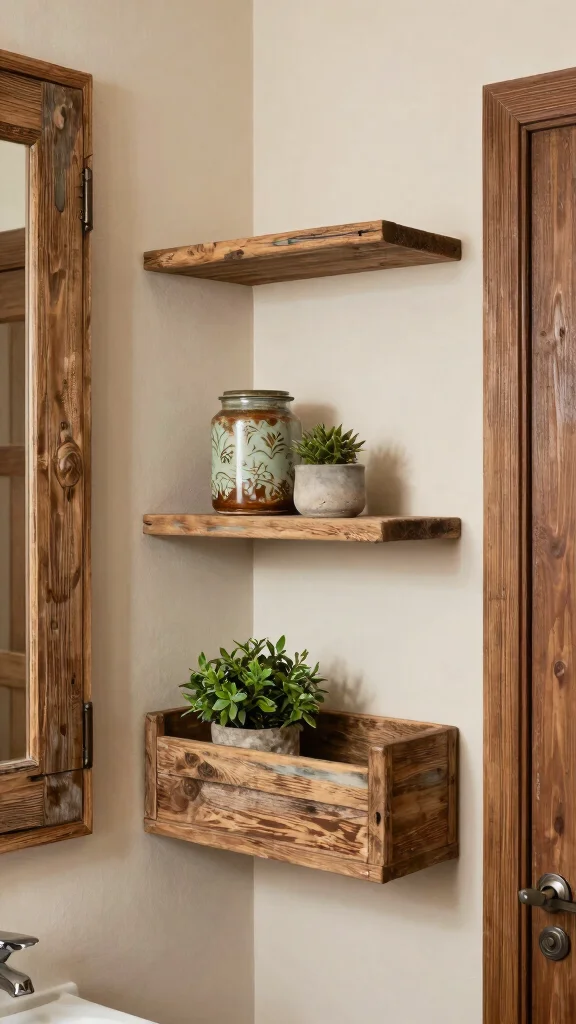
4. Corner Shelves
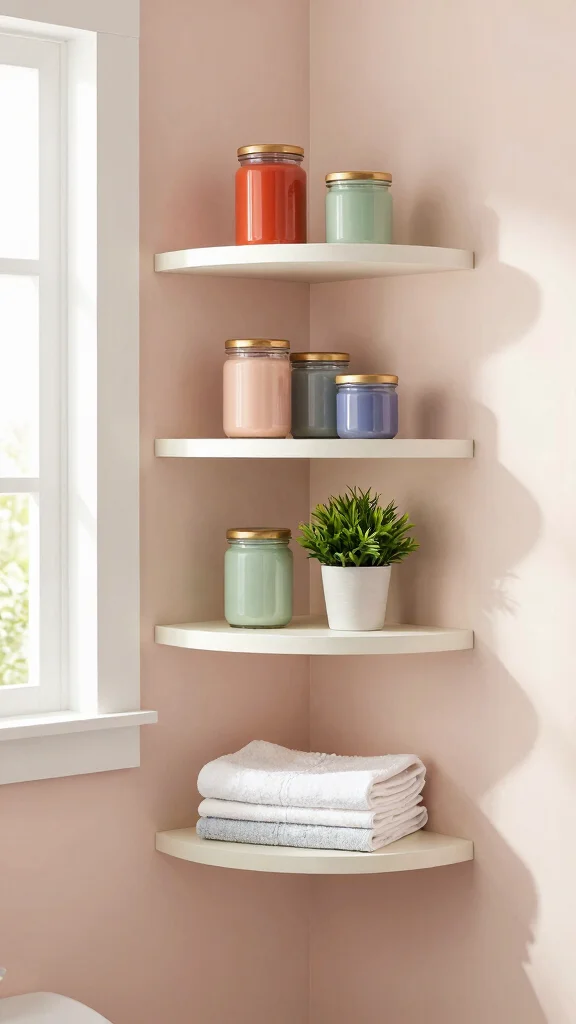
Maximize every inch of your bathroom with cleverly designed corner shelves! These floating shelves fit snugly into unused corners, providing ample storage without sacrificing style. You can create them using triangular boards, painted to match your decor, making them especially useful in smaller spaces.
Utilize these shelves for storing folded linens, decorative jars filled with bath salts, or even vibrant plants. By drawing the eye upward, corner shelves not only enhance storage but also add depth to your bathroom’s design.
Consider these ideas to make the most of corner shelves:
– Vary shelf heights for added interest.
– Incorporate glass or metal accents for a modern touch.
– Use colorful items to brighten your space.
This approach brings organization and aesthetic appeal, transforming corners into beautiful focal points.
Corner shelves turn tight bathrooms into smart storage spots. DIY floating shelves bathroom upgrades use triangular boards painted to match your decor, stacking linens, jars, and plants without crowding. Small spaces feel bigger when the eye lifts upward.
Recommended Products

【Basic 3 Set Floating Wall Shelves】Just make your own storage space by using DOLLFIO 3 sets of wooden floating wall shelves! You can combine our floating wall shelves in any way you want. Our floating wall shelves are great for all-type rooms because they process a simple & simple design.

Floating Shelves for Wall Storage Set of 6 – The size of the WOPITUES floating shelves for wall is 16.5*6*0.6 inches. WOPITUES Floating Wall Shelves for Bathroom/Bedroom Set of 6 could give you extra storage space in the bathroom, bedroom, guest bathroom, kitchen, and living room. You can install our floating shelves for wall anywhere you like. Let’s make life simpler.

Ceiling-Mounted Carbon Steel Shelf Bracket – Crafted from durable carbon steel with a sleek black powder-coated finish, this ceiling mount shelf bracket is designed for modern and industrial-style interiors while ensuring rust resistance and long-lasting performance.
Difficulty Rating & Requirements
Overall Difficulty Rating: Medium
Creating DIY floating shelves for your bathroom is a medium-level project. While the basic concept is straightforward, some techniques can be more challenging. This project is suitable for those who have some experience with basic tools and home improvement tasks. If you’re comfortable following instructions and enjoy hands-on projects, you’ll find it rewarding.
Time Estimate:
⏱ Estimated time: 3-5 hours
The time you’ll need depends on the complexity of your design and how many shelves you plan to install. Here’s a rough breakdown:
– Planning and measuring: 1 hour
– Cutting and preparing materials: 1-2 hours
– Installation: 1-2 hours
This allows for minor adjustments during the installation phase as you position your shelves.
Skill Requirements:
– Required skills: Basic woodworking, use of a drill, level usage, and measuring
– Beginner-friendly: Yes! This project is beginner-friendly if you’re willing to learn basic skills.
Most skills required can be learned quickly. For example, using a level to ensure even shelves is simple with practice. However, if you venture into more complex designs, like industrial pipe shelves, some experience would be beneficial.
Tools & Materials Needed:
🧰 Essential items checklist:
– Wood planks (required): Choose sturdy wood, such as pine or oak.
– Drill and drill bits (required): For making holes for mounting.
– Screwdriver (required): Necessary to secure the shelves.
– Level (required): Ensures your shelves are straight.
– Brackets (required): Depending on the design, you may need brackets for support.
– Sandpaper (optional): For smoothing edges before painting or staining.
– Paint or stain (optional): Adds a personal touch and protects the wood.
– Measuring tape (required): Critical for accurate measurements.
Step-by-Step Overview:
1. Planning and Measure: Spend about 1 hour deciding where to place your shelves. Measure the space and decide how many shelves you’ll need. Make sure to account for items you plan to store on them.
2. Cutting and Preparing Materials: Dedicate 1-2 hours to cut your wood to the desired lengths. Sand down edges for a clean finish. If you choose to paint or stain, allow extra time for drying.
3. Installation: Allocate 1-2 hours for this phase. Mark your wall where the shelves will go, drill holes, and secure your brackets. Use a level to double-check that everything is straight before securing the shelves onto the brackets.
4. Final Touches: Once installed, step back and admire your work. This is also the time to arrange your bathroom items on the shelves.
Cost Comparison:
Professional vs DIY: Hiring a professional can cost anywhere from $300 to $600 depending on the complexity and material choice. In contrast, building your own DIY floating shelves can cost around $50 to $150, depending on the materials you choose. If you’re looking to save money and enjoy a hands-on project, DIY is a great option. Just be honest with yourself about your skill level and whether you might need help if things get tricky.
Recommended Products
𝐌𝐨𝐝𝐞𝐫𝐧 & 𝐕𝐞𝐫𝐬𝐚𝐭𝐢𝐥𝐞 𝐒𝐭𝐲𝐥𝐞: The 𝐡𝐢𝐝𝐝𝐞𝐧 𝐛𝐫𝐚𝐜𝐤𝐞𝐭 𝐝𝐞𝐬𝐢𝐠𝐧 𝐠𝐢𝐯𝐞𝐬 𝐚 𝐜𝐥𝐞𝐚𝐧, 𝐟𝐥𝐨𝐚𝐭𝐢𝐧𝐠 𝐥𝐨𝐨𝐤 that works beautifully in modern, farmhouse, or classic decor styles, 𝐚𝐝𝐝𝐢𝐧𝐠 𝐰𝐚𝐫𝐦𝐭𝐡 𝐚𝐧𝐝 𝐬𝐭𝐲𝐥𝐞 without overwhelming your space, 𝐟𝐫𝐨𝐦 𝐭𝐨𝐢𝐥𝐞𝐭, 𝐨𝐟𝐟𝐢𝐜𝐞, 𝐥𝐚𝐮𝐧𝐝𝐫𝐲 𝐫𝐨𝐨𝐦, 𝐜𝐥𝐨𝐬𝐞𝐭, 𝐠𝐚𝐫𝐚𝐠𝐞, 𝐧𝐮𝐫𝐬𝐞𝐫𝐲, 𝐚𝐩𝐚𝐫𝐭𝐦𝐞𝐧𝐭, 𝐝𝐨𝐫𝐦, 𝐩𝐥𝐚𝐲𝐫𝐨𝐨𝐦, 𝐞𝐧𝐭𝐫𝐲𝐰𝐚𝐲, 𝐡𝐚𝐥𝐥𝐰𝐚𝐲, 𝐛𝐚𝐬𝐞𝐦𝐞𝐧𝐭, 𝐬𝐮𝐧𝐫𝐨𝐨𝐦 𝐭𝐨 𝐜𝐨𝐧𝐭𝐞𝐦𝐩𝐨𝐫𝐚𝐫𝐲 𝐥𝐢𝐯𝐢𝐧𝐠 𝐬𝐩𝐚𝐜𝐞𝐬


Sleek Floating Design: Elevate your style with AMADA’s floating shelves, ideal for living rooms, bedrooms, or office spaces. Designed with modern, minimalist sophistication, the concealed brackets of our wall shelves help to maximize wall space for a seamless, streamlined look.
5. Decorative Brackets
Elevate your DIY floating shelves with decorative brackets that add personality and style. Available in a myriad of designs, from ornate to minimalist, these brackets allow you to customize your shelves to fit your bathroom’s aesthetic. When you stain or paint your shelves to match the brackets, you create a cohesive and polished look.
These stylish brackets not only support your shelves but also serve as eye-catching features. You can display everything from skincare products to decorative baskets, enhancing both functionality and charm in your space.
Here are some tips for using decorative brackets effectively:
– Choose contrasting colors for a bold statement.
– Ensure proper installation for safety.
– Showcase seasonal decor by rotating items regularly.
This design choice beautifully marries practicality with artistic flair, enhancing the overall bathroom experience.
Recommended Products

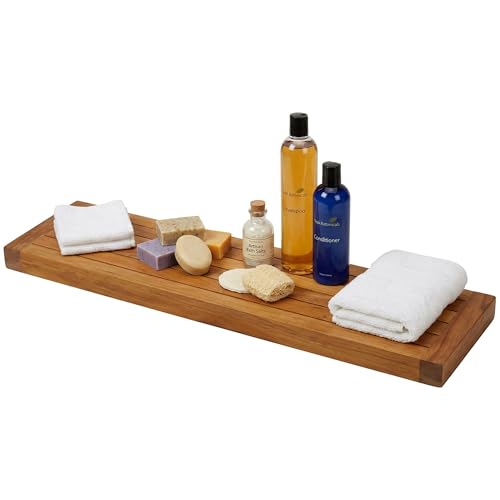
Rustic slatted design is made from solid acacia wood

【Complete 24-Inch Bathroom Vanity with Sink – Space-Saving Solution】:This 24 inch vanity with sink combines a ceramic-top basin and freestanding cabinet in one sleek unit, perfect for small baths or guest rooms The compact 24 bathroom vanity with sink design maximizes storage without sacrificing style, offering a functional upgrade for tight spaces
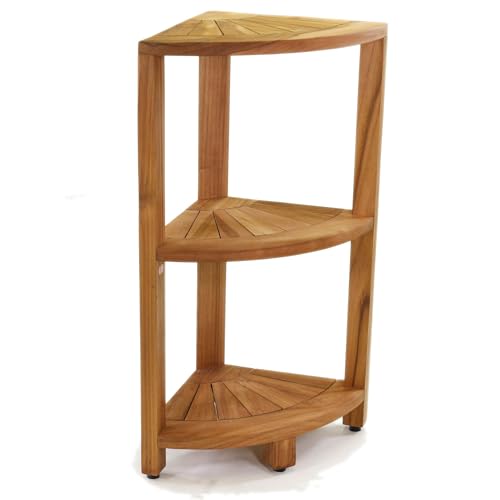
Compact & Convenient Dimensions: Maximize your space with this compact 27" high, 12" wide & 12" deep teak corner stand, designed to fit seamlessly into your shower or bathroom corner. Its thoughtful dimensions make it the prime solution for tight spaces, providing bathroom storage without overwhelming the room. Ideal for any bathroom organizer needs!
6. Floating Vanity Shelves

Integrate floating shelves into your vanity for a sleek, modern upgrade that keeps your bathroom organized. This seamless design frees up counter space and provides a perfect spot for daily essentials like toothbrushes and skincare products. Select shelves that coordinate with your vanity for a polished appearance, and consider adding storage bins for a tidy look.
This arrangement not only promotes organization but also allows you to showcase your favorite decor pieces, reflecting your personal style. By keeping the area above your vanity free of clutter, you create an inviting atmosphere.
Here are some ideas to enhance your floating vanity shelves:
– Install under-shelf lighting for a bright ambiance.
– Choose clear bins for a streamlined appearance.
– Use decorative trays to keep items organized.
This thoughtful setup transforms your vanity into both a functional and stylish centerpiece.
Recommended Products

INCLUDES – 2 display ledges, 8 medium strips; 1 display ledge holds 2 lbs

[2 Tier Floating Shelves for Wall]: Decorative wall shelves are designed to save space and don't take up much space when mounted on the wall, ledges provide more storage space for additional items or decorations, and modern style ledges easily blend into any room decoration scene to make your pieces more chic and eye-catching
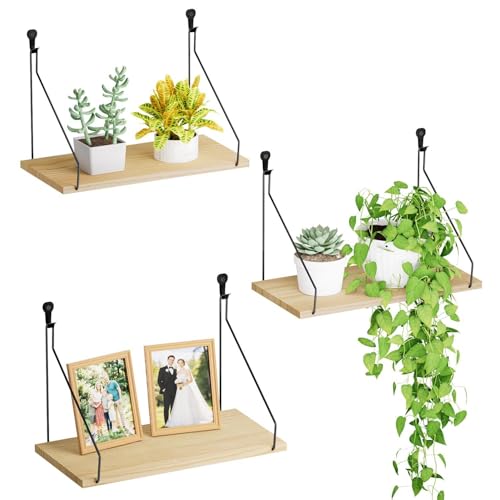
【Two Mounting Options – 7 lbs & 15 lbs Capacity】 Comes with two sets of hooks: cute plant-pattern adhesive hooks (hold up to 7 lbs) for smooth walls, and sturdy heart-shaped metal hooks (hold up to 15 lbs) for wood, brick, or concrete. Choose between no-drill or nail installation to suit your space.
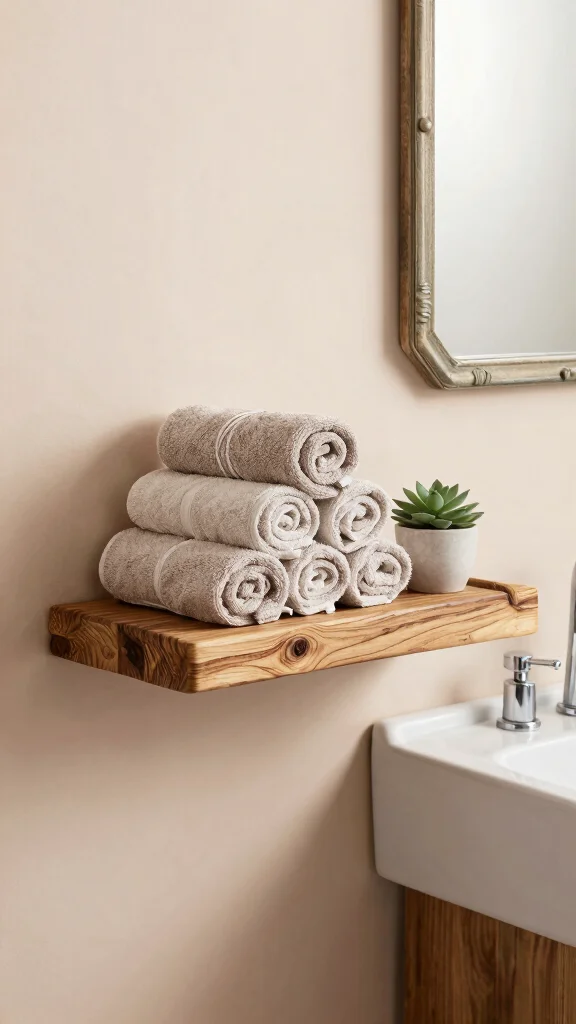
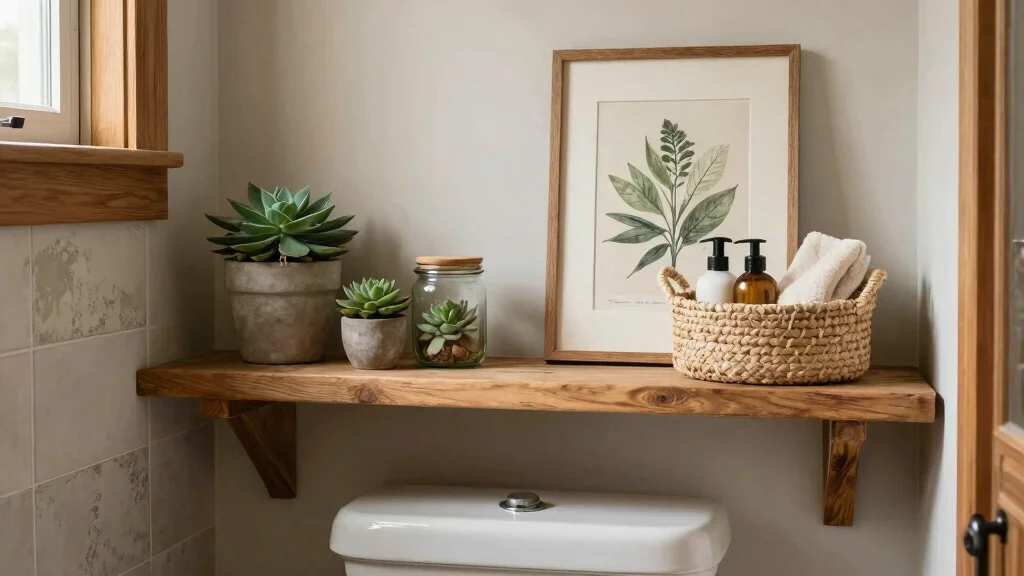
7. Farmhouse Style with Jute Rope
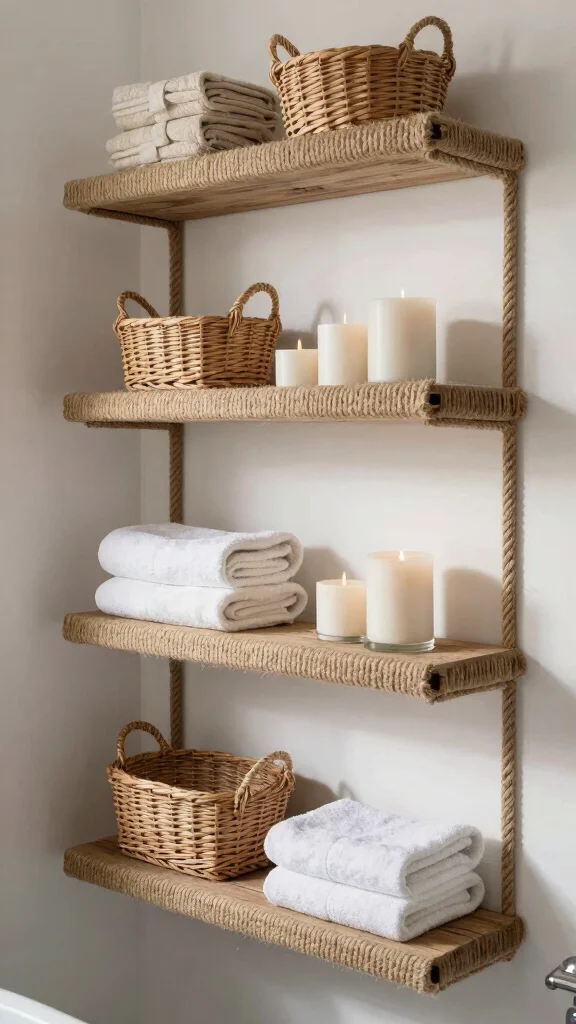
Introduce a charming farmhouse vibe by incorporating jute rope into your floating shelves. This soft, natural material can be used as a decorative edge along the shelves or as accents for hanging towels. Wrapping the edges with jute adds texture and warmth, creating a unique design that pairs beautifully with wood.
These shelves can display small baskets filled with bath essentials or decorative items like candles, enhancing your rustic aesthetic. The natural fibers of jute bring a cozy touch to your bathroom decor.
Consider these tips for incorporating jute rope:
– Ensure the jute is securely attached for durability.
– Stick to neutral tones for a cohesive look.
– Rotate baskets seasonally for added variety.
This design element not only enhances your floating shelves but also contributes to a warm and inviting atmosphere.
8. Gallery Shelf Concept
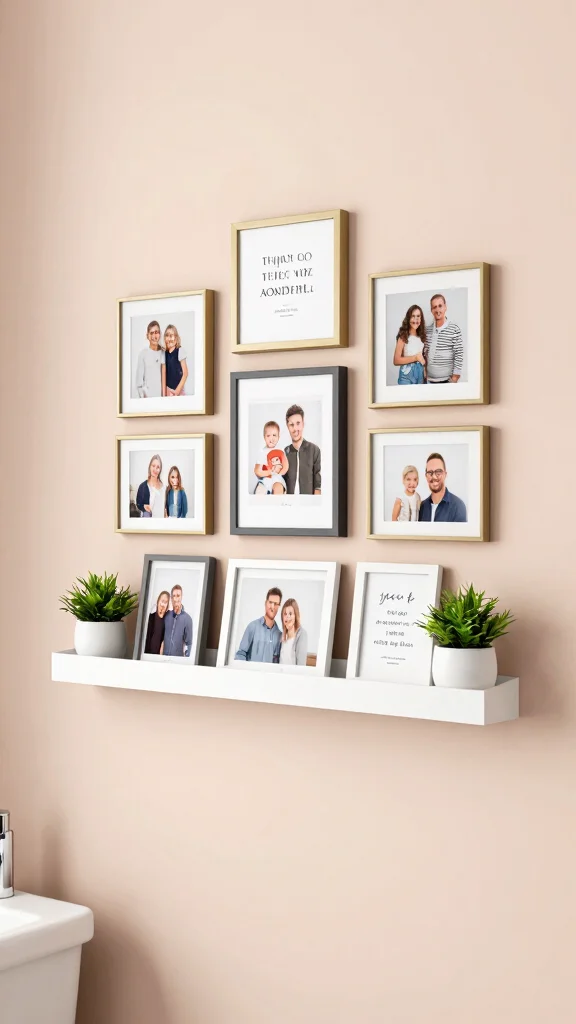
Transform your bathroom into a personal gallery with a floating shelf that showcases art and cherished items. This creative approach allows you to display framed pictures, inspiring quotes, or small art pieces that reflect your personality. Choosing a shelf width that balances stability with space for decor will enhance the overall look.
Mixing frames and coordinating colors creates a cohesive visual story, turning your bathroom into a unique expression of you and your family. Just ensure that the decor items are suitable for a bathroom environment.
Here are some suggestions to make your gallery shelf pop:
– Use lightweight frames to avoid any weight issues.
– Incorporate plants for a touch of nature.
– Rotate art pieces based on seasons or moods.
This gallery concept adds a personal touch to your bathroom while celebrating your favorite memories.
You might also like

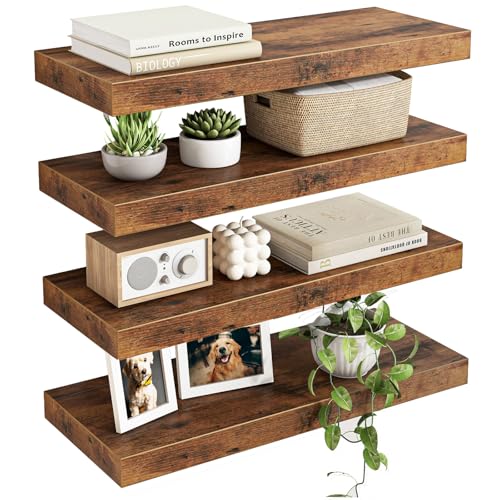
9. Tiered Shelves
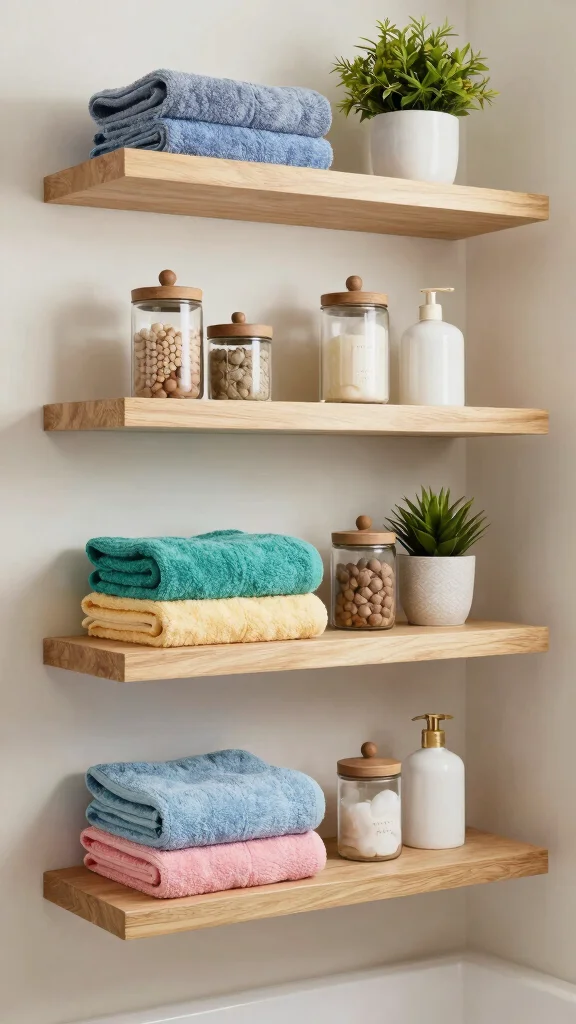
Tiered floating shelves provide a creative solution to add depth and interest to your bathroom. By stacking multiple shelves at varying heights, you create an eye-catching feature that enhances functionality while showcasing decor. Use smaller shelves at the top for lighter items and larger ones below for towels or storage baskets.
This setup not only improves organization but also allows you to display your favorite items in an engaging way. Choose finishes that complement your bathroom’s existing elements for a cohesive look.
Consider these tips for tiered shelves:
– Keep lighter items on higher shelves for safety.
– Use a consistent color palette for a unified appearance.
– Integrate small bins for easy access and organization.
This dynamic design adds visual appeal and practicality to your bathroom.
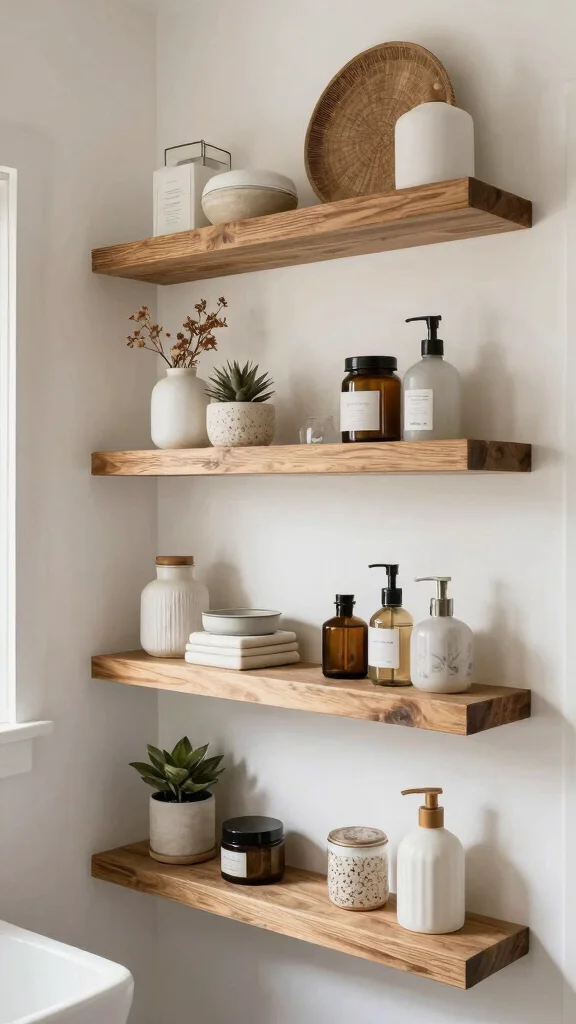
10. Minimalist Floating Shelves
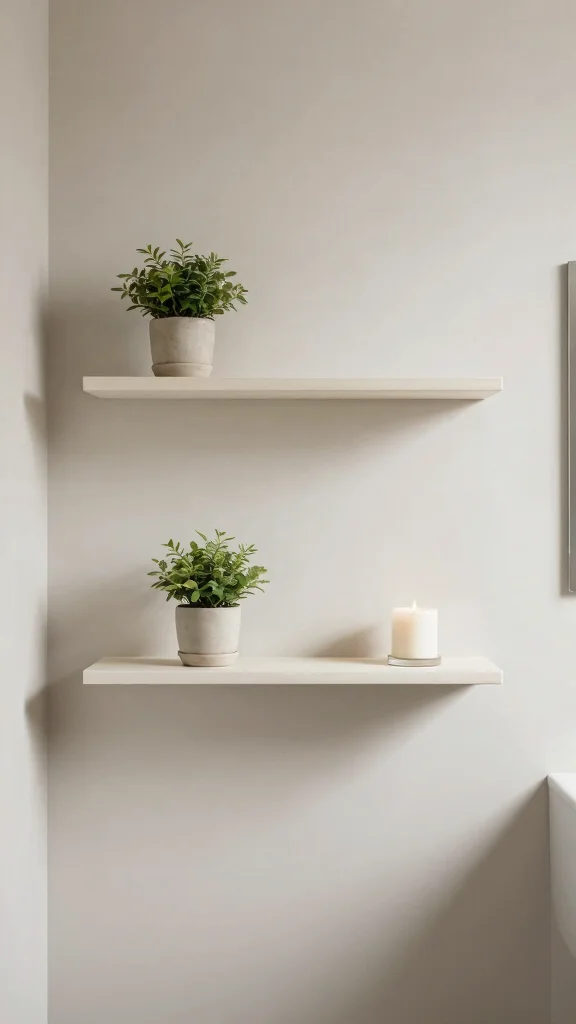
For a clean, modern aesthetic, minimalist floating shelves are perfect for small bathrooms. Their simple design allows your decor to shine without overwhelming the space. Opt for sleek, white, or natural wood shelves that seamlessly blend into your bathroom walls.
These shelves can hold essential items neatly or serve as a platform for decorative pieces like candles and small plants, adding a breath of fresh air. This minimalist approach promotes a clutter-free environment that feels spacious and inviting.
Here are some ideas to maintain a minimalist look:
– Keep decor minimal to match the shelf style.
– Use open storage solutions to avoid overcrowding.
– Select complementary colors for a polished finish.
This style enhances the overall aesthetic while keeping your bathroom organized.
Recommended Products
Compact & Convenient Dimensions: Maximize your space with this compact 1.5" high, 36" wide & 9" deep wooden shelf, designed to fit seamlessly into your shower or bathroom corner. Its thoughtful dimensions make it the prime solution for tight spaces, providing bathroom storage without overwhelming the room. Ideal for any bathroom organizer needs!

Solve Your Storage Challenges: Struggling with cluttered spaces or limited storage? This corner shelf stand provides an organized solution for bathrooms, kitchens, and living rooms, keeping essentials within reach and eliminating the hassle of crowded countertops

Solve Your Storage Challenges: Struggling with cluttered spaces or limited storage? This corner shelf stand provides an organized solution, perfect for bathrooms, kitchens, and living rooms, keeping essentials within reach and eliminating the hassle of crowded countertops.
11. Upcycled Materials
Get creative with upcycled materials to craft unique floating shelves that tell a story. Old crates, windows, or wooden pallets can be transformed into stunning, eco-friendly shelves for your bathroom. By repurposing materials, you not only save money but also infuse character into your decor.
For example, an old wooden door can be cut down to create rustic shelves, enhancing your bathroom’s farmhouse vibe. Always ensure the materials you choose are sturdy enough for practical use.
Here are some tips for working with upcycled materials:
– Sand down rough edges for safety.
– Apply a sealant to protect against moisture.
– Embrace imperfections for a charming, rustic look.
This creative approach not only showcases your style but also promotes sustainability in your space.
12. Floating Shelves with Hooks
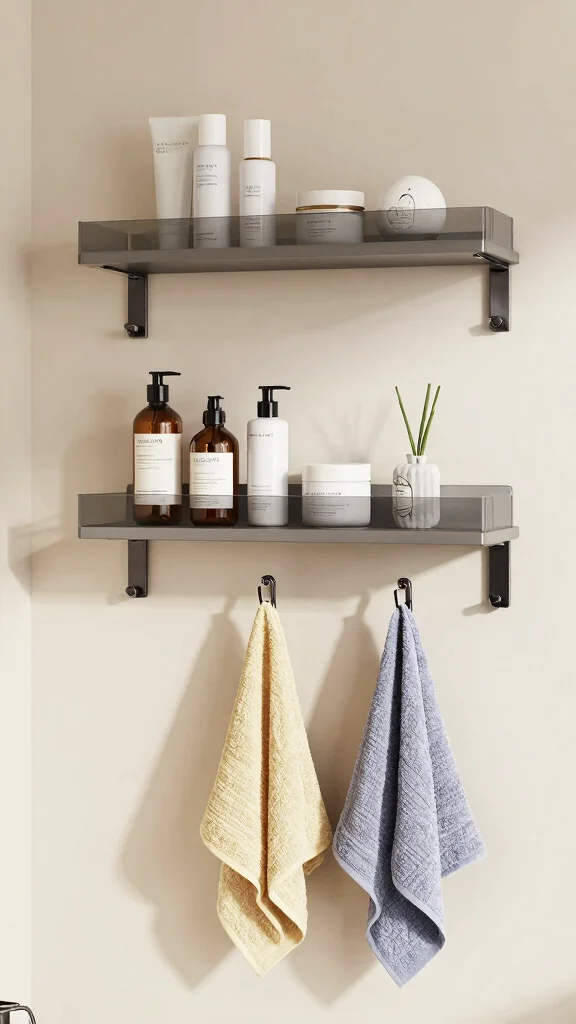
Combine functionality and style by incorporating floating shelves with hooks in your bathroom. These shelves provide a place for essentials while offering hooks below for towels or accessories, making them ideal for smaller spaces.
Select hooks that match the aesthetic of your shelves, whether rustic, modern, or vintage. This design keeps your items organized while adding visual interest to your bathroom.
Consider these ideas for maximizing your shelf with hooks:
– Use heavy-duty hooks to ensure durability.
– Arrange items by category for easy access.
– Keep the shelf above clutter-free for a clean appearance.
This clever solution balances practicality with elegance, enhancing your bathroom’s overall look.
Fun fact: in a compact bathroom, diy floating shelves bathroom with hooks can boost usable wall space by up to 40%. Pair rustic hooks with the shelves and you’ll have towels, robes, and essentials neatly within reach, without sacrificing style.
13. Painted Shelves
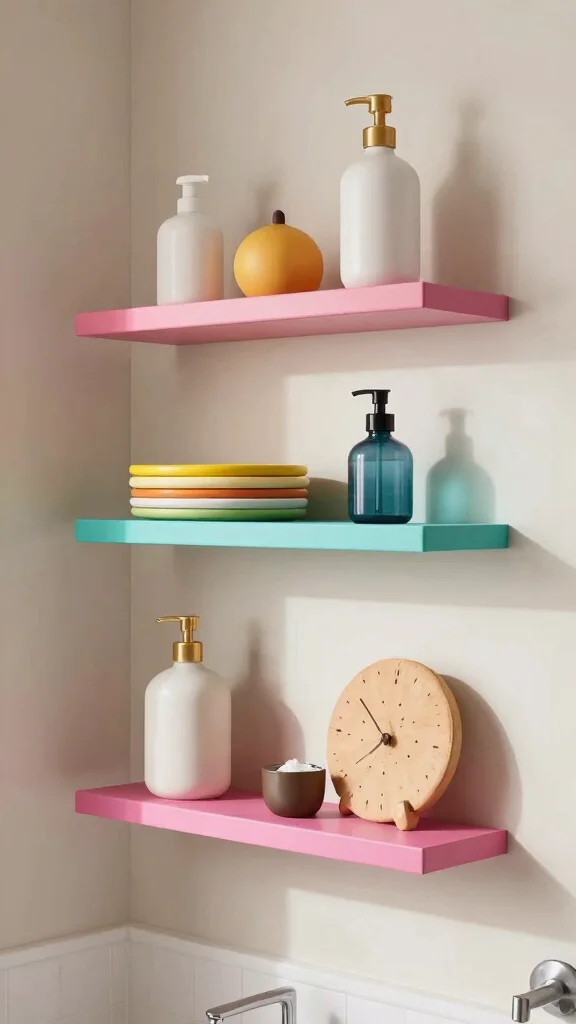
Brighten your bathroom with painted floating shelves that showcase your personality. This DIY idea allows you to select colors that uplift your space, whether vibrant or soothing. Painted shelves can energize the room or create a calming atmosphere, depending on your choices.
As trends evolve, you can easily refresh the color of your shelves, keeping your decor feeling current. Using semi-gloss or satin finishes helps withstand moisture, ensuring longevity.
Here are some tips for achieving a polished paint job:
– Use painter’s tape for clean edges.
– Seal with a protective coat for added durability.
– Coordinate shelf colors with bathroom accessories for a harmonious look.
This colorful enhancement adds a playful touch to your bathroom decor.
14. Shower Shelves
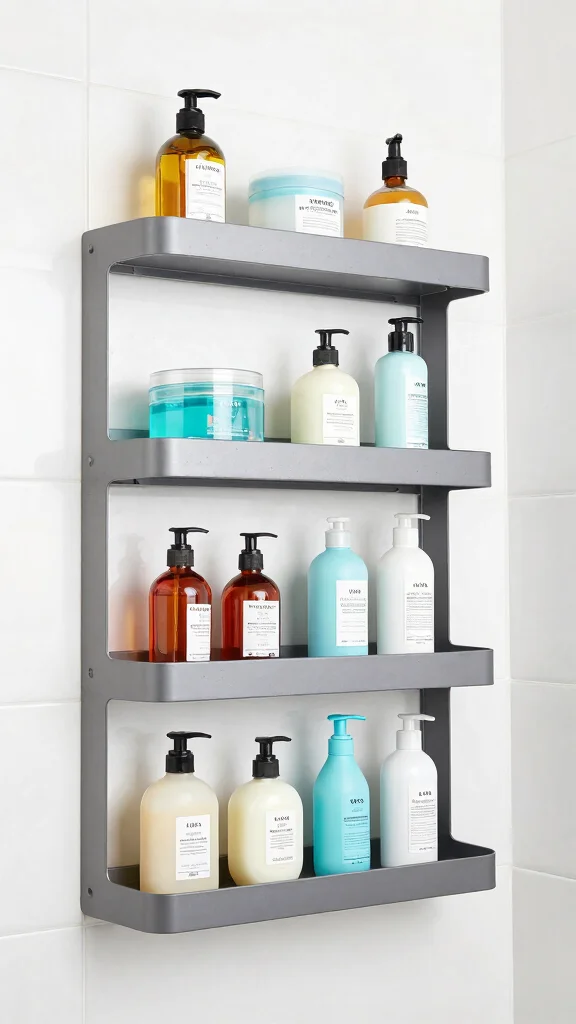
Revolutionize your shower area by installing floating shelves specifically designed for bath products. Using waterproof materials ensures durability in the steamy environment, keeping your essentials organized and within easy reach.
These shelves can hold shampoos, conditioners, and other bath necessities while providing a clean and modern look. Choose a minimalist design to maintain an uncluttered appearance or opt for bold colors to contrast with your tiles.
Here are some suggestions for your shower shelves:
– Use transparent materials for a sleek look.
– Arrange items by frequency of use for convenience.
– Consider suction shelves for a non-permanent solution.
This practical upgrade enhances your shower experience while maximizing space.
You Might Also Like
15. Tiered Plant Shelves
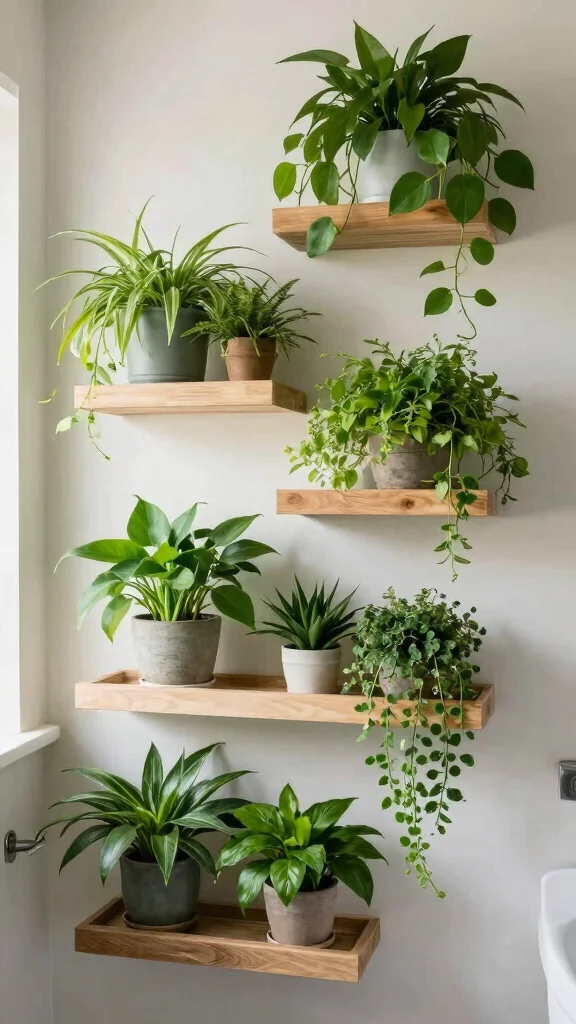
For plant enthusiasts, tiered floating shelves provide an excellent opportunity to showcase a variety of greenery in your bathroom. This not only adds vibrant life to your space but also improves air quality, creating a refreshing atmosphere.
Choose plants that thrive in humidity, like ferns or succulents, and arrange them at different heights for visual interest. Use pots that complement your decor, and consider adding decorative trays or stones to enhance the display.
Here are some tips for creating a beautiful plant shelf:
– Ensure adequate drainage for plant pots.
– Position shelves where they receive enough light.
– Swap out plants seasonally for a fresh look.
This organic touch brings nature indoors, enriching your bathroom’s aesthetic.
16. Glass Shelves
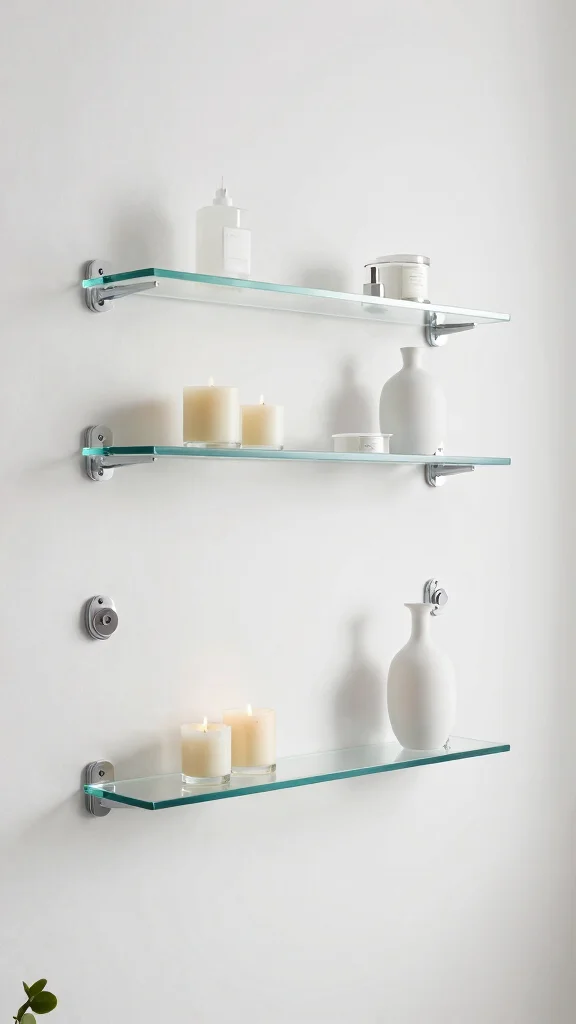
For a chic and modern look, glass floating shelves offer a sleek alternative that enhances your bathroom’s openness. They allow your decor to shine through, ensuring that the focus remains on your beautiful items without distraction.
These shelves complement brighter colors or patterned tiles, adding a touch of elegance without overpowering the design. Glass shelves are perfect for displaying curated decor, lovely product bottles, or simple candles, creating a sophisticated ambiance.
Consider these tips for glass shelves:
– Install with sturdy brackets for safety.
– Clean regularly to maintain clarity.
– Pair with minimalistic items for a stylish touch.
This modern choice elevates your bathroom’s overall aesthetic, offering both beauty and functionality.
17. Personal Touches
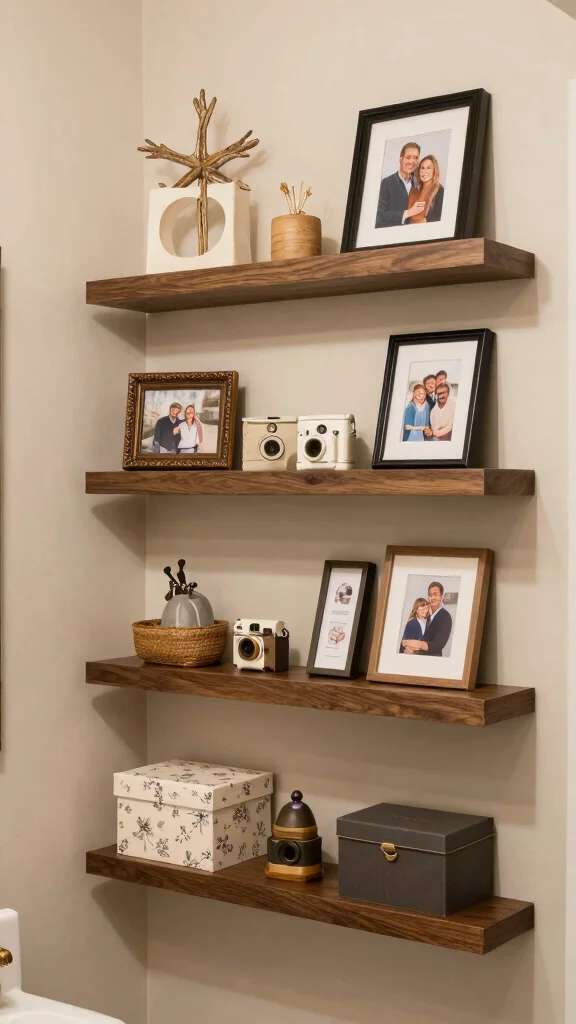
Incorporate personal items into your floating shelves to make your bathroom feel uniquely yours. Family photos, travel souvenirs, or favorite books can add character and warmth, transforming your space into a personal retreat.
Mixing personal touches with practical storage creates a beautiful balance that is both visually appealing and functional. Just ensure that your items are thoughtfully placed to avoid clutter.
Here are some tips for adding personal touches:
– Frame photos in coordinating colors for a cohesive look.
– Rotate items regularly to keep the decor fresh.
– Use decorative boxes to discreetly store small items.
This thoughtful arrangement enriches your bathroom, making it a true reflection of your personality.
18. Theme-Based Shelves

Consider crafting theme-based floating shelves that reflect your favorite aesthetic or concept. Whether it’s a beach theme complete with seashells, a spa theme with calming scents, or a botanical theme filled with lush greenery, themed shelves can make a bold statement.
Select decor items that align with your chosen theme, ensuring a cohesive and inviting display. This approach not only provides storage but also serves as a stunning focal point that enhances the overall ambiance of your bathroom.
Here are some ideas for theme-based shelves:
– Change themes seasonally for added variety.
– Incorporate DIY elements for a personal touch.
– Use colors and textures that complement your bathroom’s decor.
This creative design choice infuses your space with personality while also providing practical functionality.
Conclusion
DIY floating shelves can completely transform the look and functionality of your bathroom, offering both style and practical storage solutions.
With these 18 rustic farmhouse ideas, you can create a space that reflects your personality and meets your needs without spending a fortune.
Experiment with different materials, designs, and decor items to make your bathroom your favorite part of your home!
Frequently Asked Questions
What are the essential materials and tools I need to start a budget-friendly DIY floating shelves bathroom project?
For a rustic, budget-friendly DIY floating shelves bathroom, gather simple materials like reclaimed wood or knotty pine for the shelves and sturdy hidden cleat brackets or metal wall brackets. You’ll also need a stud finder, level, drill, screws, wall anchors, sandpaper, and a moisture-resistant finish such as water-based polyurethane or wipe-on poly.
Plan by measuring the space, locating studs, and choosing a finish that fits your budget home decor. With proper sealing, your DIY floating shelves bathroom will be durable and stylish without breaking the bank.
How can I maximize bathroom storage with wall-mounted shelves in a small bathroom without creating clutter?
Choose slim, shallow shelves and mount them high to free floor space. Use vertical stacking and align shelves in corners or above the vanity to create smart bathroom storage solutions for small bathroom ideas. Keep items in coordinated baskets or bins and limit decor to a few pieces to maintain a calm, cohesive look.
Stick to light finishes or muted tones to keep the space feeling open and integrate seamlessly with your budget home decor and rustic floating shelves style.
What are some beginner-friendly rustic farmhouse DIY floating shelf ideas for a bathroom?
Kick off with easy concepts like: 1) Reclaimed wood planks with black metal brackets for classic farmhouse charm; 2) Whitewashed pine shelves using concealed cleats for a bright, airy vibe; 3) Live-edge wood shelves paired with dark pipe brackets for rugged character. All are achievable on a budget and ideal for rustic floating shelves in a bathroom.
These ideas mix texture and simplicity, giving you small bathroom ideas that feel high-end without a high price tag.
How do I install DIY floating shelves bathroom safely in a damp bathroom to prevent warping or mold?
Start by locating studs and securing shelves with solid cleats into studs, not just drywall. Use moisture-resistant finishes on all sides and seal cuts to guard against water exposure. Position shelves away from direct spray zones and ensure a small gap from the shower to promote airflow.
Regularly wipe away condensation and inspect screws and brackets for tightness. This careful install supports durable bathroom storage solutions and keeps your rustic floating shelves looking great for years.
How can I finish and maintain DIY floating shelves bathroom on a budget?
Opt for durable, budget-friendly finishes like clear water-based sealant, whitewashing, or a subtle stain that complements your bathroom palette. Use affordable hardware and even repurpose scrap wood to cut costs. Maintenance is simple: wipe spills promptly, reapply a sealant every few years, and check for wobble or loose screws.
With a little care, your rustic floating shelves will stay sturdy and stylish, making a notable impact on budget home decor and your bathroom’s overall look.
Recommended Products

2-tiered whitewashed wooden floating shelf for home storage and organization with 3 dual-prong antique brass-toned metal hooks for hanging accessories

Scalloped Design for Stylish Home Decor: our scalloped designed coat hooks embody smooth lines with a minimalist wood hue, adding a warm and homely touch to your space; Not only are they functional but they double up as wall decor, fitting perfectly into your entrance, bedroom, or cloakroom to reflect your taste of life

Home Gym Organizer: The yoga mat holder wall mount storage home gym accessories with wood floating shelves, storage basket and 4 hook, can store your yoga mats, foam rollers, exercise bands very well and more, maximizing your storage space.
Related Topics
home decor
bathroom storage
budget upgrades
DIY floating shelves
rustic farmhouse
small bathroom
wall-mounted shelves
easy DIY
home organization
affordable decor
creative storage solutions
rustic style
Leave a Reply