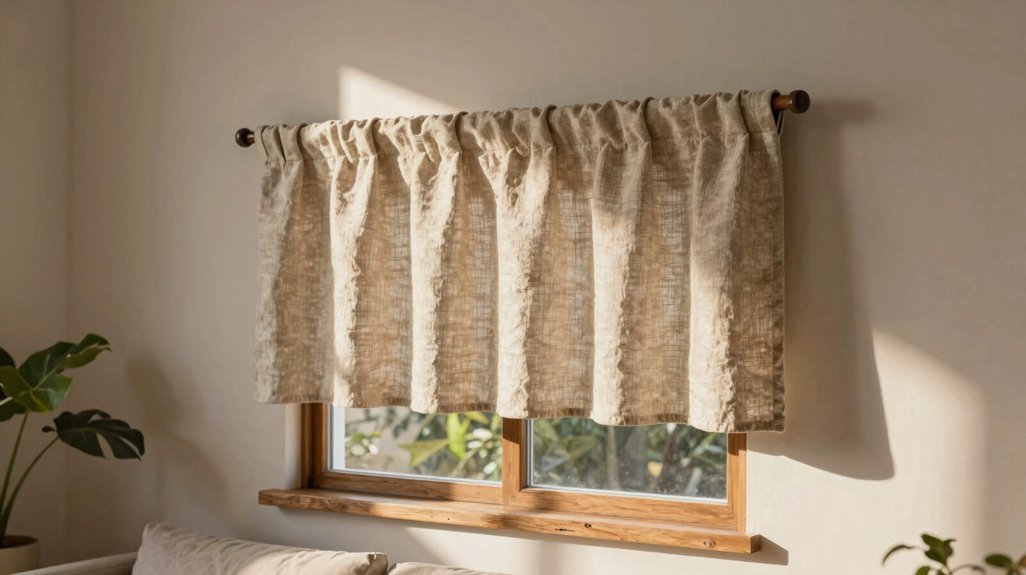
You probably don’t realize that the 12 to 18 inch fabric panel above your hotel suite window has a specific architectural purpose beyond mere decoration. That element, a valance, conceals headrails, brackets, and mounting hardware while eliminating light gaps that compromise room-darkening systems.
It creates visual height when mounted 4 to 6 inches above the frame, and you’ll find it specified in commercial installations more often than residential ones for precisely these functional reasons.
What distinguishes a valance from similar treatments, and why has it persisted when minimalism dominates current design discourse?
What Is a Valance?
In window treatment terminology, a valance constitutes a decorative fabric panel engineered to conceal the uppermost portion of a window aperture, typically spanning 12 to 18 inches in vertical drop.
A Window Valance serves dual functions: aesthetic refinement and hardware concealment. You’ll install it above blinds, shades, or curtains to mask curtain rods, blind mechanisms, and mounting brackets. Deploy it independently or layer it with complementary treatments.
Structural Variants:
- Flat: simple profile, single fabric layer
- Box-pleat: structured, geometric folds
- Layered: multiple fabric tiers for dimensional depth
- Rod-pocket: channel construction facilitating rapid removal; common in kitchen applications requiring washable materials
Comparative Specifications:
| Feature | Valance | Cornice |
|---|---|---|
| Composition | Soft fabric | Rigid material |
| Installation | Flexible mounting | Fixed framework |
| Maintenance | Launderable options | Surface cleaning only |
You’ll use valances to generate vertical visual extension, creating perceptually higher ceilings and longer window proportions.
Recommended Products

Size and Quantity: Each package contains 1 piece natural window valance. It measures 12 inches long (excluding the 1.5-inch header) by 60 inches wide. Featuring a dual rod pocket design, it is compatible with curtain rods up to 1.5 inches in diameter for easy installation. Use rigid kraft paper box for packaging, which offers crush-resistant protection, keeping curtains neatly stored and can be given as gifts

MEASUREMENT:Package Includes 1 panel kitchen valance, which measures 42" wide by 12" long
Do You Need a Valance? When It Helps and When to Skip It
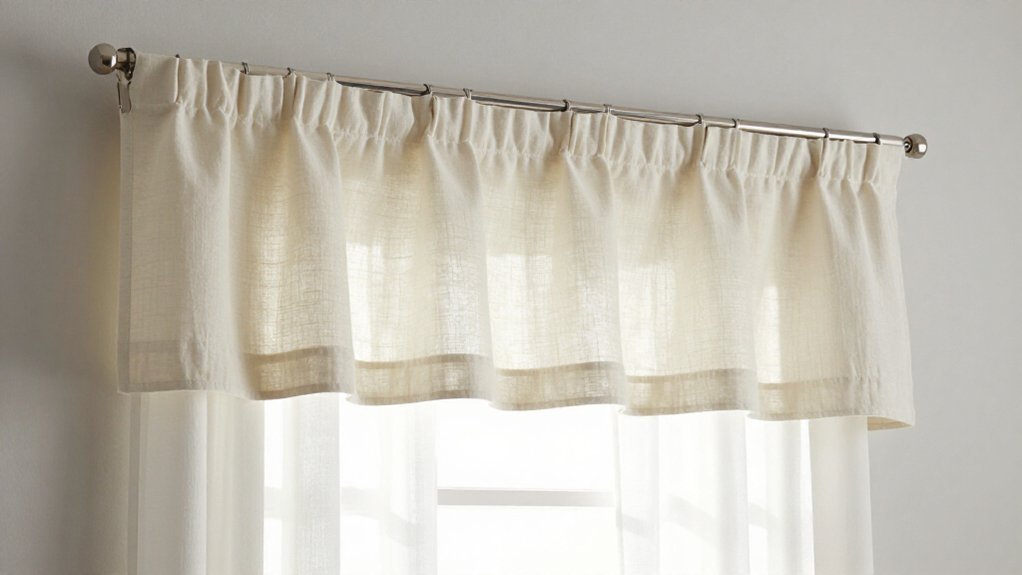
You don’t strictly need a valance to achieve functional window coverage, though you’ll often find it improves the finished aesthetic substantially.
When You’ll Want One
A valance conceals headrails, mounting brackets, and hardware above blinds or curtains. It blocks light gaps at the upper window edge where daylight leaks through. Hung slightly above the frame line, it creates vertical emphasis, making ceilings appear higher.
A valance hides hardware, blocks light gaps, and creates the illusion of higher ceilings when hung above the frame.
When You Can Skip It
If you favor simple, spare design or your window treatments incorporate a built-in decorative header, omit the valance. The redundancy adds little value.
Layering Applications
When combining multiple window treatments, position the valance as the top finishing layer. This produces cohesive, polished results across complex installations.
Evaluate your hardware visibility, light control requirements, and style preferences to determine necessity.
Recommended Products

Sold as 1 Panel: Each package includes 1 piece curtain toppers valance. Each panel measures 60 inch width, 14 inch long(The curtain length not include top 1.5" header). Top 3" rod pocket fits most curtains rods no wider than 1.5". Multiple length options are available, please measure window dimensions first for the perfect fit

Curtain Dimensions: Each package includes 1 piece linen color window valance, measuring 12 inches in length (not including 1.5" header) and 52 inches in width. Dual rod pocket design that applicable to curtain rods no wider than 1.5" for smooth installation. Use rigid kraft paper box for packaging, which offers crush-resistant protection, keeping curtains neatly stored and can be given as gifts
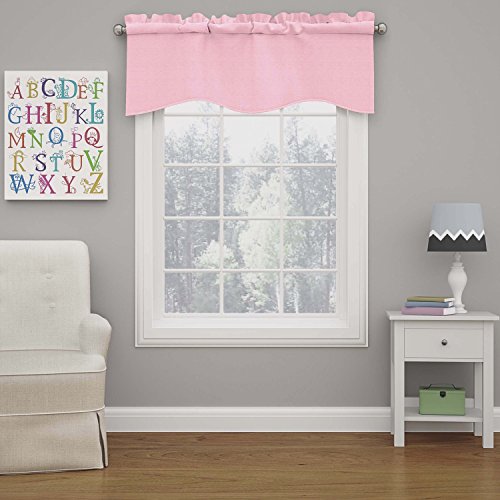
PREMIUM QUALITY – Masterly crafted 100% Polyester Valance curtains. Sold as a single valance (Measures 42" wide and 18" long).
What a Valance Does: Hardware, Light Gaps, and Height
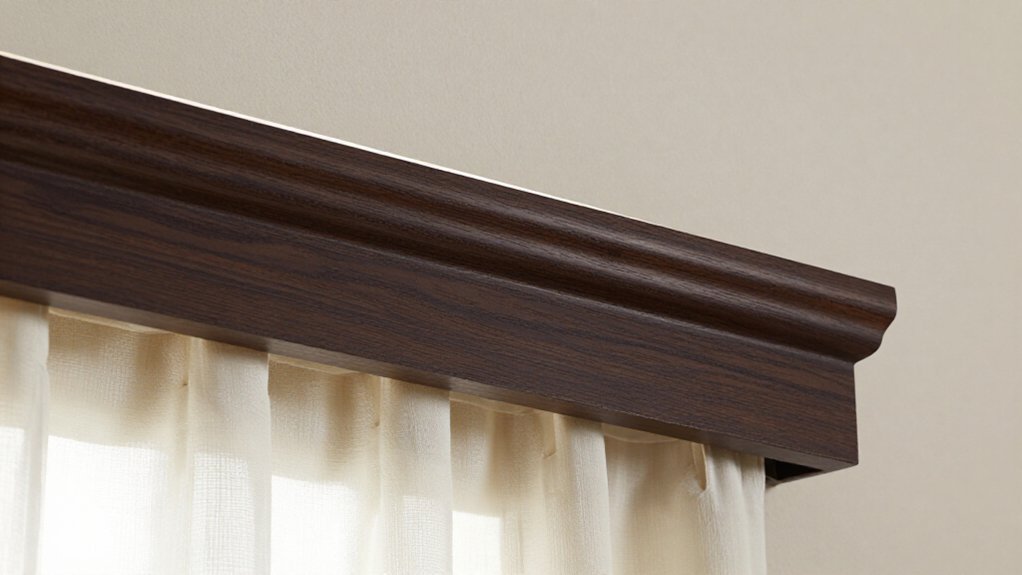
You’ll find that a valance serves three distinct functional purposes in window treatment specification. It conceals mounting hardware, including curtain rods, headrails, and brackets that disrupt visual continuity. It eliminates or reduces light infiltration through upper gaps where blinds and shades fail to achieve full frame seal. And, when mounted 4–6 inches above the window frame, it generates vertical elongation that simulates increased ceiling height.
These measurable outcomes, 12–18 inches of fabric coverage and strategic placement, change utilitarian components into integrated architectural finishes.
Recommended Products

Read Made: 2 Linen Curtain Valances per package. Each panel measures 52 inches wide by 84 inches long. Top design of Back tab & loop pocket provide 3 hanging options. <1> hanging from the back patch to create an elegant pleated look, <2> from the 3 inch rod pocket for a classic look <3> Hanging with clip rings for easy, slide open and closed (clip rings are not included)

Curtain Dimensions: Each package includes 1 piece linen color window valance, measuring 14 inches in length (not including 1.5" header) and 60 inches in width. Dual rod pocket design that applicable to curtain rods no wider than 1.5" for smooth installation. Use rigid kraft paper box for packaging, which offers crush-resistant protection, keeping curtains neatly stored and can be given as gifts

100% Light Blocking: This blackout valance features high performance on room darkening, which is thermal insulated, noise reducing, energy efficient and privacy protection.
Hides Window Hardware
Covering exposed mounting systems ranks among the most functional roles a valance performs. You install this fabric panel along the top perimeter of your window treatment to obscure visible window hardware, including curtain rods, blind brackets, and mounting fixtures.
Valances typically span the upper 12 to 18 inches of the assembly. You position them over blinds, shades, or curtains specifically because these systems leave hardware exposed at the headrail unless covered.
Key Hardware-Concealing Functions:
- Mask brackets and rods that secure primary treatments to the wall or frame
- Camouflage headrail mechanisms for roller shades, cellular shades, and roman assemblies
- Shield ceiling or wall mounts from direct sightlines at standard viewing angles
- Finish floor-to-ceiling installations when gaps exceed 18 inches above the window frame
You also mount valances slightly higher than the frame line to simulate increased vertical proportions while maintaining hardware coverage.
Blocks Light Leaks
A valance seals the upper perimeter of your window assembly, intercepting light infiltration where primary treatments terminate at the headrail. This fabric panel that hangs above your primary window treatment blocks light leaks by bridging gaps between the headrail and wall surface.
How Valances Address Light Infiltration
Inside mount installations frequently expose perimeter gaps where hardware meets the frame; valances conceal these vulnerabilities. The 12–18 inch vertical coverage typical of valances extends beyond hardware dimensions, overlapping seams that bleed daylight. You reduce top-edge light transmission even when primary treatments lack complete seal integrity.
Technical Considerations
When you’re hanging floor-to-ceiling curtains with more than 18 inches of clearance above the window frame, valances become particularly effective. Pairing them with blackout materials further eliminates hardware visibility and top-edge luminance. The result: measurable reduction in ambient light intrusion at the window’s upper termination point.
Creates Visual Height
Beyond managing light infiltration, valances perform substantial architectural work in vertical spatial perception. You install them as a top window treatment, covering only the uppermost portion. This placement draws the eye upward, making ceilings appear higher than they measure.
You conceal headrails and mounting brackets that would otherwise anchor visual attention at the top edge. You eliminate hardware distractions that fragment vertical continuity. You establish a unified color, pattern, and texture statement at the upper termination point.
You anchor floor-to-ceiling installations when wall clearance exceeds 18 inches above the window frame. You reduce light gaps near the top edge while maintaining finished aesthetics. You achieve spatial elongation without altering full curtain length, manipulating proportional relationships through strategic placement rather than structural modification.
Valance vs. Cornice: Which Top Treatment Fits Your Windows?
At the intersection of window treatment engineering and interior design, you’re deciding between two fundamentally distinct architectural solutions for masking hardware and controlling upper aperture light infiltration: the valance, a soft, drapery-derived top treatment characterized by its suspended, gravity-dependent drape, and the cornice, a rigid, three-dimensional structural element typically fabricated from wood substrates, high-density foam, or upholstered frame assemblies.
Both options conceal identical hardware categories: rods, brackets, and blind headrails. Both attenuate upper-aperture light infiltration. Your selection criterion rests on aesthetic preference and spatial character.
Valances deliver flowing, relaxed visual movement through gravity-dependent fabric suspension. Cornices impose formal architectural definition via rigid, box-like profiles.
For streamlined integration with roller or solar shade systems, specify roller/solar shade valances. For substantial, tailored massing, select cornice styles in geometric configurations, sometimes paired with matching valances.
Choose valances for softer, lighter presentation. Choose cornices for crisper, more substantial top treatment resolution.
Recommended Products

PACKAGE INCLUDES: 1* black lace ruffled valance (52"W x 18"L); Features a 3" rod pocket for easy setup on standard rods up to 1.5". Instantly refresh your kitchen or bathroom with this farmhouse-inspired window treatment.

Ready Made: Package includes 1 panel double layer valance curtain, each panel measuring 50"W x 16"L. Each panel has 2 inch high pole pocket, which works well with tension rods or normal rods, easy to install and slide. It is recommended to use a rod with a diameter of 1 inch or less. Simple pleats on the rod pocket add an elegant look.

Classic look for window top
Modern Valance Styles That Actually Work Now
You can achieve a contemporary window treatment through three primary valance constructions: flat panels, box pleat formations, and layered fabric assemblies. Flat valances deliver minimal visual mass through straight, unadorned fabric panels, typically specified in neutral chromatic values and paired with roller shade systems for cohesive, streamlined elevations. Box pleat styles introduce calculated dimensional depth via precisely spaced, small-scale folded returns, sufficient to register as intentional design without excessive volumetric presence.
Layered fabric options, such as sheer substrates superimposed over opaque grounds, generate contemporary textural interplay while maintaining functional concealment of headrail hardware at the upper aperture zone.
Recommended Products

STANDARD CONSTRUCTIONS: 2 pieces per package, each piece measures: 52 inch width by 18 inch length, constructed with 2" header and 3" rod pocket, perfect be hung from a standard basic or decorative curtain rod / pole

Hand Block Printed – These cafe curtains are hand block printed by local craftsmen, giving them a unique and authentic touch making these curtains a beautiful addition to your home. Available in a selection of

Blackout valance is made of 100% high quality polyester fabric. 1 Rod pocket window valance panel per package measuring 52 wide by 18 long inch
Flat Valances
A single, unadorned strip of fabric can change a window treatment from utilitarian to architectural. You’ll find that flat fabric valances deliver precisely this effect: a simple, straight panel that creates clean, modern lines above your existing shades or curtains.
Key Technical Specifications
Flat styles pair advantageously with roller shades; both treatments emphasize straight lines and eliminate bulky gathers. When measuring, add 4 inches per side using outside-mount calculations for proper hardware coverage.
Distribute fabric evenly along the mounting board or rod pocket to maintain a level hem without sagging.
Design Recommendations
- Select neutral tones or simple patterns to preserve the crisp aesthetic
- Prioritize flat fabric construction over gathered alternatives
- Verify hem alignment across the full window width
- Specify outside-mount dimensions for complete hardware concealment
Box Pleat Styles
Flat valances establish the foundation; box pleat styles advance the proposition. You gain dimension through small, structured folds that read clean yet tailored, avoiding the visual heaviness of ornate, ruffled alternatives.
Technical Applications
You mount a box pleat valance above existing blinds, shades, or curtains to conceal head rails and hardware while maintaining polish. The construction delivers a fuller finish than flat profiles without dated excess.
Styling Parameters
You select neutral tones for streamlined effects, or deploy subtle patterns and textures for controlled interest. When pairing treatments, you integrate box pleat valances with layered configurations, such as sheer overlays atop solid backings, generating depth without bulk.
Comparative Advantage
You achieve modern aesthetic viability through precise fold geometry: 3-inch pleat depths standard, proportioned to window width at ratios of 1:2.5 to 1:3 for ideal fullness distribution.
Layered Fabric Options
While flat and box pleat profiles each resolve specific visual requirements, layered configurations introduce stratified material interaction for heightened spatial complexity. You achieve this through layered fabric options that pair sheer overlays with heavier base textiles, generating depth without visual bulk.
Layered Fabric Options: Technical Specifications
- Sheer-over-opaque construction: You mount a lightweight voile or organza layer above a blackout or dim-out substrate, achieving 15-30% light transmission differential between strata.
- Dimensional offset: You maintain 2-4 inches of projection between fabric planes, creating shadow gradients that expand perceived window volume.
- Hardware integration: You employ dual-rod systems or specialized double brackets with 3-5 inch bracket extensions to support independent layer movement.
- Textile pairing protocols: You combine matte base weaves (minimum 200 GSM) with high-sheen or open-weave overlays for maximum refractive contrast.
You’ll avoid dated ruffled profiles; contemporary layered fabric options demand clean hem lines and minimal top-treatment embellishment. Rod-pocket constructions suit kitchen applications with 24-36 inch widths, though layered systems typically require 48+ inches for proportional balance.
Rod Pocket, Grommet, or Tab Top: Picking Your Header
The header you select fundamentally dictates how your valance interfaces with the mounting hardware, determining both installation complexity and finished aesthetic.
Your header choice fundamentally shapes how your valance meets its hardware, governing both installation ease and final look.
Rod Pocket
You’ll slide the valance onto the rod through a sewn fabric pocket, achieving a smooth, casual hang with minimal top structure. This attachment design lets the fabric drape freely without rigid shaping.
Grommet
You’ll thread the rod through metal or fabric-reinforced holes, simplifying installation while delivering tailored, evenly spaced folds. The grommet mechanism controls top drape more definitively than unstructured alternatives.
Tab Top
You’ll hang the valance using fabric loops, producing slightly more structured top draping than rod pocket configurations.
Your selection depends entirely on attachment mechanics, not pattern or fabric style. Rod pocket offers relaxed movement; grommets and tabs provide controlled, predictable silhouettes. Match your header to your desired rod interface and visual outcome.
Recommended Products

READY MADE: Set includes 1 line look valance curtain panel. Panel measures 52" wide x 12" length and features a rod pocket design to fit most standard curtain rods.

STANDARD SIZE : sage green eucalyptus leaves curtain valance measures 12"W x 42"L with 1" header and 3" rod pocket for Hanging.

PREMIUM QUAILITY : Our valance curtain is made of cotton linen blended fabric, emboss with burlap lace decoration under the rod pocket. Exquisite workmanship and neatly sewn make it durable.
How to Measure and Hang a Valance
You’ll begin by measuring window dimensions with precision, adding four inches to each side for outside mount applications to guarantee proper overhang and visual proportion. Selecting mounting style demands attention to architectural context: outside mounts extend the perceived window frame, while inside mounts preserve trim visibility but require exact casing depth clearance.
Installing hardware properly anchors the entire assembly. Mark bracket locations with a pencil and level, position them slightly above the frame line to elongate perceived ceiling height, drill pilot holes, secure with stud screws or wall anchors as substrate demands, space brackets every 30–36 inches to prevent longitudinal sag, then thread the rod through the valance pocket and distribute fabric evenly for balanced presentation.
Recommended Products

Linen Valance for Windows: Elevate your home decor with our Linen Valance Curtain. The valance measures 50 inches in width and 16 inches in length, with a 2.5 inch rod pocket that fits rods up to 1 1/2" in diameter. Five classic tone to tone colors for you to choose from!

STANDARD CONSTRUCTIONS: 2 pieces per package, each piece measures: 52 inch width by 18 inch length, constructed with 2" header and 3" rod pocket, perfect be hung from a standard basic or decorative curtain rod / pole
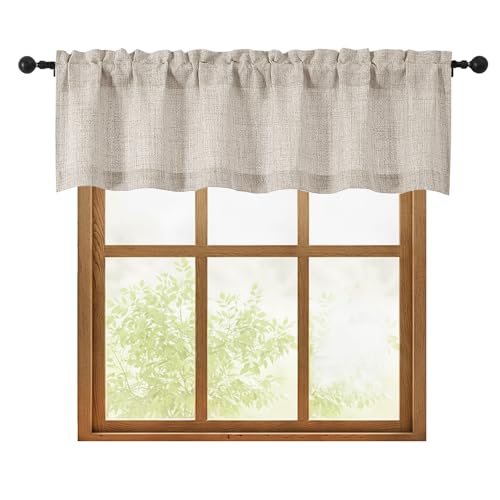
Premium Fabrics: Crafted from 100-percent high quality polyester, OWENIE light filtering valance curtains are very soft, durable elegant thick fabric. 1 panel per package and each panel measures 60 inch wide by 14 inch long dual rod pocket valance((The curtain length not include top 1.5" header). Top 3 inch rod pocket window valances can fit most standard curtain rods
Measuring Window Dimensions
Measure the total window width and add 4 inches to each side when planning an outside mount, ensuring the valance completely obscures hardware and brackets. You’ll achieve full coverage while creating a polished, intentional look.
Critical Measurement Protocols
Mark bracket positions with a pencil and level; mount them slightly above the frame line so the window looks taller.
Drill pilot holes before securing hardware; use stud screws if you hit a stud and wall anchors if you don’t. Space brackets every 30 to 36 inches to prevent sagging and maintain level alignment.
Slide the rod through the fabric pocket or attachment, then adjust fabric distribution until it sits evenly across the window.
Selecting Mounting Style
You recess hardware within the window frame, ensuring adequate depth clearance for rod diameter and fabric bulk. This approach suits traditional interiors with ornate trim.
Outside Mount Specifications
You add 4 inches to each side of the total window width for proper coverage. Mount brackets slightly above the frame line to visually elongate the opening. Space brackets 30 to 36 inches apart to prevent sagging.
Mark locations with a pencil and level, drill pilot holes, use stud screws in framing members, and employ wall anchors in hollow cavities. Slide the rod through the valance pocket, distributing fabric evenly until balanced.
Installing Hardware Properly
Since accurate measurements determine both coverage and visual proportion, begin by recording the total window width and adding 4 inches to each side. This extension ensures your valance fully covers the window ends and conceals the curtain rod brackets from view.
Critical Installation Steps:
- Mark bracket locations with a pencil and level, positioning them slightly above the frame line to create the illusion of increased ceiling height.
- Drill pilot holes; use stud screws when you encounter framing, otherwise install wall anchors for secure mounting.
- Space sturdy brackets every 30–36 inches to prevent curtain rod sagging under fabric weight.
- Thread the curtain rod through the valance pocket, adjusting gathers evenly until balanced across the window.
Best Rooms and Window Types for Valances
Where do valances deliver the most impact? You’ll find they excel in living rooms and bedrooms, where they polish the look of curtains over visible rods. They also work well in kitchens, where they add style above small windows, often over sinks where floor space is limited.
Best Window Types
Valances work well on standard windows with blinds or shades because they cover the head rail, tube, or mounting brackets while letting the lower shade manage light control. They’re commonly paired with roller shades for a clean, streamlined top treatment, or layered beneath heavier drapes for added depth.
Mounting Strategies
For a ceiling illusion, mount your valance slightly above the frame line to visually raise the head area. Choose inside mounts for a recessed look, or outside mounts when you want broader hardware coverage and a more finished effect.
Recommended Products

100% Polyester Calming, decorative design with wavy, folded pleats create a charming, textured window curtain valance. Lush Décor Wave Texture kitchen window valance is the…
Choosing Valance Fabric: Weight, Texture, and Care
Whether you’re layering over existing treatments or installing a standalone top treatment, fabric selection determines a valance’s performance and longevity.
Fabric selection is the single most important decision in creating a valance that performs beautifully and endures for years.
Weight and Drape: Select lighter sheers and cottons for soft, fluid folds, or choose heavier linens, jacquards, silk, velvet, or tailored blends for structured, formal silhouettes that maintain their shape.
Texture and Sheen: Mix woven or jacquard faces with smoother linings for visual depth; matte reads casual, while satin or faux silk delivers polished luminosity.
Construction and Protection: Specify lined valances; the backing layer mitigates solar radiation damage and extends textile lifespan.
Maintenance and Practicality: Prioritize poly/cotton or faux silk/polyester blends for wipe-clean or machine-washable care, reserving delicate silks for low-traffic installations.
When layering with blinds or curtains, match your sheer fabric or primary material to the bottom treatment’s weight and texture for balanced proportion.
Recommended Products

Linen Valance for Windows: Elevate your autumn décor with our 50" x 18" modern flax valance. The blend of polyester and linen in timeless pinpinstripes adds a rustic touch. Featuring a 2-inch pole pocket, this light reducing valance accommodates cafe curtain rods under 1 1/5" diameter
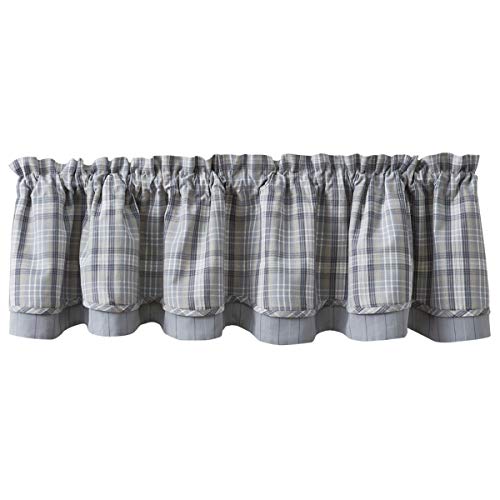
Valance can be used for any window in any location of a home.

Double Layered Curtains: Crafted with a sheer lace layer, our boho valances for windows boast a smooth, delicate handfeel, while the linen layer is soft and durable. With one-piece cutting and neatly sewn edges, our linen kitchen curtains with sheer overlay strike a balance between beauty and practicality. They are suitable for kitchen, bathroom window, camper, cafe, bedroom, basement and other places
What a Custom or Ready-Made Valance Costs
At the intersection of budget planning and design execution, you’ll find that your valance investment splits along two procurement paths: custom fabrication or ready-made retail.
Ready-Made Valances
Window valances sold off-the-shelf come in fixed widths and lengths based on typical window sizes. You’ll face limited best-match options unless you’re flexible on fit. These soft fabric or wood-composite pieces offer clean lines and a finished look at lower price points. They’re designed for either an inside or outside mount, installed at the top of the window frame.
Custom Valances
Custom valances command premium pricing due to precise tailoring. Your final cost reflects:
- Size, including width for fuller gathers
- Fabric selection (linen, polyester blends, velvet)
- Lining for solar radiation protection
- Design complexity (flat panel, box pleat, swag)
- Mounting configuration: inside or outside
- Hardware inclusion
Types of valances used alone or paired atop your window include fabric cascades, upholstered cornices made of wood, and structured piece-of-fabric treatments.
Recommended Products
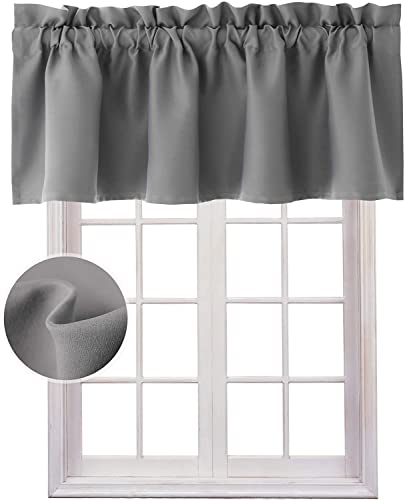
Premium Fabrics: Made of 100-percent high density polyester, our blackout valance curtains are very soft, durable and chemical-free. 1 panel per package and each panel measures 42 W by 18 L inches long. 3 inch rod pocket window valances can fit up to any standard rods perfectly

Premium Fabrics: Crafted from 100-percent high quality polyester, OWENIE light filtering valance curtains are very soft, durable elegant thick fabric. 1 panel per package and each panel measures 60 inch wide by 14 inch long dual rod pocket valance((The curtain length not include top 1.5" header). Top 3 inch rod pocket window valances can fit most standard curtain rods

Size & Hanging Options: Each set includes 1 Piece small curtain 10-14 inches (60"W x 14"L) with a 1.5" header for a polished look. Top rod pocket and weighted hem fit 1" rods for a smooth, tailored drape,Install easily with (1) top rod pockets, (2) clip rings (not included), or (3) decorative "cafe curtain" style by threading the rod through the bottom hem. No special hardware needed
Leave a Reply