Creating a beautiful and functional bathroom space is a task many of us take to heart. If you’re like me, you know that a well-decorated bathroom can transform daily routines into small moments of joy. That’s why I gathered this list of 18 DIY shelves bathroom ideas that you can easily build at home. These projects not only enhance your bathroom’s style but also provide practical bathroom storage solutions.
If you’re someone who enjoys crafting or simply wants to add a personal touch to your home, this guide is for you. You don’t need to be a woodworking expert to construct these rustic shelf designs. Whether you’re looking for wall-mounted shelves or quirky space-saving shelves, you’ll find options here that fit your taste and skill level.
In this post, you’ll discover ideas that are affordable, stylish, and practical. From chic floating wooden shelves to vintage crate shelves, these projects will help you organize your bathroom while adding charm. So grab your tools, and let’s dive into these creative DIY shelf ideas that will elevate your bathroom decor!
Key Takeaways
– Discover 18 unique DIY shelves that enhance both style and functionality in your bathroom.
– Learn about various rustic shelf designs that bring a warm, farmhouse feel to your space.
– Explore easy DIY home decor projects that cater to all skill levels, ensuring everyone can participate.
– Find practical storage solutions that utilize wall space effectively, perfect for smaller bathrooms.
– Get inspired by creative materials like reclaimed wood and vintage crates, adding personal charm to your bathroom.
1. Rustic Ladder Shelf
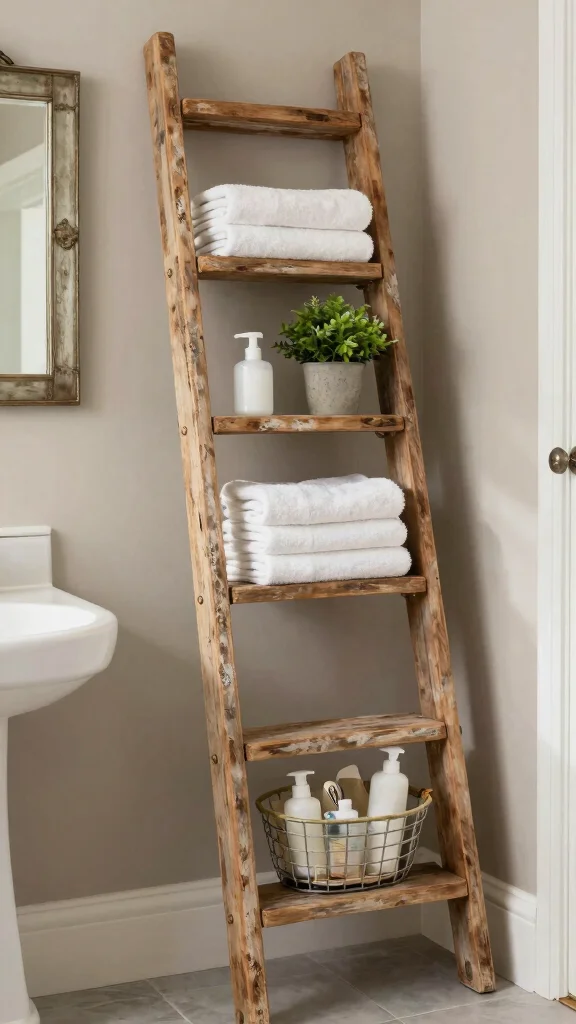
A rustic ladder shelf can become a stunning centerpiece in your bathroom, merging practicality with charm. Crafted from reclaimed wood, this shelf leans against the wall, creating a relaxed atmosphere while efficiently utilizing vertical space. Display decorative baskets filled with toiletries, neatly rolled towels, or vibrant plants to infuse life and color into your bathroom decor.
To maximize this design, consider a few practical steps. Look for second-hand wood to keep costs down, or paint the wood for a pop of color. This style aligns beautifully with the growing trend of embracing natural materials and sustainable practices in home design.
Consider these tips to create your rustic ladder shelf:
– Pair reclaimed wood with metal brackets for a contrasting look
– Install at varying heights for visual interest
– Use woven baskets to enhance texture and organization
This design not only saves space but also brings a rustic elegance that complements farmhouse aesthetics beautifully.
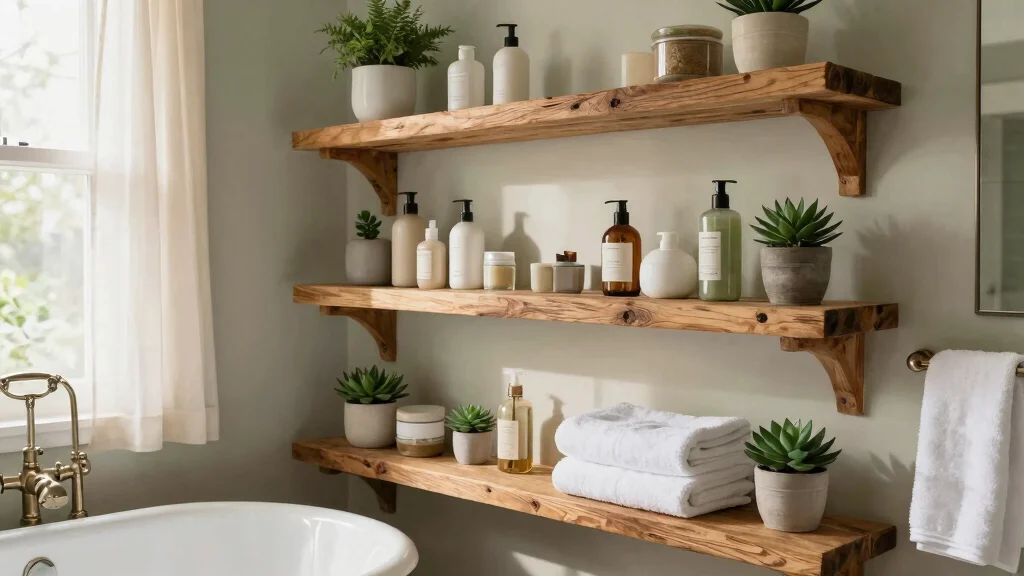
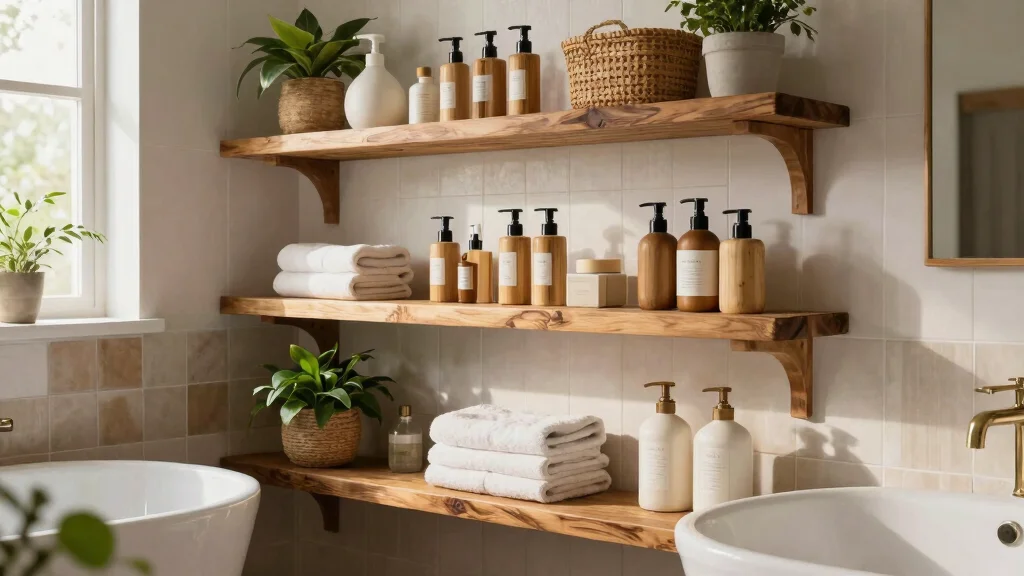
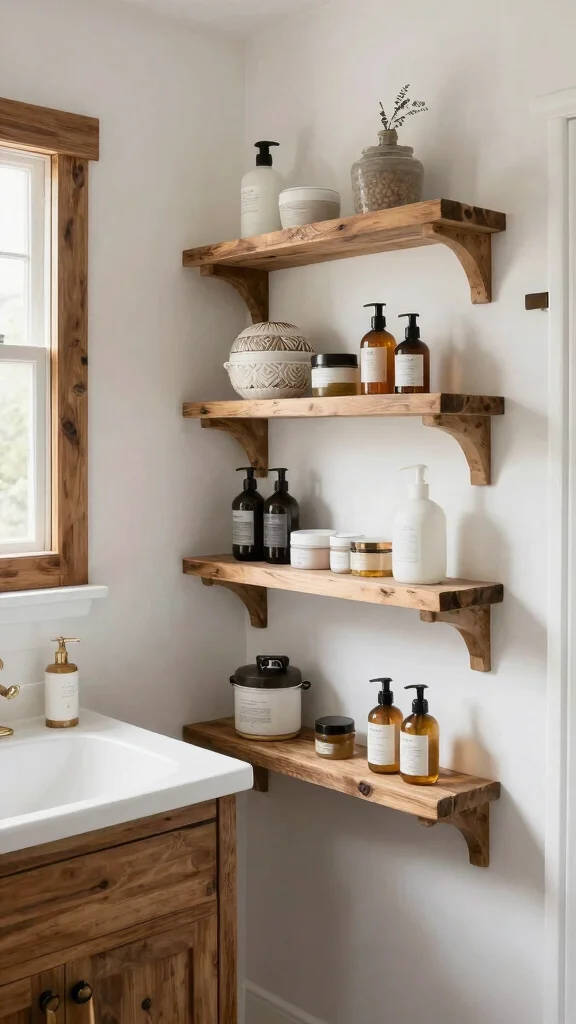
2. Floating Wooden Shelves
Floating shelves offer a sleek solution to display your favorite items without cluttering the floor space. These wall-mounted shelves are perfect for showcasing decorative pieces or essential toiletries, providing a clean and modern aesthetic. Opt for reclaimed wood for a touch of rustic charm, and finish with a sealant to protect against moisture in the bathroom environment.
Implementing this look is straightforward. Measure your desired shelf placement carefully to ensure a level installation. Consider mixing different lengths for an eclectic feel that aligns with current design trends focused on personal expression.
Try these ideas to enhance your floating shelf setup:
– Pair reclaimed wood with metal brackets for a modern touch
– Install in a staggered pattern for dynamic visual appeal
– Use decorative items like candles or art for a personalized display
Floating shelves create an airy ambiance while maintaining functionality, making your bathroom feel more spacious and inviting.
3. Vintage Crate Shelves
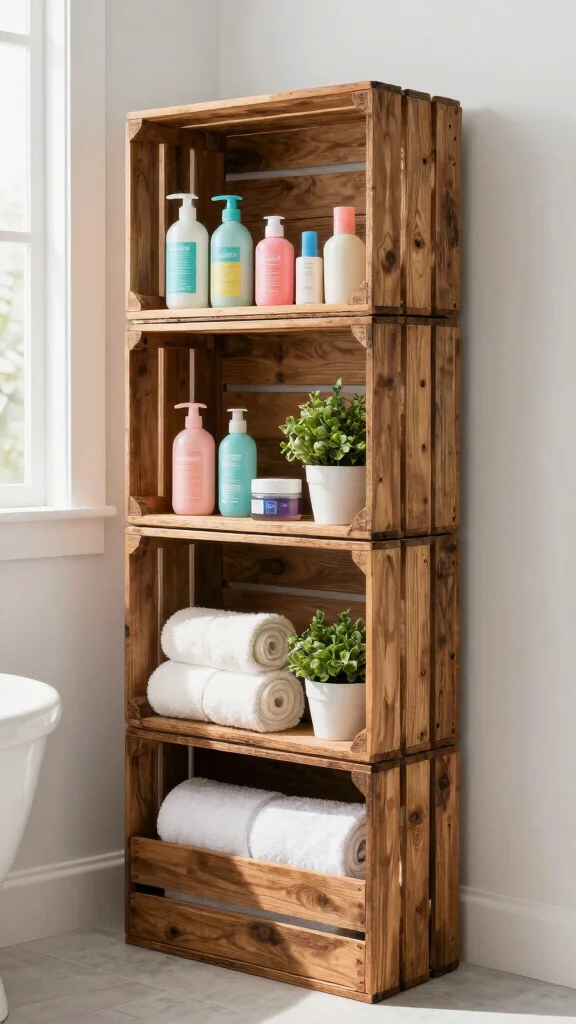
Introduce vintage crates into your bathroom for a unique and charming storage solution. These crates not only add character but also offer practical compartments for organizing your essentials. You can stack them vertically or lay them side by side to create a visually striking display that showcases your personality.
To create this look, start by sourcing vintage crates from local thrift shops or online marketplaces. A bit of cleaning and sanding can go a long way in ensuring they’re ready for your space. Feel free to paint or stain them to align with your bathroom’s color scheme.
Incorporate these suggestions for stylish vintage crate shelves:
– Stack crates for an eye-catching tiered effect
– Use them to display plants or rolled towels
– Label each crate for easy organization and access
This approach not only keeps your essentials tidy but also brings a delightful vintage charm that enhances the overall decor of your bathroom.
4. Repurposed Pallet Shelf
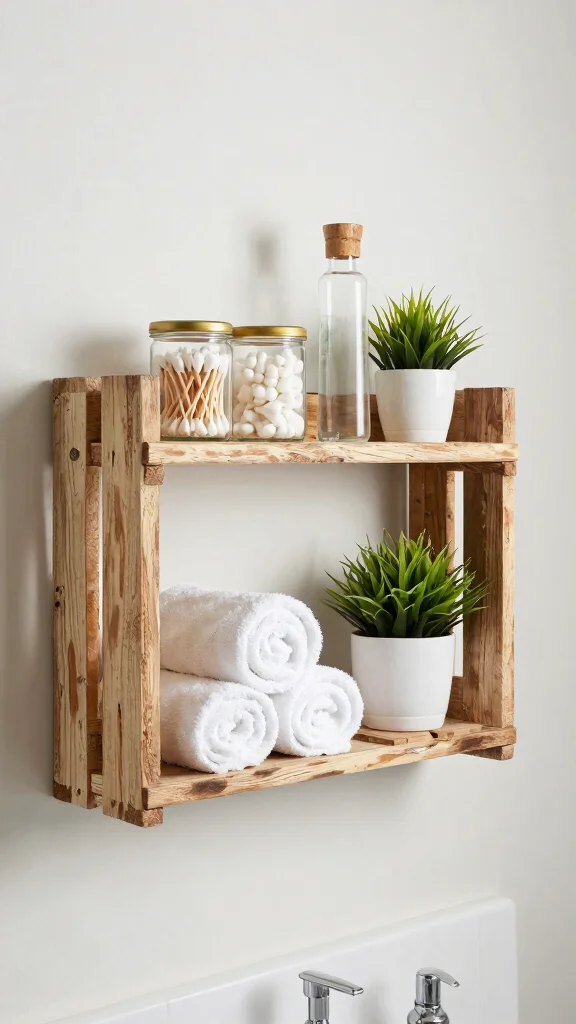
Transform old pallets into stunning pallet shelves for your bathroom, combining resourcefulness with rustic charm. The slatted design allows for airflow, making these shelves ideal for damp environments while providing both storage and display options.
To create your pallet shelf, find a sturdy pallet and dismantle it if necessary. Sanding the wood is crucial to ensure a smooth finish, and you can cut it to fit your desired shelf dimensions. Mount it securely on the wall to ensure it can hold your items safely.
Here are some tips for your repurposed pallet shelf:
– Decorate with plants or jars for a personal touch
– Use essential oils and cotton ball jars for functional decor
– Keep the natural wood finish for a rustic vibe
This design not only offers practicality but also adds a rugged elegance that resonates with modern farmhouse aesthetics.
Repurposing pallets for diy shelves bathroom adds rustic charm without breaking the budget. Pro tip: sand, seal, and mount securely to keep damp air at bay and maximize storage with pallet shelves. Your space will feel bigger and cozier, with instant, practical storage.
5. Industrial Pipe Shelves
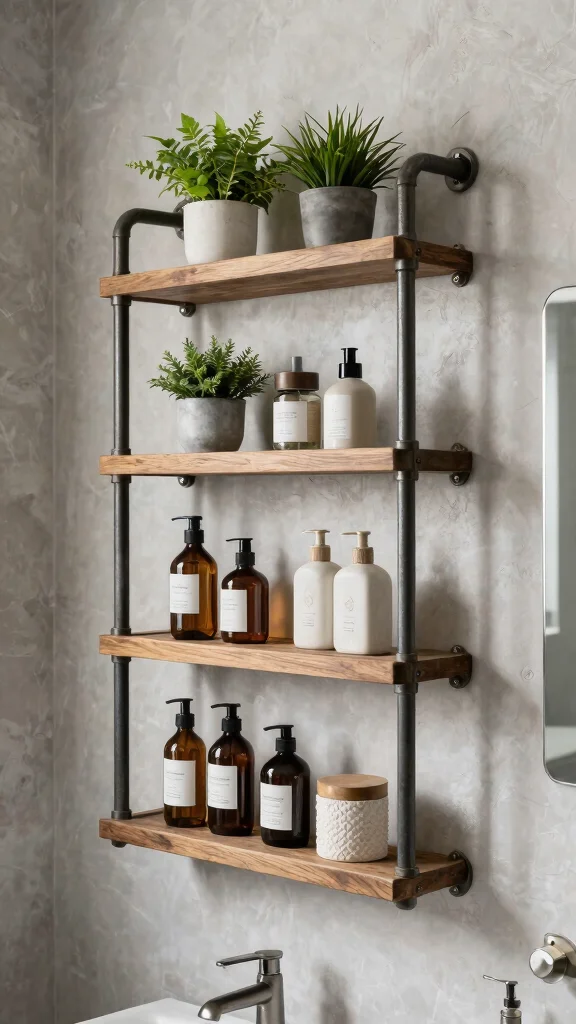
Elevate your bathroom with industrial pipe shelves, merging wood with metal for a bold statement piece. This unique design provides a sturdy yet stylish storage solution, perfect for showcasing decorative items or organizing toiletries in a contemporary space.
To get started, gather wooden boards and metal pipes, then cut the boards to your desired length. Assemble the pipe structure on the wall, ensuring it’s securely fastened. The contrast between wood and metal creates a striking visual that can enhance your overall decor theme.
Consider these ideas for your industrial pipe shelves:
– Use dark metal pipes for a dramatic effect
– Incorporate plants or decorative items for added warmth
– Arrange toiletries neatly for a functional display
This design not only serves a practical purpose but also exudes a stylish flair that makes your bathroom stand out.
6. Corner Shelving Unit
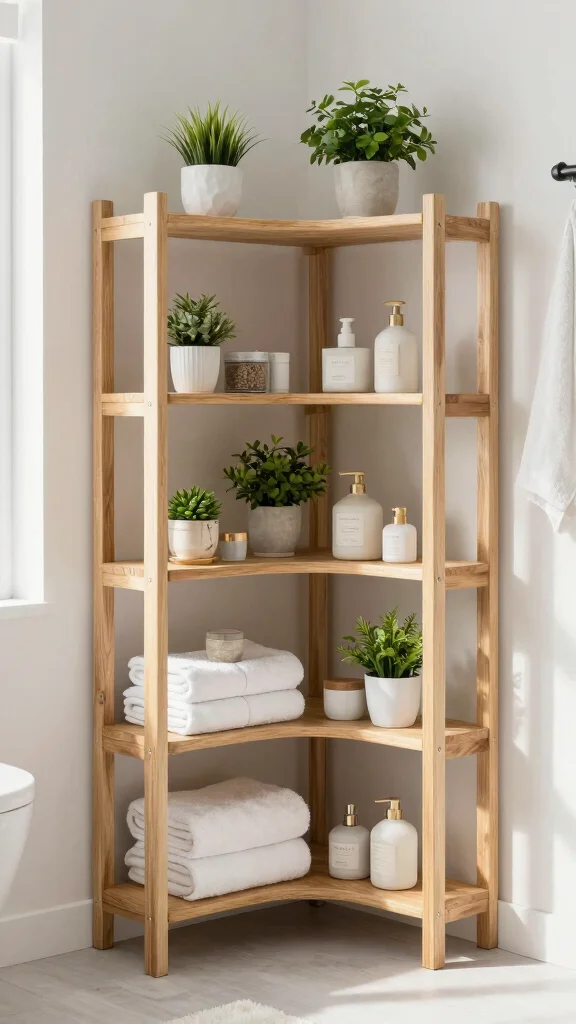
Corner shelves are a brilliant way to utilize those often-overlooked spaces in your bathroom. Their compact design fits snugly into corners, providing extra storage without occupying valuable floor area. Opt for a tiered design to enhance visual interest while maximizing storage capabilities.
To implement this idea, carefully measure the corner space and cut the wood accordingly, staggering lengths for a tiered look. Sand and finish the wood to match your decor before securely mounting the shelves.
Here are some tips for creating your corner shelving unit:
– Choose light wood to brighten the corner
– Add decorative plants or extra towels for a cozy feel
– Ensure sturdy mounting for safety and stability
These corner shelves not only provide functionality but also transform neglected areas into stylish storage solutions.
7. Rustic Pipe and Wood Combo
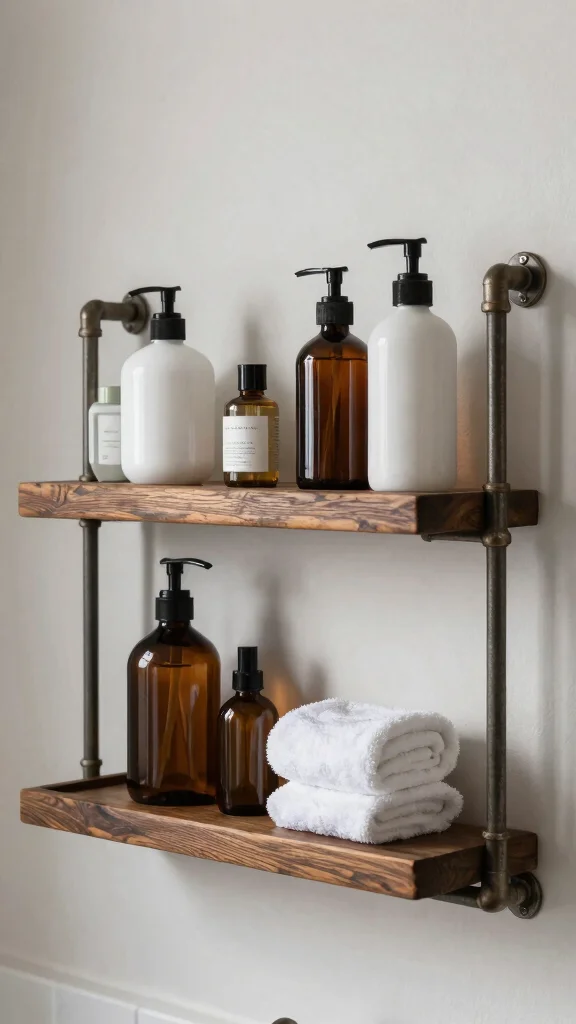
A rustic pipe and wood combo shelf combines the warmth of wood with the ruggedness of plumbing pipes, creating a stunning dual-material shelf that stands out. This design is not only practical but also serves as a conversation piece in your bathroom.
Begin by planning your shelf size and layout, using wooden boards for the shelves and pipes for the supports. Cut the pipes to fit and secure them to the wall, then attach the wooden shelves for a sleek finish.
Consider these ideas for your rustic pipe and wood combo:
– Use larger wooden boards for visible items
– Paint pipes in matte black for a modern touch
– Incorporate plants or decorative items for added warmth
This shelf design combines functionality with style, ensuring a unique aesthetic that elevates your bathroom decor.
8. Glass Shelves for a Sleek Look
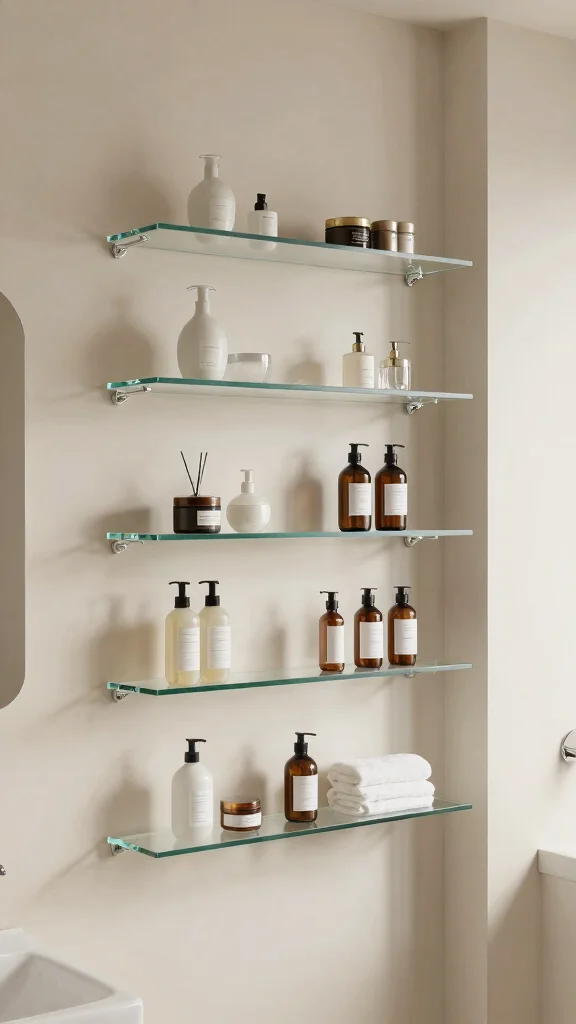
For a touch of elegance, consider glass shelves in your bathroom. These provide an airy, open feel while visually expanding the space, perfect for displaying decorative items without overwhelming the room.
To install glass shelves, purchase appropriate wall brackets designed for glass. Measure the wall space carefully before securely attaching the brackets, ensuring they can support the weight of the shelves.
Try these tips for your sleek glass shelves:
– Use tempered glass for extra durability
– Decorate with colorful towels or beautiful decor
– Clean regularly to maintain a pristine look
Glass shelves enhance sophistication, providing a stylish way to store and display your essentials.
Fun fact: glass shelves can visually expand a small bathroom by up to 20% thanks to light passing through. Measure your wall space, choose sturdy glass brackets, and keep decor light so your space stays effortlessly sleek.
You might also like
9. DIY Mason Jar Shelf
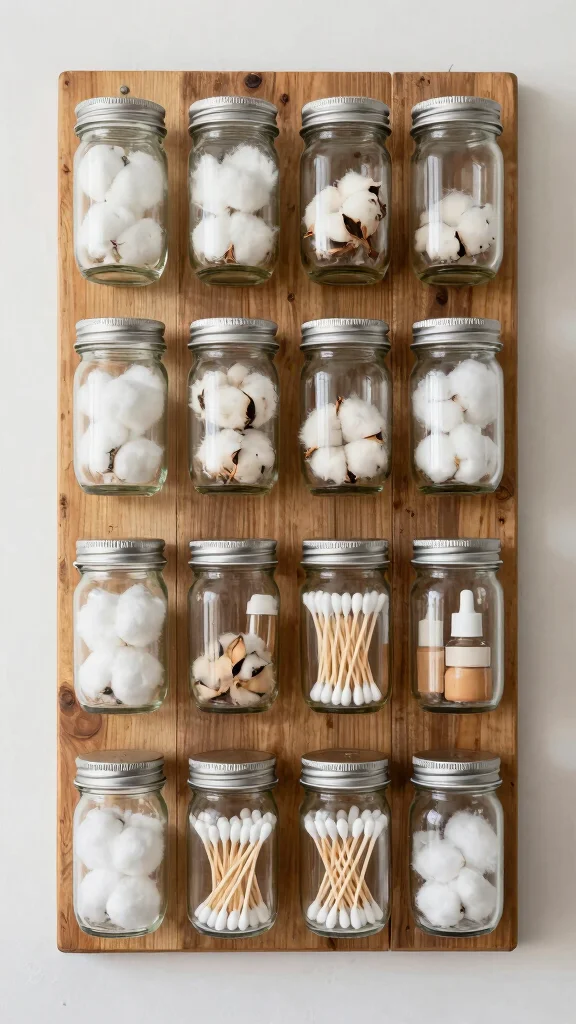
Incorporating mason jars into your shelving can create a charming and functional storage solution. Attach jars to a wooden board or use them as standalone decorations, perfect for holding everything from cotton balls to makeup brushes.
To create this project, start with a clean wooden board and mason jars. Secure the jars to the board using screws or brackets and mount the board on the wall or a shelf for easy access.
Consider these ideas for your DIY mason jar shelf:
– Paint jar lids for a pop of color
– Use twine to create a rustic look
– Mix different jar sizes for visual interest
This unique storage solution not only organizes your essentials but also ties beautifully into a rustic theme.
Difficulty Rating & Requirements
Overall Difficulty Rating: Medium
Building DIY shelves for your bathroom can be both fun and rewarding. Most of the projects range from medium to easy difficulty, making them suitable for those with even basic handyman skills. If you can use a drill and read a few simple instructions, you should be able to tackle most of these shelf ideas successfully.
Time Estimate: ⏱ Estimated time: 2-5 hours
Most of the shelf projects can be completed in a single afternoon. Here’s a rough breakdown:
– Planning and gathering materials: 1 hour
– Cutting and assembling: 1-3 hours (depending on the complexity)
– Finishing touches (like painting or sealing): 1 hour
Skill Requirements:
– Required skills: Basic woodworking, measuring, and using hand tools
– Beginner-friendly: Yes
These projects are designed for beginners. You can learn skills like drilling and sanding as you go. More advanced skills like joinery are optional, not necessary.
Tools & Materials Needed: 🧰 Essential items checklist
– Tape measure (required)
– Power drill (required)
– Wood screws (required)
– Level (required)
– Sandpaper (required)
– Paint or varnish (optional)
– Wood boards (required for most shelves)
– Brackets or anchors (optional depending on the shelf type)
Step-by-Step Overview:
1. Planning (1 hour): Decide which type of shelf you want to build. Measure your space and sketch out your design.
2. Gathering Materials (30 minutes): Head to your local hardware store to pick up wood, screws, and other materials from your checklist.
3. Cutting and Assembly (1-3 hours): Follow your design to cut the wood to size. Use your drill to assemble the parts together, ensuring everything is secure and level.
4. Finishing Touches (1 hour): Sand the edges and apply paint or varnish if desired. Let it dry completely before installing.
Professional vs DIY: You can expect to pay anywhere from $200 to $500 for similar shelves if you hire a professional. In contrast, a DIY version might only cost you $50 to $150, depending on the materials used. If you’re on a budget or love the idea of personalizing your space, taking on a DIY shelf project can be both cost-effective and satisfying. If you’re unsure about your skills, consider starting with a simple design to build your confidence.
10. Stylish Bookcase Storage
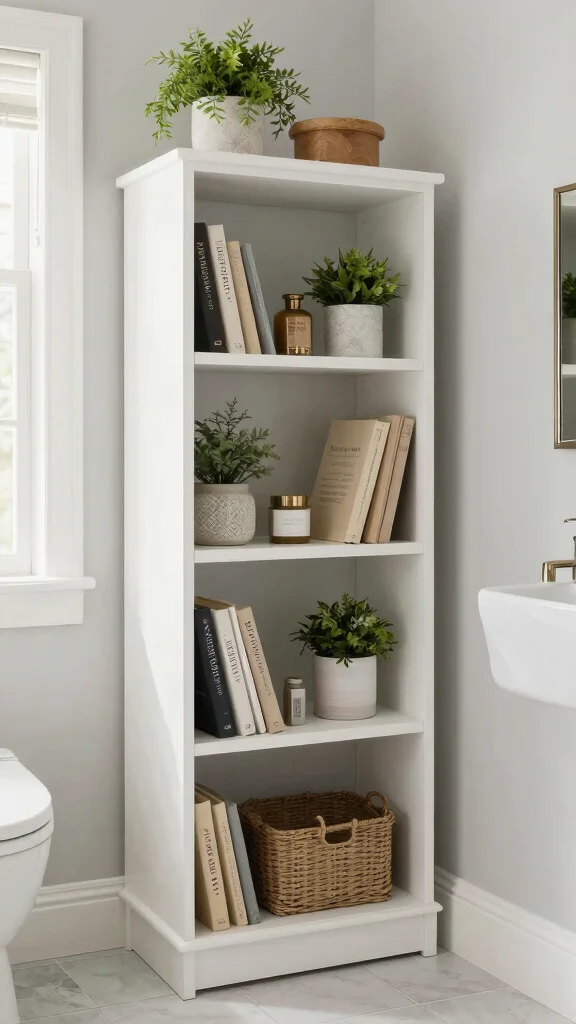
Incorporating a small bookcase into your bathroom is a clever way to maximize storage while adding a decorative touch. Use the shelves for books, plants, or bathroom necessities, ensuring a cohesive look with your farmhouse decor.
Choose a bookcase that suits your bathroom style and secure it against the wall for stability. Arrange items on the shelves, blending functionality with aesthetics for a visually appealing display.
Here are some ideas for styling your bookcase:
– Use baskets to keep smaller items organized
– Incorporate decorative boxes for a chic vibe
– Change seasonal items for a fresh look
This approach not only enhances storage but also adds a personal touch to your bathroom decor.
11. Upcycled Drawer Shelves
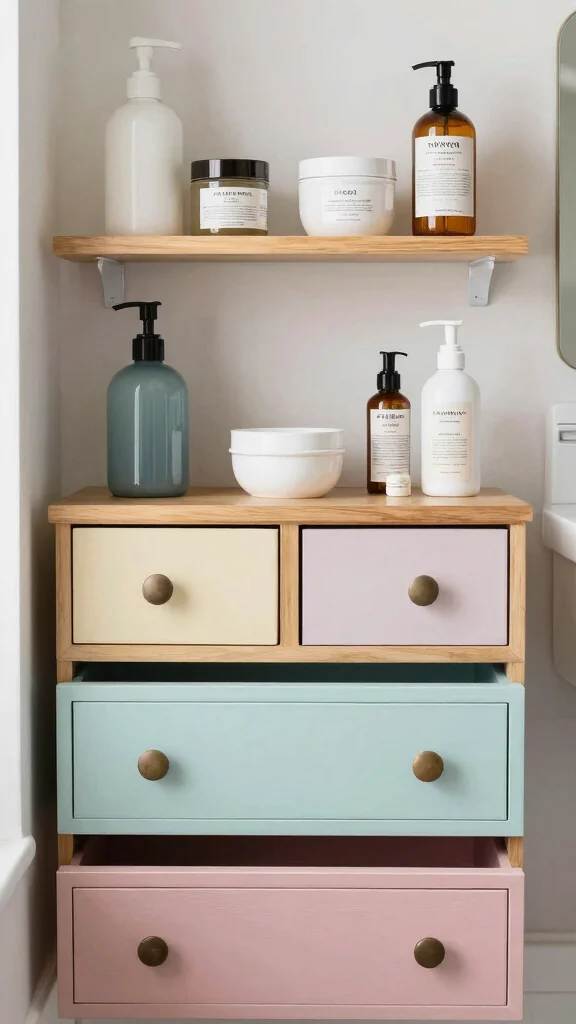
Upcycling old drawers into shelves is a creative way to blend functionality with sustainability. These shelves can hold various items while allowing you to showcase your personality through design.
Start by finding sturdy old drawers suitable for shelving. Sand and paint or stain them to match your decor, then secure them to the wall or stack them for a free-standing unit.
Consider these tips for your upcycled drawer shelves:
– Mix different sizes for an eclectic feel
– Use them to display decorative items or store essentials
– Keep the natural finish for a rustic appearance
This project not only adds unique character but also offers practical storage in your bathroom.
12. Simple Wood Box Shelving
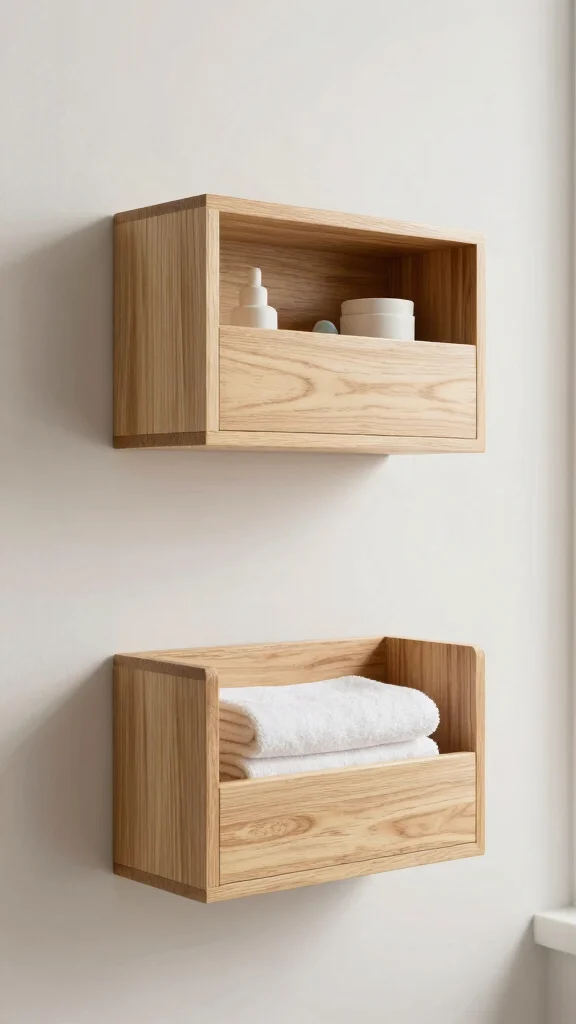
Simple wooden boxes can serve as stylish and easy shelving options. Stack them vertically or lay them flat on a wall to create a minimalist look that fits perfectly in any rustic bathroom.
Sourcing wooden boxes from a craft store or making your own can be a fun project. Sand and finish them to your liking before securely mounting on the wall with brackets or screws.
Try these ideas for your wood box shelving:
– Use varying sizes for added visual interest
– Keep them uniform for a streamlined appearance
– Fill with decorative accents or rolled towels
These boxes enhance both storage and design, making your bathroom feel organized and inviting.
13. Rustic Shelf with Hooks

Combining shelves and hooks creates an all-in-one storage solution that’s both functional and stylish. A rustic shelf with hooks is perfect for hanging towels, robes, or decorative items while providing space for toiletries or decor.
To create this piece, find a sturdy wooden board and attach hooks securely to the bottom before mounting it to the wall. Ensure it can hold the weight of your items for safety.
Here are some tips for your rustic shelf with hooks:
– Use decorative hooks that match your theme
– Add a personal touch with hanging plants
– Keep toiletries organized on the shelf
This versatile design enhances function while adding a charming element to your bathroom decor.
14. Multi-Tiered Hanging Shelves
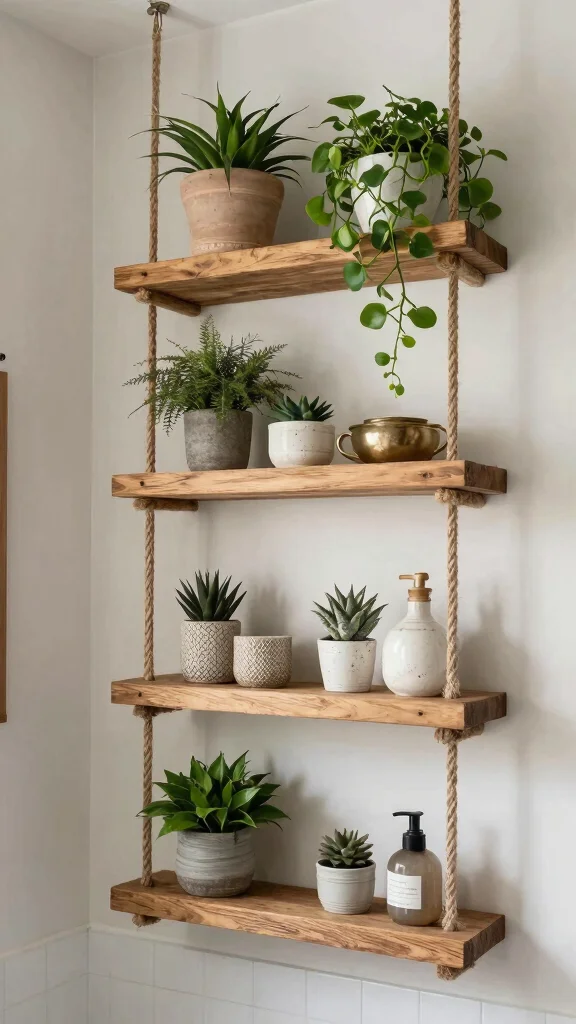
Creating multi-tiered hanging shelves adds a unique twist to traditional shelving. Made with a few boards and rope or chain, these shelves can be suspended from the ceiling or wall, providing both style and practicality.
Start by cutting boards to your desired dimensions and drilling holes in the corners for attaching the rope or chain. Secure them to a ceiling hook or wall bracket for stability.
Consider these tips for your hanging shelves:
– Choose rustic rope for a farmhouse aesthetic
– Use sleek chain for a modern look
– Display plants or decorative items for a charming touch
This design not only adds visual interest but also allows for creative decorating possibilities.
Fun fact: Multi-tiered hanging shelves can free up floor space in a small bathroom by up to 30%. For your diy shelves bathroom project, rustic rope or chain adds secure, stylish support. Hang them where you actually need storage and enjoy easy access.
15. Wire Basket Shelving
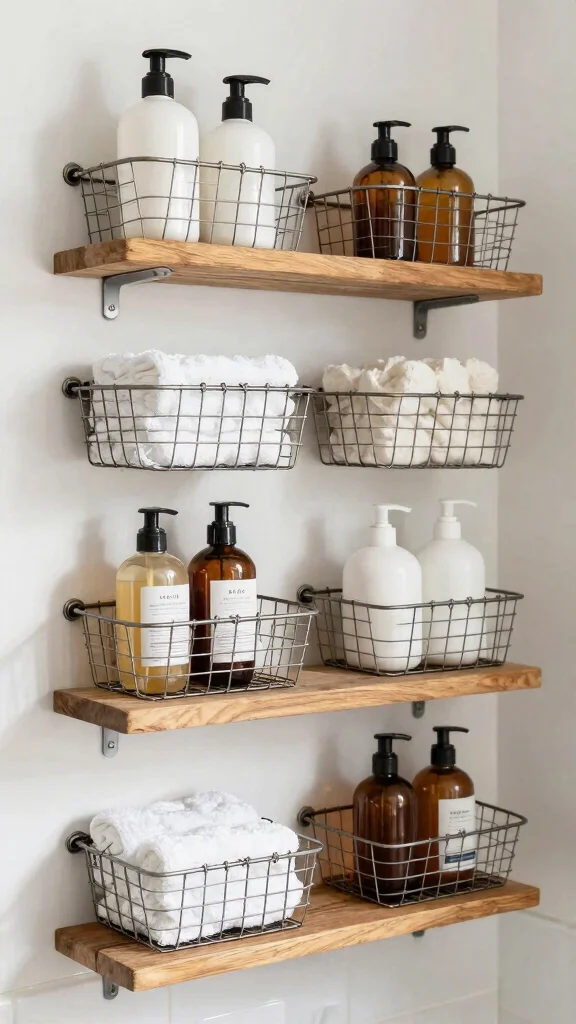
Incorporating wire baskets into your shelving can add a stylish and rustic twist. These baskets hold various bathroom essentials while keeping everything organized and easily accessible.
Choose wire baskets that fit your shelves or wall space, securing them with appropriate fasteners. Their open design allows for air circulation, making them ideal for damp areas.
Here are some tips for utilizing wire basket shelving:
– Paint baskets to match your decor
– Use labels for easy identification of contents
– Stack smaller baskets for a layered look
Wire baskets enhance the airy feel of your bathroom, providing a practical yet chic way to store your essentials.
16. DIY Towel Ladder
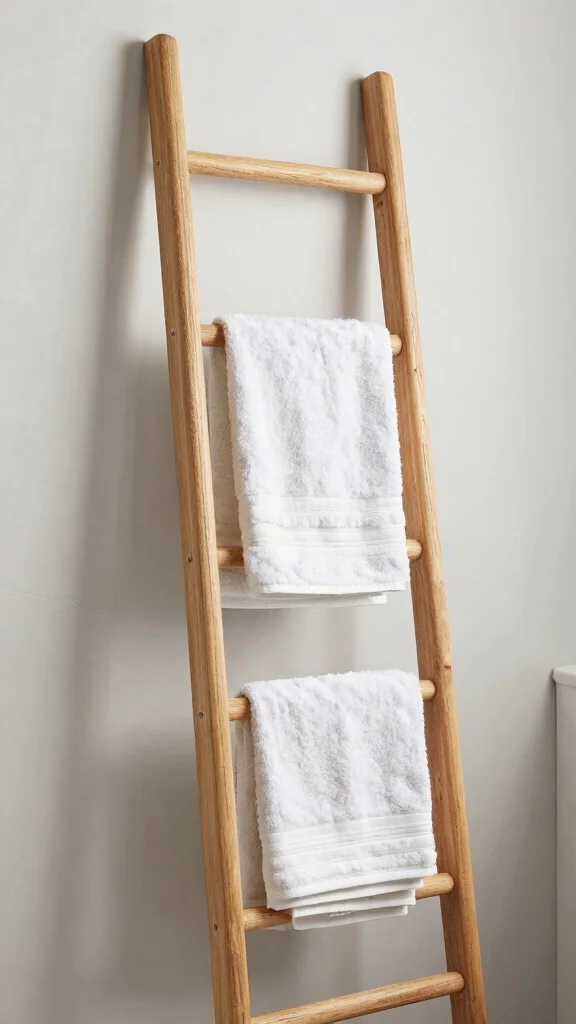
Creating a DIY towel ladder is a stylish way to organize towels while adding a decorative element to your bathroom. This project allows for customization to match your unique decor style.
Start by using wooden dowels or boards for the ladder rungs. Cut two side pieces and attach the rungs at equal distances, then finish with paint or stain to your liking. Lean it against the wall or mount it directly for stability.
Consider these tips for your towel ladder:
– Place a small plant on the top rung for added decor
– Use colorful towels to brighten the space
– Ensure the ladder is securely mounted for safety
This design provides practicality while adding a rustic touch that enhances your bathroom decor.
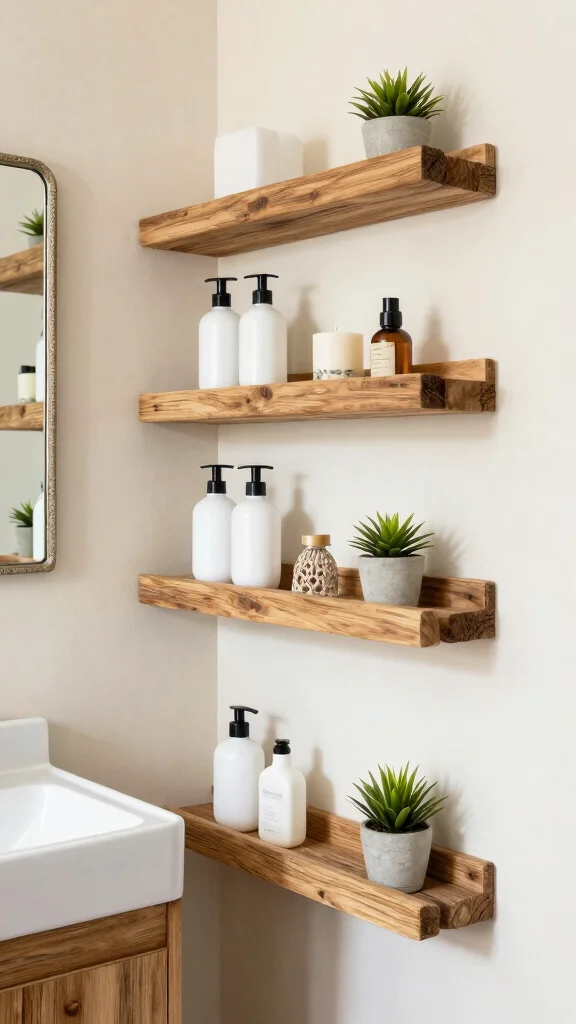
17. Pallet Wall Shelves

Using pallets to create wall shelves is a trendy way to introduce rustic charm into your bathroom. The natural wood grain offers a cozy, farmhouse appeal while providing functional storage.
Begin by dismantling a wooden pallet and selecting the best parts for shelving. Sand the pieces and apply a protective finish before securely attaching them to the wall with brackets.
Here are some tips for your pallet wall shelves:
– Paint or stain the wood to match your decor style
– Use them to hold plants or toiletries
– Consider a staggered arrangement for visual interest
This design enhances your bathroom’s aesthetics while providing useful storage solutions.
18. Chic Rustic Spice Racks
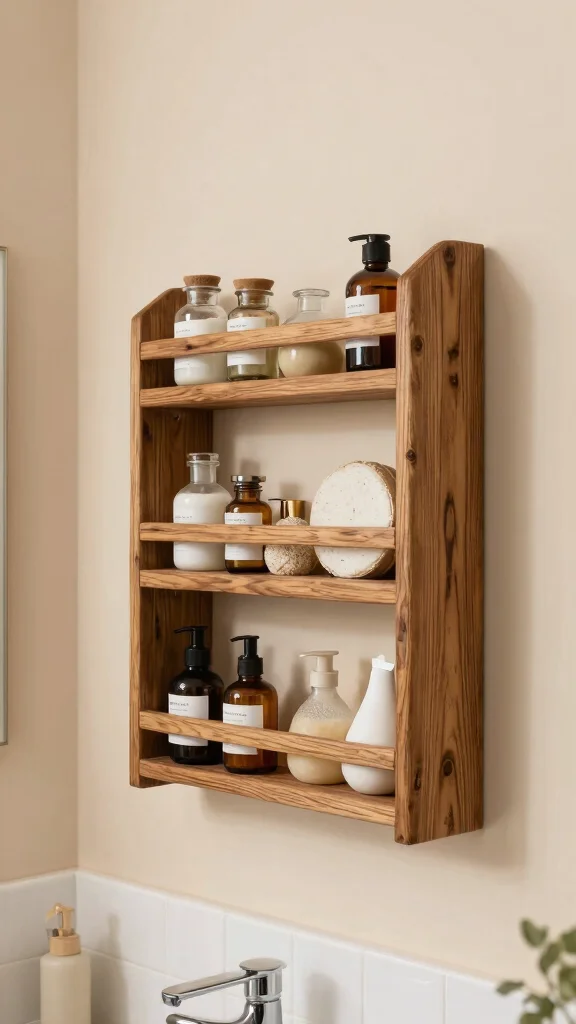
Repurposing a rustic spice rack for your bathroom is a creative storage solution that infuses a bit of farmhouse charm while offering practicality. This unique idea can help keep your essentials organized in style.
Start by cleaning and sanding a spice rack to remove rough spots. Stain or paint it to suit your bathroom theme before securely mounting it on the wall.
Consider these ideas for maximizing your spice rack:
– Store small jars of bath essentials or candles
– Use it as a decorative display for plants
– Get creative with how you fill it for a stylish focal point
This clever design not only enhances your storage but also adds character to your bathroom decor.
Conclusion
With these 18 DIY shelves bathroom ideas, you can effortlessly enhance your space with style and organization. Each project not only showcases your creativity but also provides practical solutions for storage. Embrace the warmth of rustic farmhouse decor and let these ideas inspire your next DIY project. Get started today, and transform your bathroom into a charming, cozy retreat!
Frequently Asked Questions
Question: What are some simple DIY shelves for a rustic farmhouse bathroom?
Looking for easy diy shelves bathroom ideas that fit a rustic farmhouse vibe? Start with weather-resistant wood like pine or reclaimed boards. Plan wall-mounted shelves to save floor space and keep counters clear, a key bathroom storage solutions approach.
Steps: 1) Measure wall area and decide shelf depth (6–8 inches is usually perfect for bathroom items). 2) Cut boards, sand smooth, and apply a rustic finish (whitewash, stain, or clear sealant). 3) Seal with a moisture-resistant topcoat to protect from humidity. 4) Install sturdy anchors and brackets or opt for a wall-mounted French-cleat system for a seamless look. 5) Style with baskets, glass jars, and towels for practical storage and farmhouse charm.
These diy shelves bathroom projects are beginner-friendly and deliver instant impact with minimal fuss.
Question: What tools and materials do I need to build wall-mounted shelves in a small bathroom?
Here’s a practical starter kit for diy shelves bathroom wall-mounted projects. Materials: sturdy boards (pine or reclaimed wood), brackets or a French-cleat system, wood screws, wall anchors for drywall, moisture-resistant finish, sandpaper, and a protective sealant. Tools: tape measure, level, pencil, saw (or have boards pre-cut), drill with bits, stud finder, and a screwdriver.
Steps: 1) locate studs and mark positions. 2) cut boards to length. 3) sand and finish boards. 4) install brackets or cleat. 5) mount shelves level and secure to studs or anchors. 6) add moisture-safe decor like baskets. This keeps your diy shelves bathroom sturdy in humid spaces.
Question: How can I maximize storage with space-saving shelves without cluttering a bathroom?
To maximize bathroom storage with space-saving shelves, think vertically and modular. Use wall-mounted shelves in corners and above the toilet to free counter space. Choose open or cubby-style designs with small baskets for small items, plus doors or baskets to hide clutter. Tips: 1) group similar items together (toiletries, towels, medications) in labeled containers. 2) choose moisture-friendly materials. 3) use adjustable shelf heights to accommodate taller bottles. 4) keep the top shelf visually light with a single decorative piece to avoid overcrowding. With these bathroom storage solutions, you gain function without sacrificing style, all while staying true to rustic shelf designs.
Question: What finishes work best for rustic shelf designs in humid bathrooms?
For rustic shelf designs in humid bathrooms, choose moisture-resistant finishes. Best options include water-based polycrylic or polyurethane for wood shelves because they seal well without heavy odor. Avoid wax or plain oil that can break down with humidity. For a rustic look, try a light stain with a matte seal or a whitewash finish. Steps: 1) sand and prep. 2) apply a stain or paint as desired. 3) seal with 2–3 thin coats of your chosen finish, lightly sanding between coats. 4) seal all edges and undersides for full protection. These tips help your shelves stay beautiful and durable in a bathroom setting.
Question: Are there beginner-friendly projects in the 18 DIY shelves bathroom ideas that require no power tools?
Yes. Many beginner-friendly projects in the 18 diy shelves bathroom ideas can be tackled with basic hand tools or pre-cut parts. Look for simple wall shelves or crates that come ready-to-hang, or use ready-made brackets or a French cleat system. Steps: 1) pick a design that uses pre-cut boards or crates. 2) sand and finish the wood. 3) attach brackets or cleats. 4) mount securely to studs or masonry with appropriate anchors. 5) decorate with towels and jars for easy easy DIY home decor that keep your diy shelves bathroom look rustic and stylish.
Related Topics
diy shelves bathroom
rustic farmhouse
bathroom storage solutions
space-saving shelves
wall-mounted shelves
easy DIY home decor
beginner friendly
budget friendly
quick projects
functional decor
minimalist design
modern rustic
Leave a Reply